Category: Sneaker & Footwear Care

  • How to Clean and Condition Premium Nubuck Boots

    How to Clean and Condition Premium Nubuck Boots

    A single rain-soaked walk across a city sidewalk can leave a watermark on nubuck that no amount of dry brushing removes. That pale, cloudy stain sits right on the toe box, mocking every dollar spent on the boots.

    Most boot care guides treat nubuck like a slightly fussier version of smooth leather. The problem is that nubuck responds to moisture and friction in completely opposite ways, and the wrong product applied at the wrong time can flatten the texture permanently.

    This guide is for the person who owns one good pair of nubuck boots and commutes through unpredictable city weather. Not a sneakerhead with a closet full of options. 

    Someone who needs these boots to hold up through subway platforms, wet crosswalks, and the occasional bar-floor spill.

    What Makes Nubuck So Vulnerable on City Streets

    Nubuck gets its soft, velvety surface from a specific manufacturing step that most people never think about. The leather itself is full-grain, the same grade used in high-end smooth leather goods. 

    But the outer surface gets sanded down to raise a fine nap, and that exposed nap is where all the trouble starts.
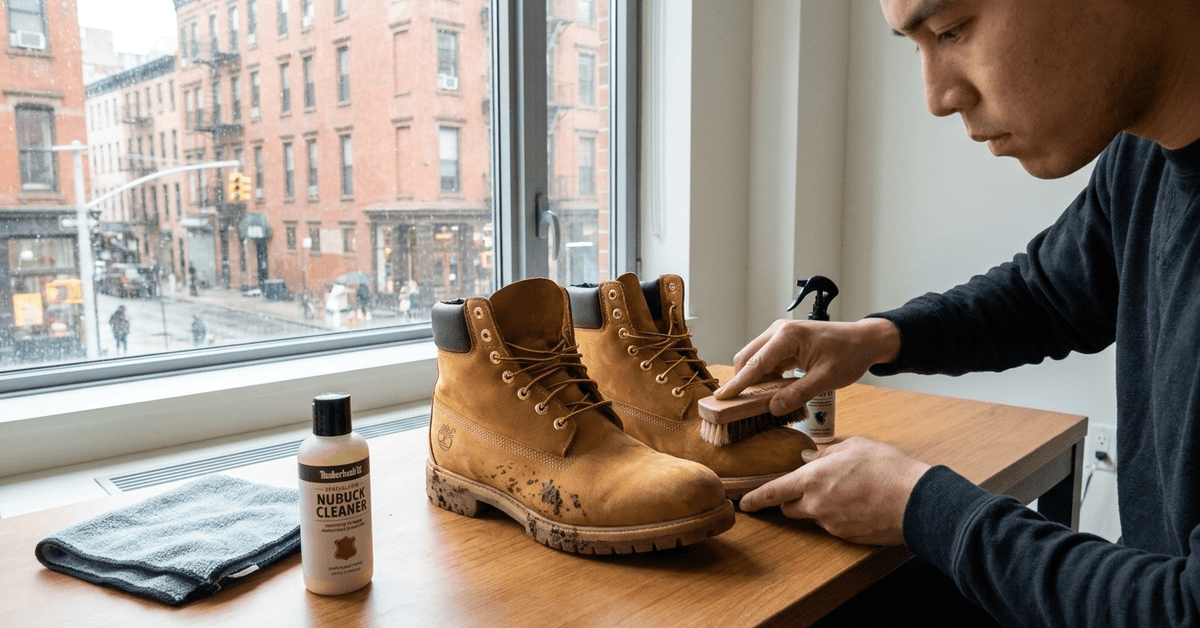
    Image 1

    The Sanding Process Changes How Damage Works

    Smooth leather has a sealed surface that repels liquids for a few seconds before absorption. Nubuck’s sanded surface has no such barrier. Liquid hits the raised fibers and wicks in almost instantly. 

    City environments compound this problem. Pollution particles, brake dust, and fine grit from construction sites settle into the nap throughout the day. A pair of nubuck boots worn on a London commute picks up a film of grime that’s invisible until the next morning, when the surface looks dull and flat.

    I would skip nubuck entirely for anyone who can’t commit to a 90-second post-wear brushing habit. The material punishes neglect faster than any other leather type, and once the nap flattens from embedded dirt, restoration gets expensive.

    The Daily Brush That Prevents 80% of Nubuck Damage

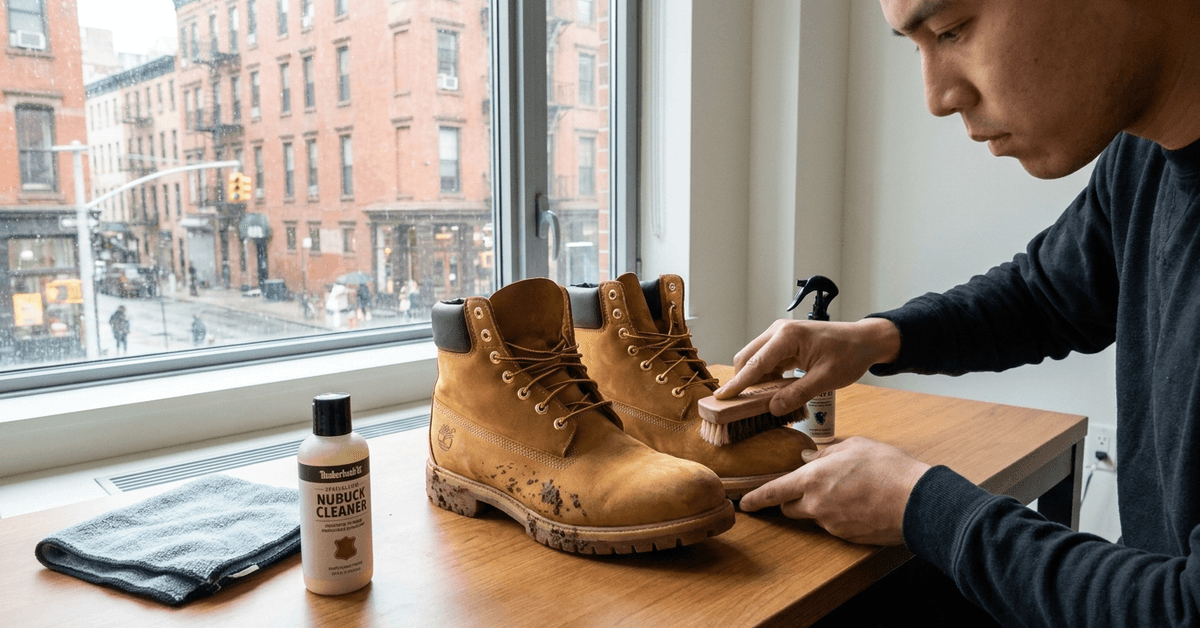
    A nubuck brush with rubber or crepe bristles is the single most useful tool in any boot care routine. Not a suede brush. Not a horsehair brush. The wrong bristle type can scratch the finish or push particles deeper into the fibers.

    Dry-First, Then Brush: The Sequence That Matters

    One thing most care instructions gloss over: the boot needs to be completely dry before brushing. Running a brush over a damp nubuck surface pushes moisture and dirt particles into the leather, creating those gray smudge marks that look like permanent stains.

    After wearing boots through rain or damp streets, stuff them loosely with newspaper and let them sit at room temperature for a few hours. No radiators, no hair dryers, no sunny windowsills. Heat warps the leather and cracks it along the flex points. 

    Once the surface feels dry to the touch, short strokes with the nubuck brush lift dirt and restore the nap’s direction.

    This two-minute routine after every wear prevents the kind of buildup that requires a full deep clean. Think of it like flossing: boring, fast, and dramatically cheaper than the alternative.

    Deep Cleaning Nubuck Boots After Rain and Street Stains

    Sometimes the daily brush is not enough. A rainstorm in Toronto or a festival weekend in Berlin leaves the kind of mess that needs a dedicated cleaning session. The tools for this are different from daily maintenance, and mixing them up is a common mistake.

    A proper deep-cleaning kit fits inside a small bag and includes these items:

    • Nubuck-specific cleaner in foam or liquid form (never saddle soap or dish detergent, both of which strip the finish)
    • Cleaner eraser for spot-treating individual marks without wetting the entire boot
    • Microfiber cloth for dabbing and lifting, never cotton towels that leave lint in the nap
    • A shoe tree to hold the boot’s shape during drying

    Coffee, Mud, and Bar-Floor Marks

    Different stains call for different first responses. A mud splash should dry completely before any attempt to clean it. Scrubbing wet mud into nubuck grinds particles into the fibers. Let it cake, then flake it off with a brush.

    Coffee and alcohol spills need immediate blotting with a dry microfiber cloth. Press down without rubbing. 

    Rubbing spreads the stain outward and deeper. After blotting, let the boot dry fully, then apply a small amount of nubuck cleaner in circular motions over the affected area.

    Eraser vs. Liquid Cleaner: Picking the Right One

    The eraser is better for dry, surface-level scuffs. It works like a pencil eraser, lifting marks through gentle abrasion. Liquid cleaner handles stains that have penetrated the nap. 

    A good rule: if the mark disappears when you rub your thumb across it, try the eraser first. If the color has changed and stays changed, go liquid.

    Stain Type First Tool Technique Drying Needed First?
    Mud splash Nubuck brush Flake off dried mud, then brush Yes
    Coffee or alcohol Liquid cleaner Blot, dry, then clean in circles Partial (blot first)
    Scuff or dry mark Cleaner eraser Light rubbing, then brush nap Yes
    Water ring Microfiber cloth + brush Even out moisture, then dry and brush No (address immediately)

    The water ring stain is the sneakiest one. A single raindrop can leave a visible circle if part of the boot dries faster than the rest. The fix is counterintuitive: lightly dampen the entire surface with a cloth so it dries evenly, then brush once fully dry.

    Conditioning Nubuck Without Flattening the Nap

    Standard leather conditioner will ruin nubuck boots. This point needs repeating because the instinct to “moisturize” leather with cream or oil is strong, and it’s wrong for this material. 

    Cream conditioners seal the surface and flatten the nap permanently. The velvety texture that makes nubuck distinctive disappears under a layer of waxy product.

    Spray Conditioners: The Only Safe Option

    Nubuck conditioner sprays are formulated to absorb into the fibers without coating them. Hold the can about 15 cm from the surface and apply a light, even mist. 

    Two light coats beat one heavy coat every time. A heavy application can leave dark spots that take days to even out.

    Let the boots air dry completely between coats. No forced heat. A shoe tree from a reputable leather care supplier inside the boot during this process helps maintain shape while the fibers absorb the conditioner.

    Waterproofing Nubuck Boots: Why Monthly Spraying Wastes Product

    The standard advice for waterproofing nubuck is to apply a water-repellent spray once a month. I think that schedule is wasteful and poorly timed for anyone living in a city with variable weather patterns like New York, Amsterdam, or Melbourne.

    A fixed monthly calendar ignores two realities. 

    First, the spray coating washes away during deep cleaning, so any month where a deep clean happens mid-cycle leaves the boot unprotected for weeks. Second, dry months where boots see minimal rain don’t need reapplication at all.

    A better approach ties spraying to events, not dates:

    • Reapply after every deep clean, since the cleaning process strips the previous coat
    • Spray the night before any forecasted rain or snow
    • Skip months where the boots stay dry and see only indoor wear

    This event-based method uses less product and keeps protection active exactly when the boot faces moisture. A monthly habit, by contrast, often means spraying boots that sit in a closet during dry spells and missing the window right after a rainstorm scrub.

    Boot covers or galoshes are worth considering for heavy downpours. They look ridiculous. They also cost less than one professional nubuck restoration, and cities like Chicago and Paris can dump a centimeter of rain in thirty minutes during spring.

    Storing Nubuck Boots in a Small City Apartment

    Compact living spaces create specific storage problems for nubuck. Tossing boots into a pile near the front door exposes them to humidity, dust, and heat from nearby radiators. 

    The leather absorbs ambient moisture, and mold can develop on the nap within a week in humid climates.

    A few storage habits make a measurable difference:

    • Cedar shoe trees absorb internal moisture and keep the boot from collapsing into creases
    • A breathable fabric bag (never plastic, which traps humidity) protects against dust
    • A small portable dehumidifier in the shoe cabinet controls ambient moisture, especially useful in cities like Singapore or Miami where indoor humidity stays high year-round

    Boots should live away from direct sunlight and heat sources. A closet shelf beats a rack by the window, even though the rack is more convenient. 

    The American Leather Chemists Association recommends storing leather below 70% relative humidity and away from UV light, both of which degrade the fiber structure over time.

    Questions People Ask About Nubuck Boot Care

    These come up constantly in forums and search results, and the answers are rarely specific enough to act on.

    • Q: Can I use a suede brush on nubuck boots?
      Suede brushes with brass or steel bristles are too aggressive for nubuck’s finer nap. Stick with rubber or crepe bristle brushes designed for nubuck. The softer material lifts dirt without scratching the surface.
    • Q: How do I remove oil stains from nubuck?
      Sprinkle cornstarch or talcum powder on the stain and leave it overnight. The powder absorbs the oil slowly. Brush it off the next morning and repeat if needed. Liquid cleaners tend to spread oil stains rather than lift them.
    • Q: Is nubuck waterproof after spraying?
      No spray makes nubuck fully waterproof. A water-repellent spray buys time by causing droplets to bead on the surface, but prolonged exposure to rain will still soak through. Think of it as a delay, not a seal.

    Conclusion

    Nubuck boots reward the city dweller who treats care as a short daily habit rather than an occasional rescue mission. The right brush, the right conditioner type, and event-based waterproofing keep the texture intact through seasons of urban wear. 

    Skipping the standard leather cream aisle and reaching for nubuck-specific products is the single decision that separates boots that last from boots that flatten within months. A two-minute routine after each wear costs nothing and saves everything.
  • Step-By-Step guide to Removing Scuff Marks from Patent Leather

    Step-By-Step guide to Removing Scuff Marks from Patent Leather

    Patent leather picks up scuffs the way a white car picks up bird droppings. One subway ride, one crowded escalator, and that mirror finish looks like it survived a street fight.

    The standard fix most cleaning guides repeat is petroleum jelly and a soft cloth. But the product choice matters far less than timing and technique, two things those guides barely mention.

    This one is for the daily commuter: the person wearing patent leather oxfords to the office or carrying a patent leather crossbody through packed metro stations. If city grit is a daily opponent, the repair process needs to match that pace.

    Why Patent Leather Scuffs Faster on City Streets

    Regular leather absorbs minor contact. A light brush against a wall or a bump from a passing bag barely registers on a matte surface. 

    Patent leather has no such forgiveness because the high-gloss polyurethane or lacquer coating sits on top, exposed to every point of contact like a freshly waxed car hood.

    City environments multiply the problem. Concrete sidewalks carry fine grit that acts like low-grade sandpaper against any smooth surface. 

    Image 1

    Escalator edges, bus seats, and the metal poles on commuter trains all create contact points that standard leather shrugs off but patent leather records instantly.

    The Commute Factor

    Think about a typical rush-hour train ride. A patent leather shoe touches the floor, the seat frame, maybe another passenger’s luggage. Each contact leaves a potential mark. The same shoe in a car or at a desk job might go weeks without a single scuff.

    Cities like Amsterdam and Paris add cycling and scooter commuting to the equation. Pedal straps, scooter decks, and bike baskets all create friction zones that hit footwear and bags at predictable spots.

    Why Color Makes a Difference

    Darker patent leather, like deep navy or black, hides shallow surface marks better than lighter shades. 

    A pale blush or white patent surface shows every contact point. I’d pick black or deep burgundy patent leather for any accessory that faces a daily city commute, specifically because lighter colors demand twice the maintenance for half the visual payoff.

    The Five-Minute Scuff Removal Process

    Speed is the real variable in patent leather repair. A scuff treated within a few hours responds to gentle cleaning alone. 

    Leave that same mark for a week, and the coating begins absorbing the discoloration. The fix becomes harder, and sometimes the mark becomes permanent.

    The process breaks into three stages: clean, soften, and buff. Each stage takes less than two minutes.

    Clean the Surface First

    Loose dirt sitting on top of a scuff makes it look worse than it is. A dry microfiber cloth removes that layer. Paper towels, napkins, or tissues leave fibers behind and can scratch the finish, so they should never touch patent leather.

    If grime sticks, a fragrance-free baby wipe does the job. These are easy to carry in a commuter bag and work on patent surfaces without leaving residue. Light circular motions across the scuffed area, then a pat dry with a clean section of the cloth.

    Soften the Mark and Buff It Out

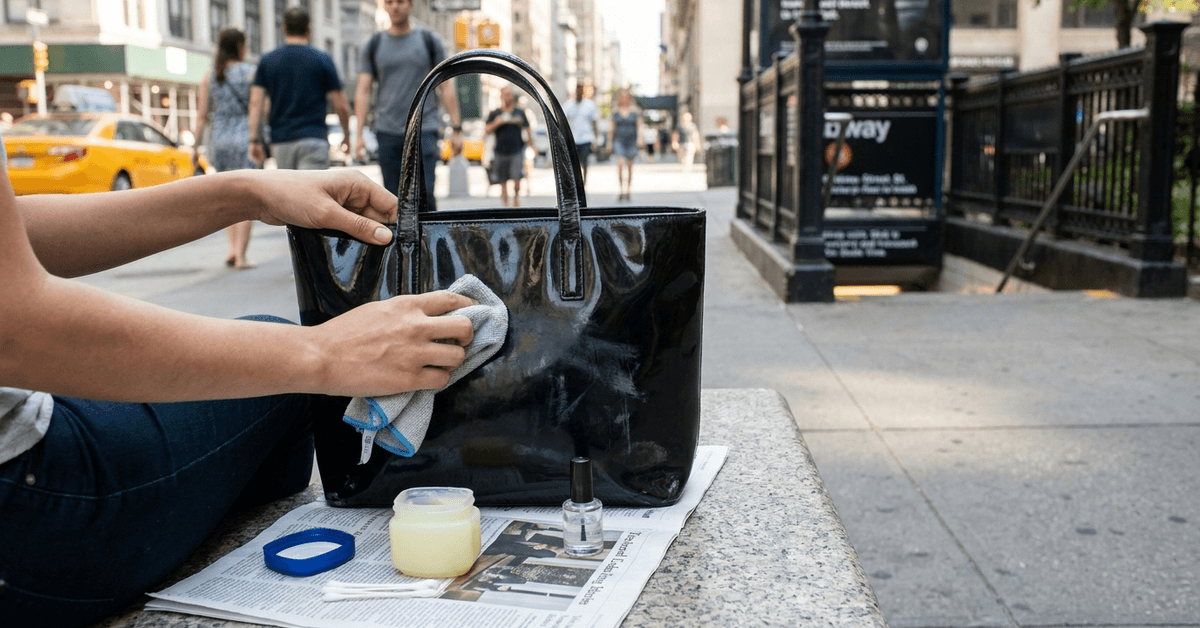
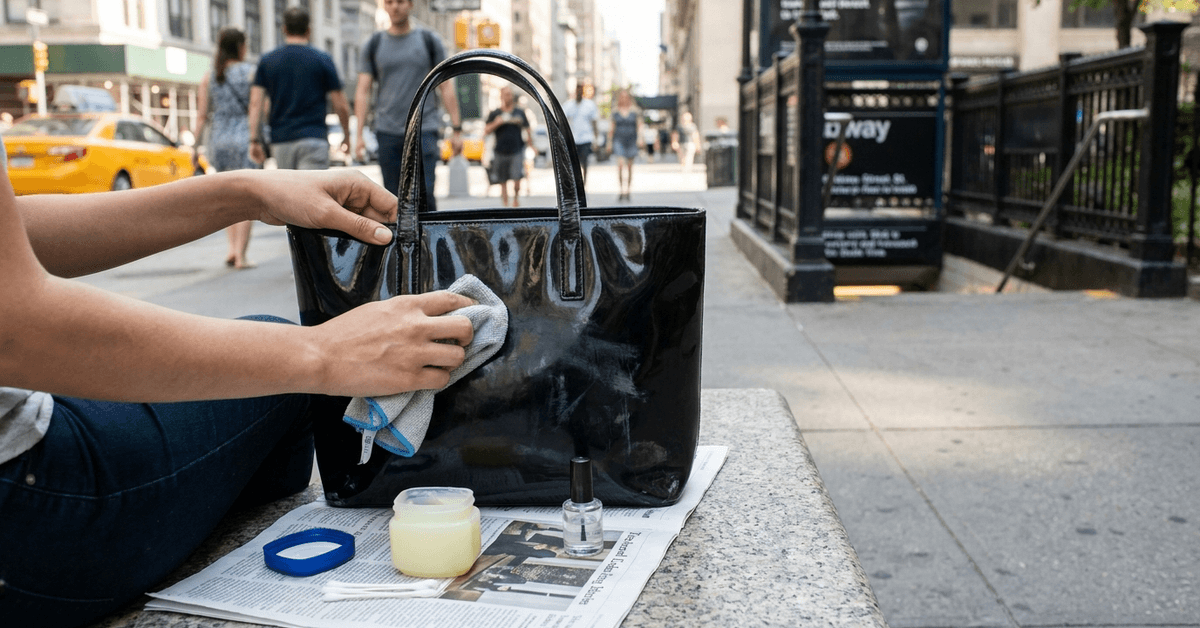
    Once the surface is clean, apply a small amount of mineral oil directly to the scuff. Rub gently with the cloth for about 30 seconds, using light circular pressure. The oil softens the displaced coating material and allows it to settle back into position.

    Buff the area with a dry section of the cloth until the shine returns. Sometimes the scuff disappears entirely. Sometimes a faint shadow remains. That shadow usually fades over the next day or two as the coating re-levels.

    I would skip petroleum jelly for this step, and I think the common advice to reach for Vaseline as a first-line patent leather fix deserves a hard second look. 

    Petroleum jelly leaves a tacky film on the surface that collects city dust, street grit, and fiber from bag linings within hours. Mineral oil absorbs cleaner and dries without that sticky residue. 

    What to Pack in a City Bag for Patent Leather First Aid

    A small kit keeps patent leather looking sharp between full cleanings. The items take up less space than a phone charger.

    These are the essentials worth carrying:

    • Microfiber cloth (a single small square, folded): handles both cleaning and buffing without scratching the surface
    • Fragrance-free baby wipes (two or three in a resealable pouch): quick surface cleaning in transit, no need for water
    • Cotton swabs: reach into seams, creases, and detailed areas on shoes where a cloth can’t apply enough pressure
    • A travel-size bottle of mineral oil: available at most city drugstores and pharmacies for under $5

    That kit fits inside a zip pouch smaller than a wallet. The mineral oil bottle is the bulkiest piece, and even that fits inside most jacket pockets.

    Stubborn Scuffs and the Limits of Home Fixes

    Some marks go deeper than the surface coating. A scuff that exposes the base leather underneath, or one that cracks the patent finish, is past the point where household products can help.

    Clear Nail Polish as a Targeted Repair

    Clear nail polish works as a spot fix for medium-depth scuffs that don’t respond to mineral oil. Apply it with a cotton swab directly on the mark, staying within the damaged area only. Let it dry completely before wearing or storing the item.

    The nail polish fills in minor surface cracks and restores a degree of gloss. But it changes the texture slightly. 

    The repaired spot may look marginally different from the surrounding area under direct light. On darker patent leather, this is rarely noticeable. On lighter shades, the difference can be visible.

    Knowing When a Cobbler Is the Better Call

    A scuff that splits the patent finish or peels the coating away needs professional attention. Neighborhood cobblers in areas like London’s Soho or Berlin’s Mitte specialize in this type of repair. 

    Department store shoe counters can also provide spot-cleaning guidance and point toward the right patent leather care products. Professional repair apps have started operating in urban centers, offering pickup and delivery for leather repair. 

    The cost runs higher than a DIY fix, but for a high-end patent leather bag or dress shoe, the investment in professional restoration is often worth the price difference.

    Daily Habits That Reduce Patent Leather Scuffing

    Repair is reactive. The bigger win for daily commuters is reducing how often scuffs happen.

    Some prevention habits that make a measurable difference:

    • Store shoes and bags in dust bags after each use, even for overnight storage, to block dust that dulls the finish over time
    • Rotate patent leather items across the week instead of wearing the same pair daily, especially in damp climates like northwestern Europe
    • Carry the item in a protective sleeve during transit if possible, particularly for bags that ride against body or seat surfaces during commutes
    • Check contact points on regular commute routes: if a particular bag always brushes against a rough seat edge, shift how the bag sits
    Prevention Method Effort Level Scuff Reduction
    Dust bag storage after each use Low (30 seconds) Reduces surface dulling and minor contact marks
    Weekly rotation with other footwear Low Cuts wear-per-item roughly in half
    Carrying sleeve during transit Medium Protects against the highest-friction commute moments
    Choosing darker patent colors One-time decision Lighter scuffs stay invisible longer on dark surfaces

    The single most effective habit on this list is rotation. A pair of patent leather shoes worn three days per week instead of five accumulates roughly 40% fewer scuff events, simply because two days of rest also mean two fewer commutes of exposure.

    Items to Keep Away from Patent Leather

    A few common cleaning mistakes make scuffs worse or permanently damage the finish.

    Colored shoe polish almost never matches patent leather’s gloss-coat color and leaves visible residue. Abrasive scouring pads tear through the coating in seconds. And leather sprays formulated for matte or nubuck surfaces contain solvents that dissolve patent leather’s topcoat.

    Excessive moisture is another risk. Soaking patent leather, even briefly, lets water seep into seams and loosen the bond between the coating and the base material. A damp cloth is fine. A wet cloth, or rain without a protective cover, is not.

    The Leather Care Guide from Saphir Médaille d’Or breaks down which products are safe for different leather types, including patent.

    Questions People Ask About Removing Scuffs from Patent Leather

    A few of these come up constantly among commuters trying to keep patent leather intact through daily city wear.

    • Q: Can I use rubbing alcohol to remove scuffs from patent leather?
      Rubbing alcohol can strip the glossy topcoat on patent leather, leaving a dull spot that looks worse than the original scuff. Stick with mineral oil or a product specifically labeled for patent surfaces.
    • Q: How long do scuff marks take to become permanent on patent leather?
      Shallow surface scuffs can often be buffed out days later. Deeper marks that sit for more than a week start bonding with the coating, and the removal success rate drops sharply after that window.
    • Q: Does patent leather crack more easily in cold weather?
      Cold temperatures make the polyurethane coating stiffer and less flexible. A patent leather shoe flexed repeatedly during a cold-weather walk is more prone to surface cracking than the same shoe at room temperature.

    Conclusion

    Patent leather holds up in city environments when the repair response is fast and the cleaning products stay simple. 

    The commuters who keep their patent finishes intact are the ones who treat scuffs the same day, not the same month. 

    Mineral oil, a microfiber cloth, and 30 seconds of buffing do more than any expensive specialty product sitting unused at home. Stepping out with that mirror-shine finish intact after a rough commute week feels like a small, satisfying victory.

  • Sneaker Maintenance Checklist: Daily Habits for Longevity

    Sneaker Maintenance Checklist: Daily Habits for Longevity

    A pair of sneakers worn daily on city pavement loses about 30% of its tread depth in the first three months. That timeline shrinks even faster in rain-heavy cities like London or Vancouver.

    The typical sneaker care guide throws a product list at you and calls it a day. But the fastest way to destroy a pair has nothing to do with cleaning frequency. It has everything to do with drying method, rotation, and the five minutes after you get home.

    This one is for the daily commuter walking six-plus kilometers through concrete, subway platforms, and crowded sidewalks. If sneakers are your primary footwear and replacing them every few months feels wasteful, this routine changes that math.

    Why City Pavement Eats Sneakers Faster Than Trails

    Something odd happens when sneaker care articles talk about wear and tear. They treat every environment the same. A hiking trail, a gym floor, and a Tokyo sidewalk all get the same advice. That makes no sense.

    Concrete and Asphalt Are Abrasive Surfaces

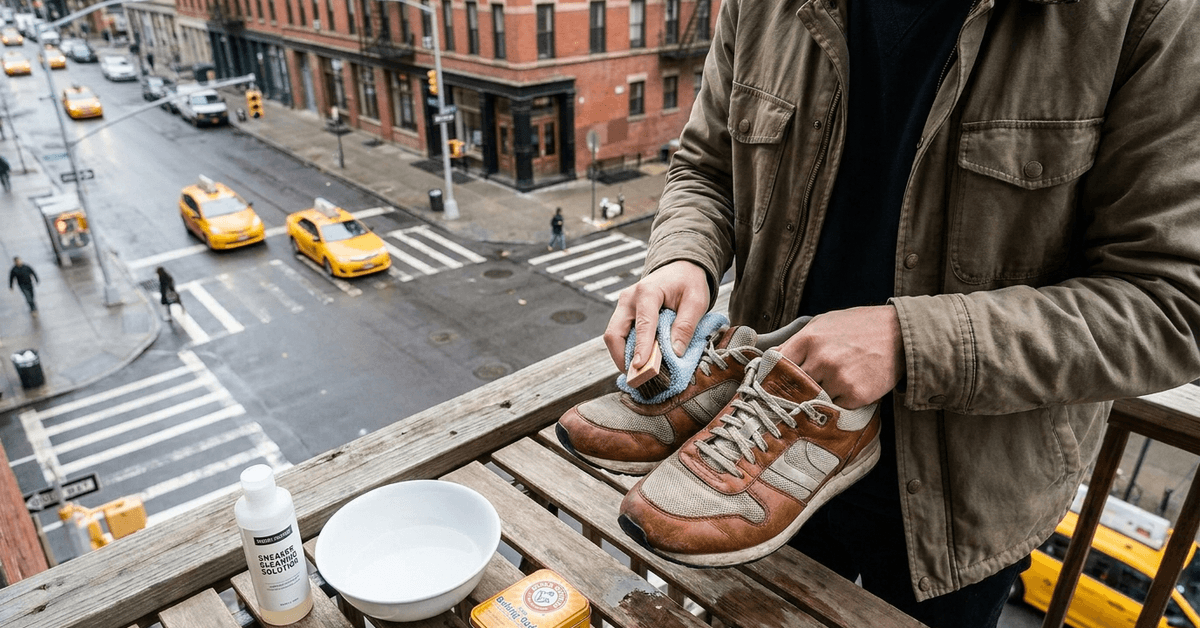
    Concrete sidewalks in cities like New York or Paris grind rubber soles differently than packed dirt or even asphalt roads. The flat, hard surface creates consistent friction on the same contact points of the sole, wearing down tread in a predictable pattern. 

    Image 1

    Trail runners get uneven wear because terrain varies. City commuters get concentrated wear because the surface never changes.

    Look at the bottom of a pair that’s done three months of city walking. The ball of the foot and outer heel will be noticeably smoother than the rest. 

    Rain, Puddles, and the Moisture Problem

    Getting caught in a sudden rainstorm is part of city life in Vancouver, Singapore, and most of Northern Europe. The issue is not the water itself. The issue is what happens in the next 12 hours.

    Sneakers left wet overnight develop a musty smell within 48 hours. The adhesive between the sole and upper weakens over repeated wet-dry cycles. Mold growth starts in warm, enclosed spaces faster than people expect.

    The Nightly Two-Minute Routine That Keeps Sneakers Alive

    A full deep-cleaning session once a month sounds reasonable on paper. 

    But I would bet on a two-minute nightly wipe over a monthly scrub every time, based on how dirt and moisture settle into mesh and canvas fibers overnight. The damage happens between wearings, not during them.

    A Quick Wipe-Down After Each Wear

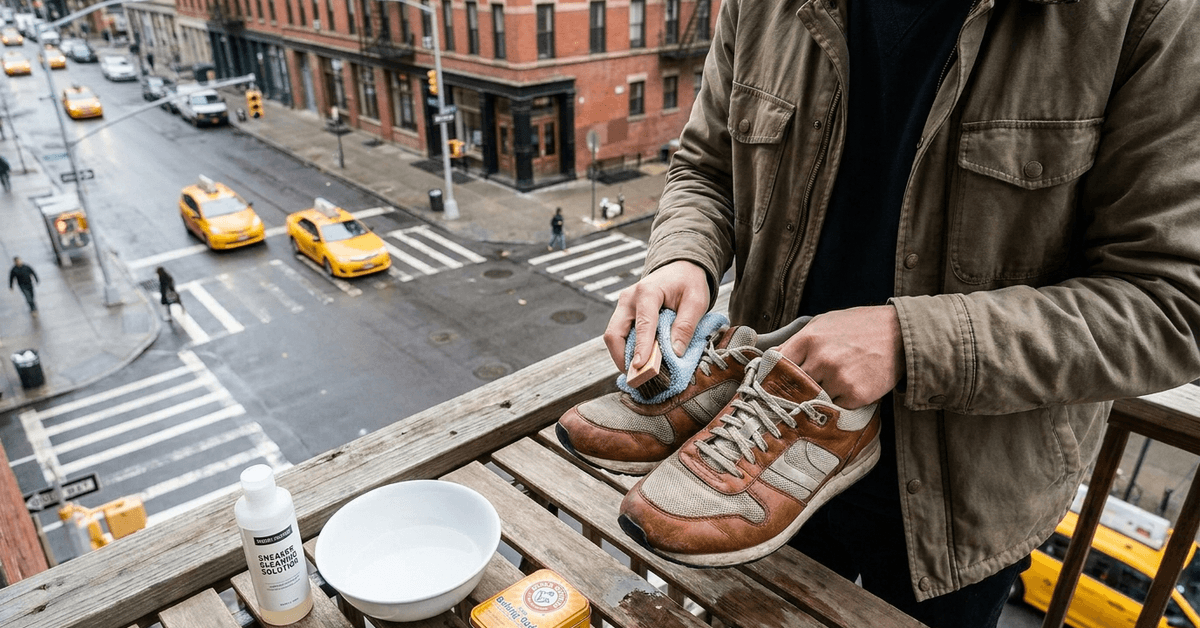
    The simplest version of this: keep a microfiber cloth near the front door. Wipe the uppers and toe box when you take the sneakers off. That interrupts dirt from bonding with the material overnight.

    Crep Protect Wipes are a popular portable option for this. A damp microfiber cloth does the same job at home for a fraction of the cost. The wipe takes about 30 seconds. The payoff compounds over weeks.

    Spot-Treating Stains the Same Night

    A stain that sits for 24 hours is ten times harder to remove than one treated immediately. That timeline matters for street food spills, coffee drips, and puddle splashes that happen during a normal city day.

    The treatment is simple:

    • Mild dish soap mixed with cold water in a spray bottle handles most stains on leather, canvas, and synthetic uppers
    • A soft-bristled brush (an old toothbrush works) loosens grime from seams and textured surfaces
    • Knit and mesh materials need a lighter touch: dab instead of scrub, and avoid hot water that can shrink the weave

    Specialized cleaners like Jason Markk work well across multiple fabric types. But for daily spot treatment, the dish soap solution covers about 90% of cases.

    Removing Insoles and Airing Out

    After a full day of walking through markets, subway cars, and packed streets, the inside of a sneaker traps heat and moisture. Removing the insoles and leaving the sneaker open overnight lets both the footbed and the interior dry naturally.

    Baking soda sprinkled inside overnight pulls moisture and neutralizes odor. 

    Sneaker Balls and similar deodorizer products are a more convenient version of the same idea. Either approach works. The step that matters is removing the insoles. Most people skip it.

    Sneaker Cleaning Products: The $20 Kit Versus the $3 Fix

    I think the common recommendation to buy a dedicated sneaker cleaning kit is overblown for daily maintenance. A $20 Jason Markk set or a $15 Crep Protect bundle makes sense for quarterly deep cleans. 

    For everyday upkeep, mild dish soap, cold water, a microfiber cloth, and a soft brush handle the job at roughly one-fifth the cost. That said, one product category earns its price tag: waterproofing spray

    A silicone-based or fluoropolymer spray applied to new sneakers adds a layer of water and stain resistance. The catch is reapplication frequency. A single coat lasts about two to four weeks of daily city use, not the “all-season protection” most labels promise.

    Product Type Approximate Cost Best Use Case Reapplication Needed
    Mild dish soap + cloth $3 Daily wipe-downs and spot cleaning N/A
    Sneaker cleaning kit (Jason Markk, Crep Protect) $15–$20 Deep cleaning every 4–6 weeks N/A
    Waterproofing spray $10–$18 Rain protection for mesh and canvas Every 2–4 weeks with daily wear
    Sneaker deodorizer (Sneaker Balls, baking soda) $5–$8 Odor and moisture control After each heavy-use day

    Baking soda at $3 a box, replaced every few months, handles both deodorizing and mild stain treatment.

    The marketing around sneaker care products treats every scuff like a crisis. A daily commuter who wipes down sneakers nightly and treats stains within hours does not need a specialized solution for routine grime. 

    Save the premium cleaner for suede, nubuck, or heavily stained knit uppers where dish soap might not cut it.

    Drying Mistakes That Ruin Sneakers Faster Than Dirt

    The single fastest way to destroy a pair of sneakers is tossing them near a heater or radiator after they get wet. 

    Heat warps adhesive bonds between the sole and upper. It also dries leather too quickly, causing cracks. Mesh and knit materials shrink under direct heat.

    The Newspaper Method Still Works

    Stuff wet sneakers with crumpled newspaper or clean rags. The paper absorbs moisture from inside while the sneaker maintains its shape. Replace the stuffing every few hours if the sneakers are soaked through.

    Air drying in a shaded, ventilated area is the safest approach. A shoe rack near the front door, away from radiators and direct sunlight, gives sneakers the airflow they need. The drying process takes 12 to 24 hours for a fully soaked pair.

    Rotation: The Maintenance Step Nobody Budgets For

    Wearing the same pair of sneakers every single day never lets them fully dry between uses. The moisture from foot sweat alone (about half a pint per day for an average adult) saturates insoles and inner linings.

    Rotating between two pairs gives each pair a full rest day. This extends the life of both pairs significantly. 

    Most sneaker care articles focus entirely on cleaning products and skip the rotation question. I’d argue rotation does more for sneaker longevity than any cleaning kit on the market.

    Lace Maintenance and Small Details That Add Up

    Dirty laces drag down the look of an otherwise clean sneaker. A weekly rinse under running water keeps them presentable. Badly frayed laces should be replaced rather than cleaned, and replacement laces cost less than a cup of coffee.

    Re-lacing after washing also gives you a chance to check the eyelets and tongue for wear. Loose eyelets can create pressure points during long walks. The tongue slipping sideways is usually a sign the laces are threaded incorrectly or unevenly.

    Tracking Wear and Finding Sneaker Services in 2026

    A few apps help city commuters stay ahead of maintenance needs:

    • Strava lets users tag specific footwear to each activity and tracks cumulative mileage per pair
    • Apple Health and Google Fit log daily step counts, which can estimate total distance per sneaker pair over time
    • Google Maps and Instagram searches for “sneaker cleaning” or “sneaker repair” in any major city turn up local specialists

    Professional sneaker cleaning services exist in most cities with populations over 500,000. A full deep clean typically runs $15 to $40 depending on the city and the condition of the sneakers. 

    For a pair that costs $150 or more, the math on professional cleaning versus replacement makes sense at least once or twice a year.

    The Strava app is especially useful for commuters who walk and run in the same pair. Tagging footwear to activities builds a log that tells you when a pair is approaching its mileage limit.

    Packing Sneakers When Traveling Between Cities

    A spontaneous trip to Berlin, Barcelona, or any city with cobblestone streets puts extra stress on sneaker soles. Packing matters more than people think.

    • Reusable dust bags or a wrapped t-shirt prevent scratches and scuffs inside a bag
    • Small silica gel packets tucked inside the sneaker control humidity during transit
    • A travel-sized pack of wipes and a spare set of laces handle unexpected stains or breakage on the road

    The silica gel trick is the most overlooked packing habit for sneaker care. Those packets, often thrown away from new shoe boxes, absorb moisture during flights and train rides where temperature changes cause condensation inside bags.

    Questions People Ask About Urban Sneaker Care

    These are the questions that come up most when sneaker maintenance gets specific to city life.

    • Q: How often should I deep clean sneakers if I wear them daily in the city? A deep clean every four to six weeks is a reasonable schedule for daily city wear. The nightly wipe-down handles surface grime between those sessions. Waiting longer than six weeks lets embedded dirt permanently discolor lighter-colored fabrics.
    • Q: Can I put sneakers in the washing machine instead of hand cleaning? Machine washing loosens adhesive and can deform the shoe structure, especially on pairs with foam midsoles. Hand cleaning with mild soap and cold water takes about five minutes per shoe and preserves the build quality.
    • Q: Is baking soda safe to use inside all sneaker types? Baking soda works well inside synthetic and canvas interiors. For leather-lined sneakers, a sneaker-specific deodorizer is a better choice since baking soda can dry out leather over time.

    Conclusion

    City sneakers take a beating that no suburban pair ever experiences on a regular basis. The nightly two-minute wipe, proper drying away from heat, and rotating pairs matter more than any product. 

    Sneaker longevity in an urban setting comes down to daily habits done consistently over months. The best time to start protecting a pair is the same day they come out of the box.