A single loose thread near the toe box of a sneaker can split into a full seam failure within two weeks of daily city walking. That timeline shrinks if rain or puddles get involved.
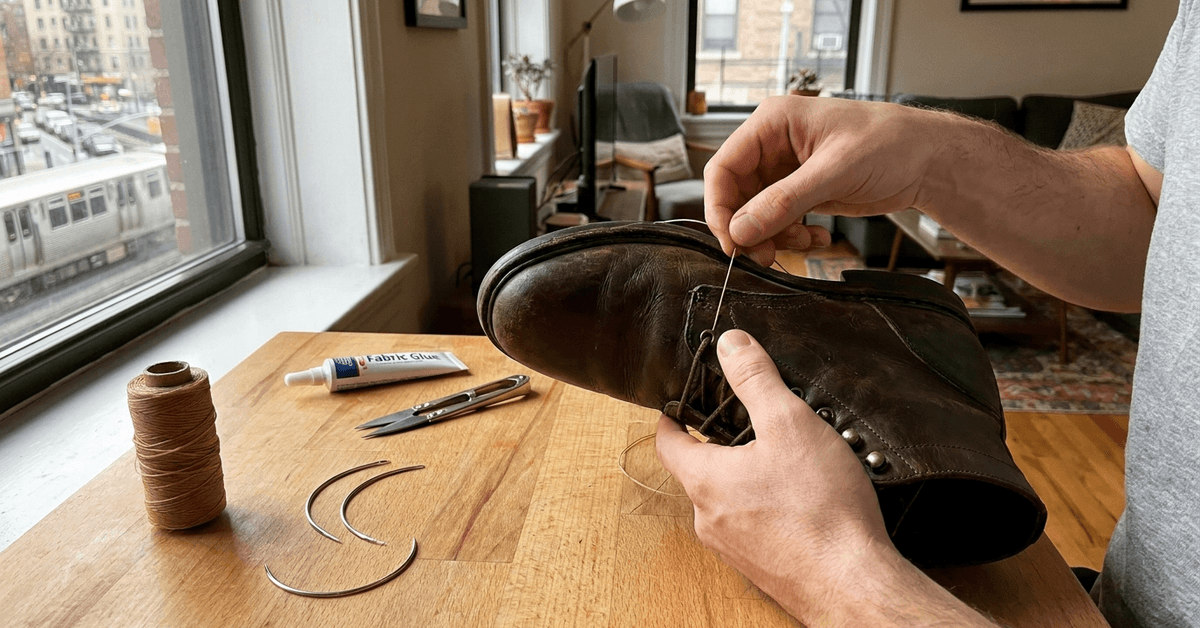
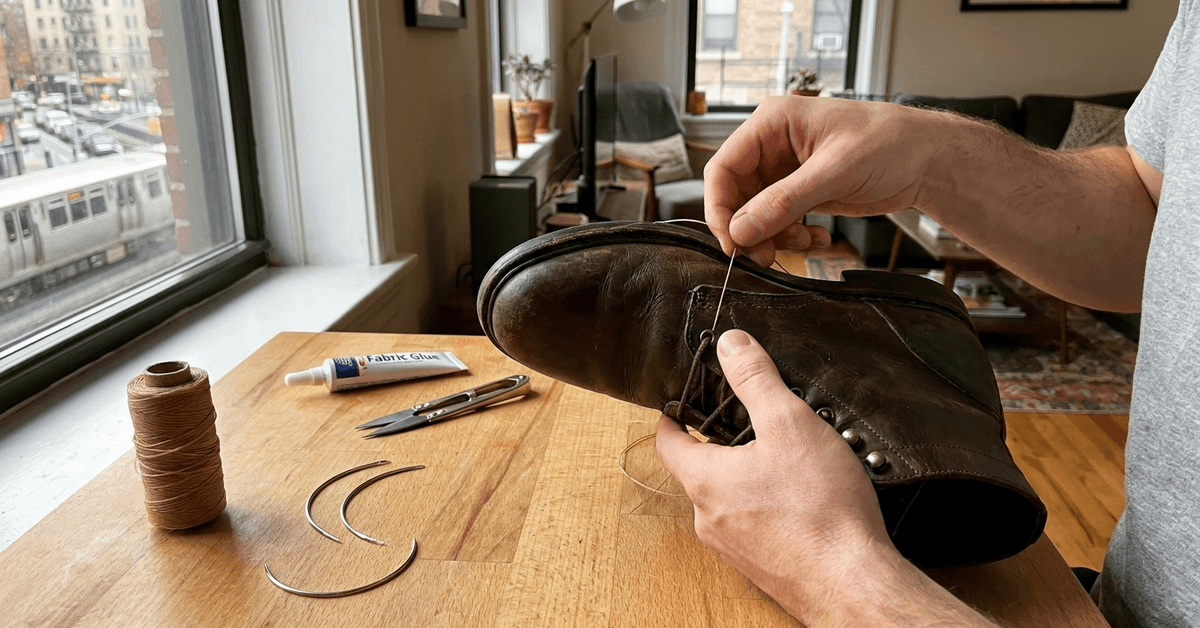
Most shoe care guides treat stitching problems like a cobbler-only job. The fix for surface-level loose threads takes about 20 minutes, a curved needle, and a $10-$15 repair kit.
This one is for the daily commuter, the student walking campus in worn-in boots, the person who’d rather spend a Saturday afternoon fixing a shoe than dropping $50 at a repair shop. Grab a seat. The stitch-by-stitch process is simpler than it looks.
Stop-Start Walking Wears Seams Differently Than Straight-Line Mileage
City shoes die in a specific way. The constant flexing from subway stairs, escalator steps, and sharp sidewalk pivots stresses seams at angles that a long countryside hike never would.
A five-mile day in Tokyo or London puts different strain on a toe box than a five-mile day on a trail.
That pattern matters when you’re checking for damage. The spots that fail first on urban shoes aren’t random.
Toe Box Failures and Lace Row Stress
The toe box takes the brunt of every step, especially during the exaggerated flex of climbing stairs. Sneakers and canvas shoes show fraying here first because the upper material bends sharply at that crease point hundreds of times per commute.
Lace rows on sneakers sit right where tension is highest. Every time you tie or retie, the stitching around those eyelets absorbs lateral force. Loose threads around lace rows often go unnoticed because the laces themselves cover the damage.
Heel Seams on Dress Shoes and Boots
Dress shoes and boots tend to fail at the heel counter seam. That’s the curved section wrapping the back of your foot. Stiff leather resists the flex, so the thread absorbs more force per step than on a soft canvas shoe.
I’d pay closest attention to any boot heel seam after about six months of regular city wear. The stitching there often loosens before any other part of the shoe shows signs of trouble.
The 30-Second Check That Catches Problems Early
A quick inspection saves hours of repair later. Run a fingertip along every seam once a week, paying attention to bumps and raised loops. A thread that feels bumpy or shifts when you nudge it is already failing.
Raised Loops and Visible Gaps
A tiny loop of thread poking above the surface means a stitch has slipped. The thread hasn’t broken yet, but it’s lost tension. A visible gap where two pieces of material separate, even by a millimeter, is a step beyond that.
Both of these are fixable at home if you catch them before moisture and dirt settle into the opening. Once grime packs into a split seam, the repair gets harder and the thread won’t grip cleanly.
The Gentle Tug Test
Pinch the seam lightly between your thumb and forefinger and pull outward. On a healthy seam, nothing moves. On a failing one, you’ll feel the thread slide or see the gap widen. That slide is your signal to grab the repair kit.
Repair Kit Essentials and Where to Find Them
Keeping a small repair kit at home (or even in a messenger bag) means the difference between fixing a problem on the spot and watching it get worse over a week of commuting. The kit itself is small enough to fit in a desk drawer.
A solid kit includes these items:
- Curved shoe repair needle (a straight needle works, but curved is easier for thick sole edges)
- Heavy-duty nylon or polyester thread, cut to about 18 inches per repair
- Small sharp scissors and a thimble to protect your fingers
- Fabric glue or clear nail polish for sealing knots after stitching
Brands like WUTA and Dritz sell pre-assembled sets online and at specialty retailers. A basic kit runs between $10 and $15.
| Feature | WUTA Leather Stitching Kit | Dritz Sewing Repair Kit |
|---|---|---|
| Needle types | Curved and straight, multiple sizes | Straight only, limited sizes |
| Thread material | Waxed nylon | Polyester |
| Best for | Leather boots and thick canvas | Sneakers and fabric shoes |
| Portability | Compact roll pouch | Flat plastic case |
| Typical price | ~$12-$15 | ~$8-$10 |
The WUTA set is better for leather and thick materials. The Dritz kit works fine for fabric sneakers and lighter shoes.
Fixing Loose Stitching Step by Step
The process is the same whether the shoe is a canvas sneaker or a leather boot. The only variable is needle size and thread thickness.
Clean the Shoe and Prep the Area
Wipe the damaged area with a damp cloth to remove dirt and grit. Let it dry completely. Stitching into wet fabric causes the thread to slip and the repair to fail.
Set up near natural light or a bright lamp. Lay all tools within arm’s reach. This isn’t a project that benefits from getting up mid-repair to find scissors.
Anchor the Thread Before the Damaged Section
Thread the needle and tie a knot at the long end. Insert the needle two to three stitches before the loose section, not at the loose section itself. This anchor prevents the repair from unraveling backward.
Pull the thread through until the knot catches on the inside of the shoe. That knot should sit between the upper fabric and the lining where it won’t rub against your foot.
Follow the Original Stitch Path
Push the needle through the same holes the original stitching used. Those holes are already punched through the material, so the needle passes through more easily. On badly worn shoes where the original holes have stretched or disappeared, create a new parallel line of stitches about 2mm from the old one.
Keep stitches tight and even. Tug each stitch snug after pulling the thread through, but stop before the material puckers or bunches. Puckered stitching looks bad and creates new stress points.
Tie Off Past the Damage
Continue stitching two to three holes past where the damage ended. Tie a small knot on the inside of the shoe. Trim the excess thread close to the knot, then seal the knot with a drop of fabric glue or clear nail polish. That seal keeps the knot from loosening under daily wear.
When a Cobbler Is the Better Call
I think the standard advice to “just take it to a cobbler” for every stitching issue overestimates the difficulty of surface-level repairs and underestimates the $30-$60 cost per visit. A loose thread on a canvas sneaker toe box does not need professional intervention. A curved needle and 18 inches of nylon thread handle that job in 20 minutes.
But some repairs do belong in a shop. Sole separation, structural boot seams, and damage to welted construction should go to a professional. The stitching that attaches a sole to an upper goes through multiple layers of leather, rubber, and sometimes a welt strip. Forcing a home needle through that construction risks puncturing the waterproofing layer or creating uneven tension that causes the sole to peel elsewhere.
Luxury or irreplaceable shoes also deserve professional care. A pair of $400 boots can tolerate a cobbler’s $50 fee more comfortably than a botched home repair.
Finding a cobbler in most cities is straightforward. A Google Maps search for “shoe repair near me” returns rated results with reviews. Some urban delivery apps will even pick up and drop off shoes at partner cobblers, which saves time on a busy schedule.
Keeping Stitching Intact Longer
Repair skills matter, but prevention cuts down on how often those skills get used. A few habits extend the life of shoe stitching significantly.
- Rotate between two or three pairs so no single shoe absorbs five consecutive days of commuter abuse
- Store shoes with cedar inserts or rolled newspaper inside to hold the shape and wick moisture away from glue and thread
- Fix loose threads the day you notice them, not a week later when the seam has opened further
Moisture is the biggest enemy of stitching longevity. Wet thread stretches, and stretched thread loses its grip on the fabric. Keeping shoes dry after rainy commutes (and away from direct heat sources like radiators, which crack leather and weaken adhesive) adds months to a seam’s life.
The WUTA official store carries replacement thread and needles if your kit runs low. Stocking a couple of extra pre-waxed nylon spools means repairs happen on the spot instead of waiting for a delivery.
Questions People Ask About Fixing Loose Shoe Stitching
These are the questions that come up most when people search for shoe repair help.
- Q: Can fabric glue replace stitching on shoes? Fabric glue can hold a loose flap temporarily, but it won’t match the durability of a proper stitch on any seam that flexes during walking. Think of glue as a patch to buy time, not a permanent solution.
- Q: What thread is best for repairing sneakers? Heavy-duty nylon or waxed polyester thread holds up best. Cotton thread absorbs moisture and weakens quickly, so skip it for any shoe that sees rain or sweat regularly.
- Q: How long does a home stitching repair last on shoes? A properly anchored repair using nylon thread and sealed with glue can last several months of daily city wear. The knot seal is the part that makes or breaks the longevity.
Conclusion
A loose thread spotted on Monday morning can turn into a split seam by Friday if city walking does its work. The 20-minute fix described above costs less than a lunch and keeps a good pair of shoes alive for months longer.
The best tool in any shoe care routine is the willingness to act on damage before dirt and moisture settle in. Grab the needle, follow the old stitch line, and tie off past the damage.