Blog

  • How to Protect Expensive Sneaker Insoles From Wearing Out

    How to Protect Expensive Sneaker Insoles From Wearing Out

    A $300 pair of limited-edition sneakers loses half its resale value the moment the insole compresses and flattens. That damage happens faster than most collectors expect, sometimes within 60 to 90 days of daily city wear on concrete sidewalks.

    The usual advice focuses on cleaning the uppers and storing sneakers properly. Insole degradation, though, starts from below: sweat, heat cycling between cold pavement and warm interiors, and friction that no amount of exterior care addresses.

    This one is for the sneaker collector who wears the pairs they buy. Not the vault-storage type, but the person walking 10,000 steps a day across subway platforms, office floors, and city concrete in shoes that cost real money.

    Why City Walking Destroys Insoles Faster Than Anything Else

    The pace of insole breakdown in an urban environment has less to do with total mileage and more to do with what happens between steps. 

    Concrete is unforgiving. Every footfall on a city sidewalk transfers more shock through the midsole than the same step on grass, carpet, or even asphalt.

    The Thermal Cycling Problem Nobody Talks About

    I would rank thermal cycling above raw walking distance as the primary insole killer, based on how memory foam and gel materials behave under repeated temperature shifts. 
    Featured Image

    Stepping from a 35°F sidewalk into a heated subway car, then back outside, then into an office: that loop happens six or eight times in a single commute. 

    Memory foam softens in heat and stiffens in cold. Each transition stretches and contracts the cellular structure of the foam. Over weeks, this produces the same flat, dead feeling that people blame on “too much walking.”

    Cork insoles are slightly more resistant to this cycle, but humidity hits them harder. A rainy week in Amsterdam or London can warp cork that would have lasted months in a dry climate.

    Moisture Buildup on Public Transit

    Packed trains and buses add another layer of damage. Feet sweat more in enclosed, heated transit cars. 

    That moisture migrates down through the sock, saturates the insole surface, and sits there until the wearer reaches their destination. Gel-based insoles handle moisture better than memory foam, but repeated saturation degrades both.

    Insole Materials and How Each One Fails

    Not every premium insole breaks down the same way. The material inside the shoe determines which threat does the most damage and which prevention method matters most.

    Memory Foam Compression

    Memory foam is the most common insole material in sneakers priced above $150. Popular among brands favored in cities like Berlin and Seoul, it adapts to foot shape instantly. 

    The tradeoff: heat and sustained pressure compress the foam permanently. A memory foam insole used daily on city pavement will lose roughly half its original cushion height within three months. Once compressed, the material does not bounce back.

    Gel Puncture and Degradation

    Gel-based insoles hold their cooling properties longer, making them popular for all-day city wear. 

    The weak point is physical puncture. Broken glass, gravel debris, and sharp edges on subway grates can breach the gel layer through a thin outsole. Once punctured, the gel redistributes unevenly and creates pressure spots.

    Cork: Humidity’s Favorite Target

    Cork insoles mold to the foot over time, a trait that makes them feel custom-fitted after a few weeks. Humidity is the enemy. 

    Extended exposure to rain, puddles, or even high ambient moisture can cause cork to crack and crumble. Sneaker collectors in dry climates get far more life from cork than those in tropical or coastal cities.

    Material Primary Failure Mode Lifespan (Daily Urban Wear) Best Climate
    Memory Foam Heat compression 60–90 days Cool, dry
    Gel Puncture, uneven redistribution 90–120 days Warm, dry
    Cork Humidity cracking 90–150 days (dry) / 30–60 days (humid) Dry, moderate

    Gel outlasts memory foam under most conditions, but cork in a dry climate offers the longest lifespan if moisture is controlled.

    Practical Insole Protection That Costs Almost Nothing

    The most effective insole care habits are the cheapest ones. Expensive cleaning kits and professional services have their place, but daily routines do most of the work.

    Removable Insole Liners as a Sacrificial Layer

    Adding a thin insole liner on top of the original insole absorbs the daily punishment instead. The liner takes the sweat, friction, and grit so the original material stays closer to factory condition.

    • Antimicrobial liners from brands like Dr. Scholl’s or Pedag cost under $15 and last several weeks before needing replacement
    • Trim liners to match the shoe’s footbed precisely; a liner that shifts during wear creates more friction, not less
    • Wash liners weekly in cold water and air dry completely before reinserting

    I think antimicrobial liners specifically are a better investment than aftermarket gel insoles, considering a $12 Pedag liner protects a $40 original insole that cannot be repurchased once the sneaker sells out.

    Pair Rotation Splits Wear in Half

    Owning at least two daily-wear pairs and alternating them every other day gives each insole a full 24-hour recovery period. Foam that has time to decompress between wearings retains its structure significantly longer than foam that gets compressed again the next morning.

    This habit is common among hospitality workers in Dubai and tour guides in Paris, people who log serious mileage on hard surfaces daily.

    The Overnight Air-Out Trick

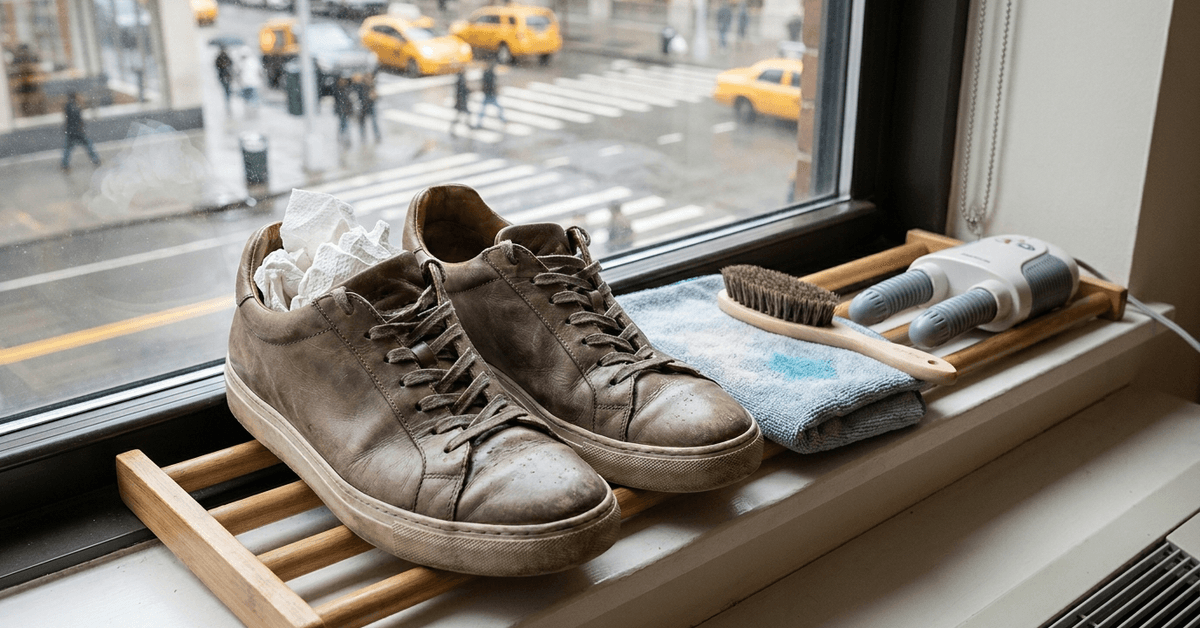
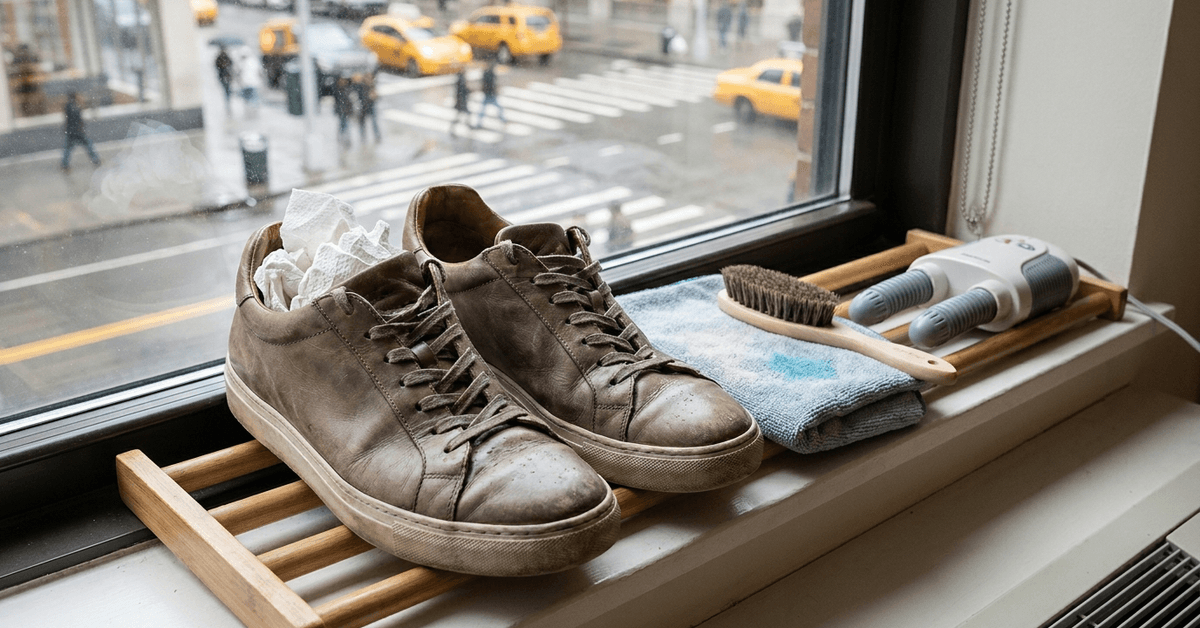
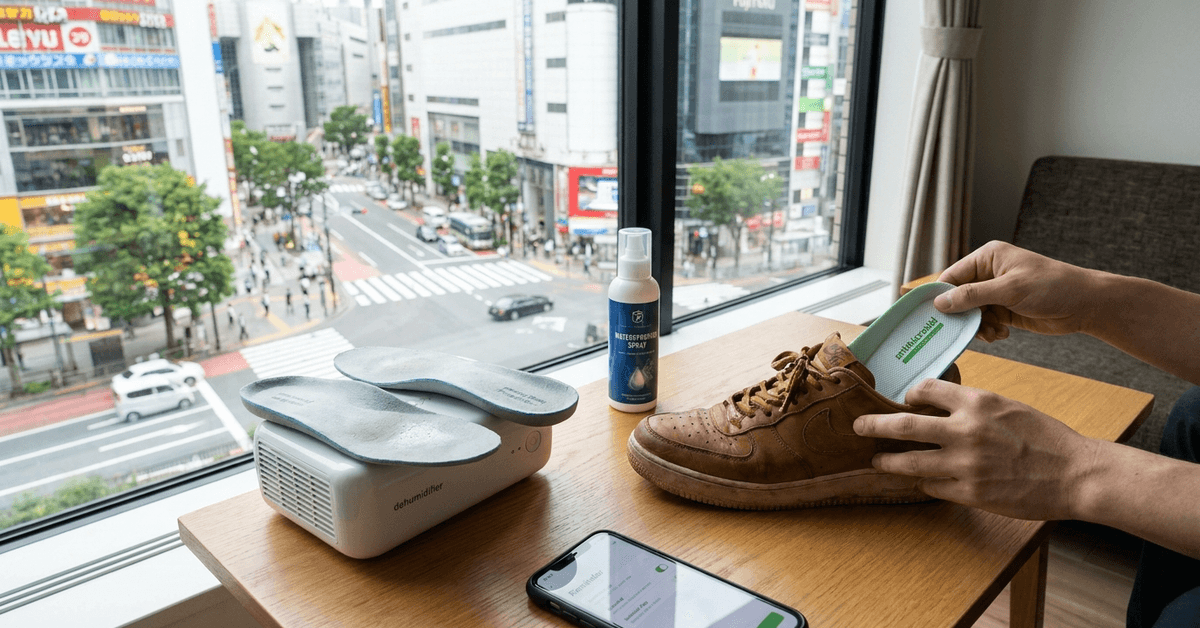
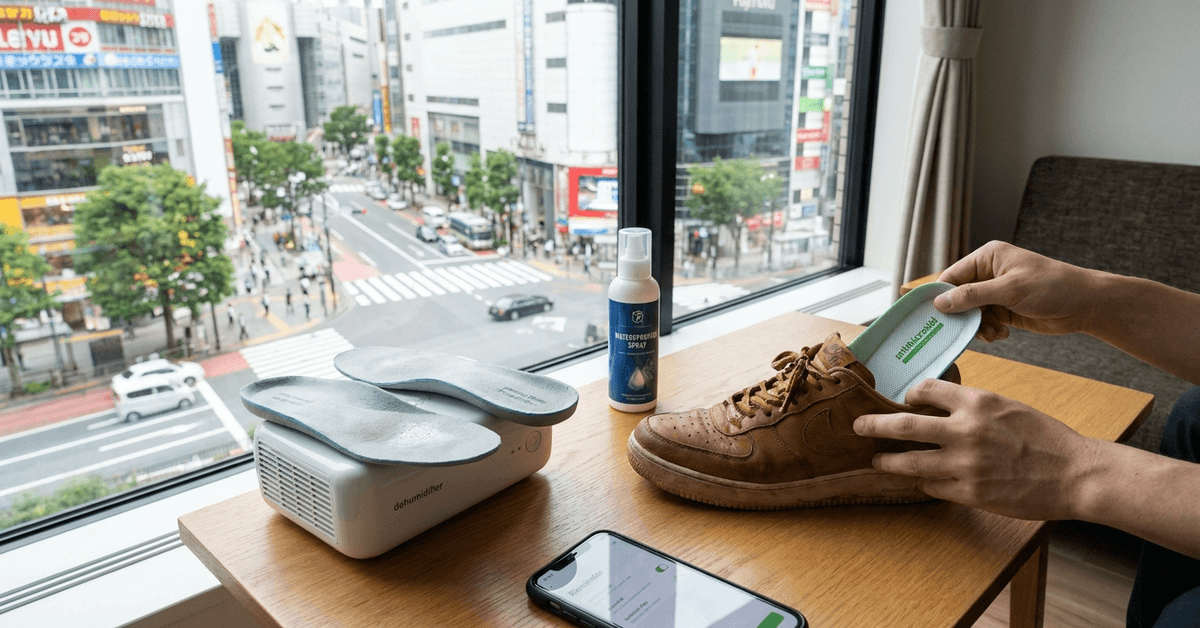
    Removing insoles from the shoe every night and setting them on a flat surface to breathe prevents moisture from sitting in the material overnight. A windowsill works. So does any dry, ventilated shelf.

    • Silica gel packets (repurposed from product packaging or bought cheaply at stores like Muji) placed inside the empty shoe pull residual moisture out of the midsole
    • Portable shoe dehumidifiers available through Amazon or Rakuten handle heavier moisture loads for around $10–$20
    • Never use a hairdryer or radiator to speed up drying: direct heat warps foam and cracks cork

    Sock Selection Changes Insole Lifespan More Than People Expect

    I was surprised that switching sock material made a measurable difference in insole condition after 30 days of testing between cotton and moisture-wicking pairs. 

    Cotton socks absorb sweat and hold it against the insole surface. Moisture-wicking fabrics like those in Stance performance socks or Uniqlo AIRism pull sweat away from the foot before it reaches the insole.

    What to Look for in an Urban Sock

    The right sock for city sneaker wear is seamless, thin enough to avoid adding bulk inside a snug shoe, and made from synthetic or merino blends that dry fast.

    • Avoid cotton on any day involving more than 5,000 steps
    • Seamless toe construction prevents friction hotspots that accelerate localized insole wear
    • A snug, non-bunching fit keeps the sock in place so it functions as a barrier rather than a friction source

    Double-Layer Socks for High-Mileage Days

    During city marathons, music festivals, or any full-day event, two thin sock layers reduce the friction that reaches the insole. 

    Runners and festival-goers in Los Angeles and London use this technique regularly. The inner sock grips the foot. The outer sock slides against the shoe. The insole sees less direct abrasion.

    Protecting Resale Value Through Insole Condition

    Resale platforms like StockX and GOAT evaluate insole condition as part of their authentication and grading process. A sneaker with a compressed, stained, or odor-damaged insole grades lower and sells for less. 

    Collectors in Seoul, Chicago, and Paris pay close attention to this detail. Keeping the original insole paired with the original box and receipt creates a stronger resale listing. 

    Swapping in a fresh aftermarket insole for daily wear and storing the original untouched is a strategy that pays for itself when resale time arrives.

    Things That Ruin Insoles Faster: Common Mistakes

    A few popular care habits do more harm than good:

    • Soaking memory foam insoles in water breaks down the cell structure; a damp cloth wipe is the maximum safe cleaning method
    • Storing sneakers in sealed plastic bags traps moisture inside and accelerates mold growth and odor buildup
    • Using bleach or strong detergents on gel or foam degrades the material and can cause chemical breakdown of adhesives holding the insole in place

    The instinct to deep-clean expensive shoes makes sense, but insoles need a lighter touch than uppers. Gentle surface cleaning after heavy-wear days is enough.

    Questions People Ask About Sneaker Insole Care

    A few questions come up repeatedly among urban sneaker collectors caring for high-end pairs.

    • Q: Can insoles be replaced on limited-edition sneakers? Some brands sell replacement insoles separately, but most limited releases do not offer this option. Third-party replacements exist through retailers like Foot Locker, though they rarely match the exact fit and branding of the original. Keeping the original in good condition matters more than finding a replacement after the fact.
    • Q: How often should sneaker insoles be cleaned? A light wipe with a damp cloth after any day exceeding 8,000 steps keeps surface grime from embedding in the material. Deep cleaning should happen no more than once a month, and only with a gentle, non-detergent cleaner. Over-cleaning degrades foam and gel faster than normal wear.
    • Q: Do insole liners change how a sneaker fits? A thin antimicrobial liner adds about 1–2mm of height inside the shoe. That is enough to notice on a snug-fitting pair. Trimming the liner precisely and choosing the thinnest available option minimizes fit changes. Some wearers go half a size up on daily pairs to accommodate the liner.

    Conclusion

    Expensive sneakers worn daily on city pavement face a specific set of insole threats most care guides ignore. Thermal cycling, moisture accumulation, and material-specific failure modes all matter more than total step count. 

    Cheap habits like insole liners, sock upgrades, and overnight air-outs protect more value than expensive cleaning kits. The collectors who keep their insoles intact are the ones resale platforms reward when it is time to sell.
  • The Best Ways to Maintain Clear Icy Soles on Streetwear Sneakers

    The Best Ways to Maintain Clear Icy Soles on Streetwear Sneakers

    Clear icy soles can yellow inside a shoe box. No city grime needed, no rainy commute, no mud puddle. Just oxygen and time doing quiet damage while the sneakers sit untouched.

    That fact breaks the standard advice loop. Cleaning guides focus on what happens after a wear, not what happens during the six months a pair spends on a shelf between rotations.

    This one is for the city sneaker collector running a rotation of four to eight pairs. The person who cleans after every wear but still opens a box to find cloudy, amber-tinted rubber staring back.

    Oxidation Starts Before the First Scuff

    Most yellowing conversations start and end at dirt. Pavement grime, rain puddles, construction dust. All real problems. But the chemical process behind cloudy soles starts the second clear rubber meets air.

    Oxidation changes the molecular structure of the transparent rubber compound. Oxygen bonds with the polymer chains in the sole material, and those bonds shift the color from clear to amber. 

    Featured Image

    Sunlight accelerates the reaction, and so does heat. A pair stored near a radiator or a south-facing window will yellow faster than one worn twice a week on clean sidewalks.

    Why Polluted Air Makes It Worse

    City air carries particulate matter and volatile organic compounds that bond to sole surfaces. Nitrogen dioxide and ozone, both common in dense urban areas, speed up oxidation on exposed rubber. 

    A pair sitting on a shelf in a Manhattan apartment with the windows cracked is aging faster than an identical pair in a sealed container.

    The Storage Paradox Nobody Talks About

    The sneaker community treats storage as a solved problem: throw in some silica gel, close the box, done. 

    I’d argue that silica gel alone is doing less than most collectors think for icy soles, because silica controls moisture but does nothing about oxygen exposure. The soles still sit in ambient air. 

    Wrapping individual pairs in plastic film or vacuum-sealing them removes the oxygen contact that drives yellowing during long storage gaps. Gel packs handle humidity. Plastic wrap handles oxidation. Two separate enemies need two separate defenses.

    The Sunlight Restoration Trick Has a Built-In Contradiction

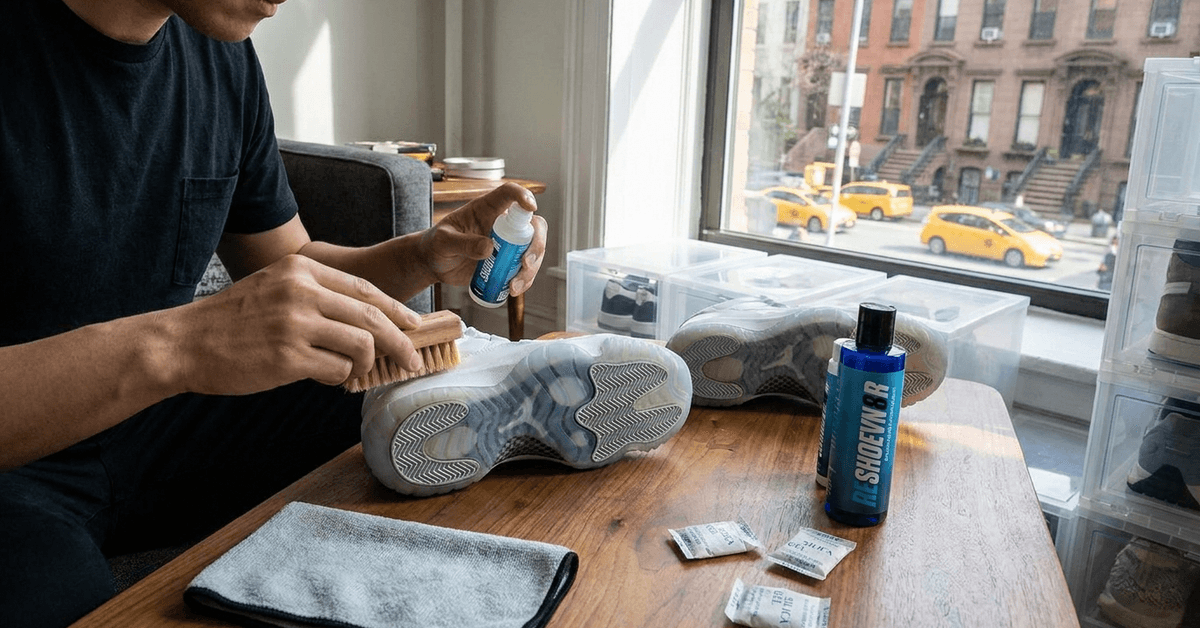
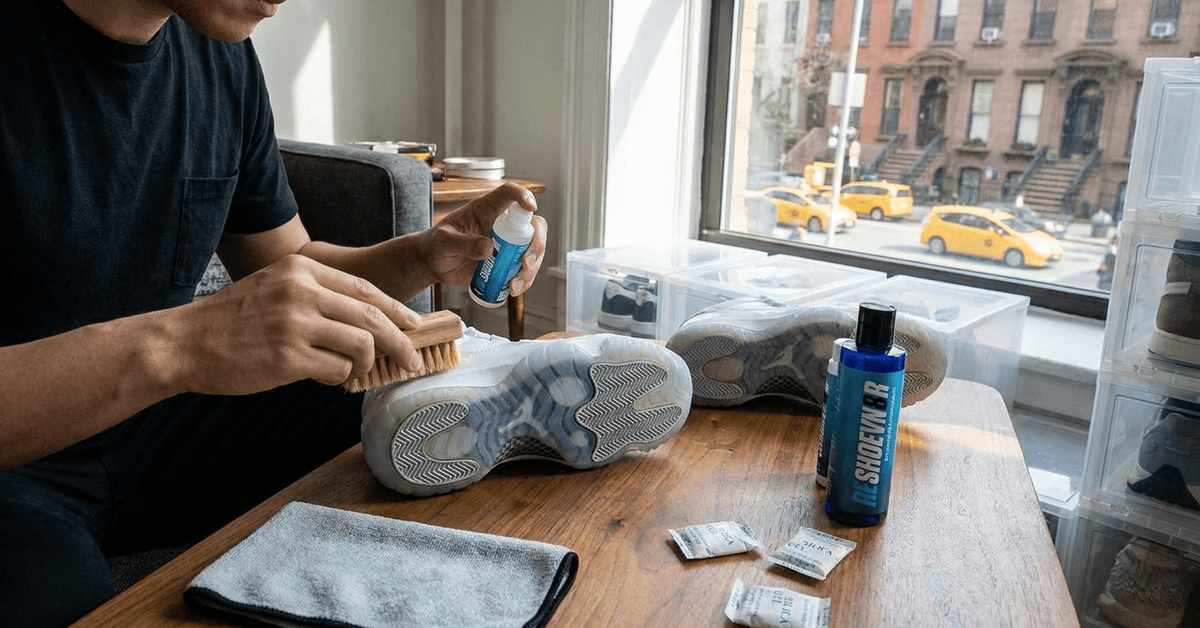
    A popular deep-cleaning method involves applying a gel like Reshoevn8r Sole Revive, wrapping the sole in plastic film, and leaving the shoe in direct sunlight for up to four hours. 

    The UV energy activates the cleaning compound and lifts some of the yellowed layer.

    I think this method is a net negative for anyone using it more than once or twice on the same pair, and the reason is simple: UV radiation is the same force that causes oxidation in the first place. 

    The temporary brightness fades within weeks, and each session weakens the sole material slightly. Repeated UV restoration creates a cycle where the sole looks good for a short window, then yellows faster than it did before the treatment.

    A Safer Approach to Deep Cleaning

    Skip the sunlight step. Apply the restoration gel, wrap the sole, and place it under an indoor UV lamp for controlled, timed exposure. 

    UV cabinets used by professional restoration shops like Sole Fresh in New York work on this principle: controlled dosage, consistent distance, timed sessions. The result lasts longer because the sole material takes less cumulative UV damage.

    Rinsing and drying speed matters too. Leaving moisture on a treated sole lets mineral deposits settle into the surface. Pat dry immediately with a microfiber cloth and let the pair air out in a shaded, ventilated spot.

    Weekly and Monthly Cleaning Routines That Fit City Life

    Cleaning icy soles does not need to be a weekend project. The two-tier system works well for anyone wearing their pairs on regular rotation in a city.

    Quick clean after each wear takes under two minutes. A soft-bristle toothbrush, a drop of dish soap in warm water, and circular motions across the sole surface. Wipe dry immediately. That’s it. The goal is removing surface particulates before they bond to the rubber.

    Monthly Deep Maintenance

    Once a month, a more thorough session catches anything the daily wipe misses:

    • Apply a dedicated sneaker cleaning solution to the sole and scrub with a medium-bristle brush
    • Wipe the midsole and outsole edges where grime collects in seams
    • Inspect for micro-scratches or cloudy patches that signal oxidation starting
    • Dry completely before returning to storage

    This monthly session takes about ten minutes per pair. For a rotation of six pairs, that’s an hour a month. Manageable.

    Over-Cleaning Creates Its Own Problem

    One thing that gets buried in cleaning guides: micro-scratches from aggressive scrubbing trap dirt particles and accelerate discoloration. 

    Stiff brushes, abrasive sponges, and excessive pressure on clear rubber leave tiny grooves invisible to the naked eye. Those grooves fill with city dust and create a permanently hazy layer that no amount of cleaning can reverse.

    Soft bristles and light pressure protect the surface. A toothbrush works better than a shoe brush for icy soles specifically because the bristles are softer and shorter.

    Tools Worth Buying vs. Tools That Waste Money

    The sneaker care market sells a lot of products. Some of them work. A city-based collector needs a short list, not a full arsenal.

    Product Best Use Price Range
    Jason Markk Quick Wipes On-the-go cleaning after transit or events $10-$15 for a pack
    Reshoevn8r Cleaning Solution Monthly deep cleans for heavy city grime $10-$18 per bottle
    UV-protective spray Pre-wear coating to slow oxidation on soles $12-$20 per can
    Stackable clear shoe boxes with UV filter Long-term storage that blocks light $25-$40 for a set of six

    The UV-protective spray is the most underrated item on this list. A single coat before wearing a pair creates a thin barrier between the rubber and ambient air. 

    The protection fades after a few wears, so reapplication matters, but the cost per use is low.

    Skip the Bleach

    Bleach and hydrogen peroxide solutions appear in DIY sneaker forums as yellowing fixes. Both accelerate the exact chemical reaction they claim to reverse. Bleach breaks down rubber polymers. 

    Hydrogen peroxide creates initial brightening followed by faster oxidation. A pair treated with bleach will look worse within a month than an untreated pair left in storage.

    Smart Storage for Small Urban Apartments

    Closet space in city apartments is a known constraint. The typical sneaker rotation gets stuffed into a shared closet, sometimes near heating pipes or under a window. Both locations speed up yellowing.

    A few storage adjustments make a measurable difference:

    • Keep boxes away from heat sources: radiators, dryer vents, south-facing windows
    • Wrap each pair in acid-free tissue paper or plastic cling film before boxing
    • Place one silica gel packet per box and replace them every three to four months
    • Stack boxes in a closet interior, not along an exterior wall where temperature swings are wider

    Seasonal rotation helps too. Pairs worn during summer can go into sealed storage for fall and winter, reducing their total air exposure by months.

    The Rainy Day Pair Strategy

    Owning one designated “beater” pair for wet or dirty conditions protects the rest of the collection. This does not need to be a cheap shoe. 

    It can be any pair with a darker or opaque sole that handles rain and slush without cosmetic risk. Reserving icy-soled pairs for dry days alone cuts their exposure to the worst city conditions by a wide margin.

    When DIY Stops Working and a Pro Shop Makes Sense

    Severe yellowing on a pair worth $300 or more is a case for professional restoration. 

    Shops like Kicks Clinic in London and Sole Fresh in New York use UV cabinets and industrial-grade formulas that remove oxidation layers without the surface damage of home methods. Most services run under a day for turnaround.

    A professional restoration typically costs between $30 and $80 per pair depending on severity. For a pair with resale value above $200, that math works out. For a $90 pair with moderate yellowing, it probably does not.

    What to Ask a Restoration Shop

    Not all shops handle icy soles the same way. A few questions filter the good ones from the ones guessing:

    • Do they use a UV cabinet or natural sunlight? Cabinet is better for controlled results.
    • Do they apply a post-treatment sealant? A sealant layer slows re-oxidation after restoration.
    • Can they show before-and-after photos of similar sole types? Icy soles behave differently than standard rubber.

    Questions People Ask About Clear Icy Sole Care

    These come up constantly in sneaker forums and search results. Short answers that add something the sections above touched only briefly.

    • Q: Can I use a magic eraser on icy soles? Magic erasers are micro-abrasive sponges. They remove surface grime effectively but create fine scratches on clear rubber that trap future dirt. A soft toothbrush and soapy water is safer for transparent soles.
    • Q: How long do icy soles stay clear without any care? Depends on climate and storage. A pair stored in a sealed box in a cool, dry room can stay clear for six to twelve months. The same pair in an open rack near a window may yellow within weeks.
    • Q: Does wearing icy soles more often prevent yellowing? Wearing them does not prevent oxidation, but it does let you catch discoloration early and clean it off before it bonds permanently. Rotation between wearing and proper sealed storage is the best balance.

    Conclusion

    Clear icy soles stay sharp when storage gets as much attention as cleaning. Sealed containers and oxygen barriers matter more than any scrub brush. 

    A soft-bristle toothbrush and monthly routine can outperform expensive kits used carelessly. The collectors who keep their soles clear for years treat prevention as the real skill.

  • How to Clean and Condition Premium Nubuck Boots

    How to Clean and Condition Premium Nubuck Boots

    A single rain-soaked walk across a city sidewalk can leave a watermark on nubuck that no amount of dry brushing removes. That pale, cloudy stain sits right on the toe box, mocking every dollar spent on the boots.

    Most boot care guides treat nubuck like a slightly fussier version of smooth leather. The problem is that nubuck responds to moisture and friction in completely opposite ways, and the wrong product applied at the wrong time can flatten the texture permanently.

    This guide is for the person who owns one good pair of nubuck boots and commutes through unpredictable city weather. Not a sneakerhead with a closet full of options. 

    Someone who needs these boots to hold up through subway platforms, wet crosswalks, and the occasional bar-floor spill.

    What Makes Nubuck So Vulnerable on City Streets

    Nubuck gets its soft, velvety surface from a specific manufacturing step that most people never think about. The leather itself is full-grain, the same grade used in high-end smooth leather goods. 

    But the outer surface gets sanded down to raise a fine nap, and that exposed nap is where all the trouble starts.

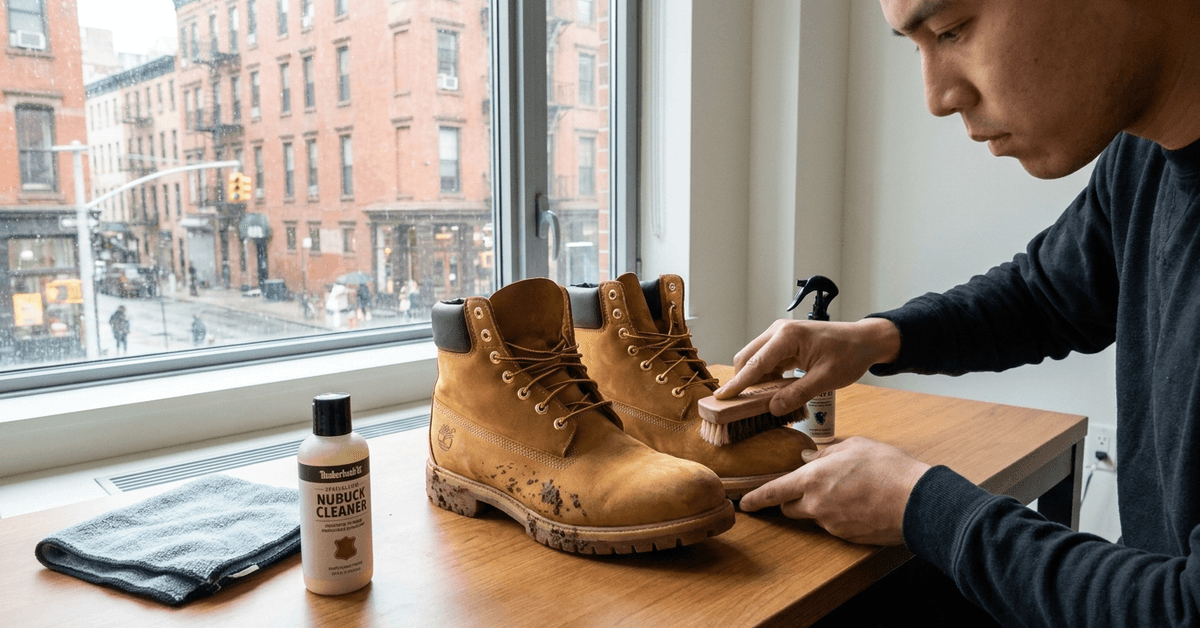
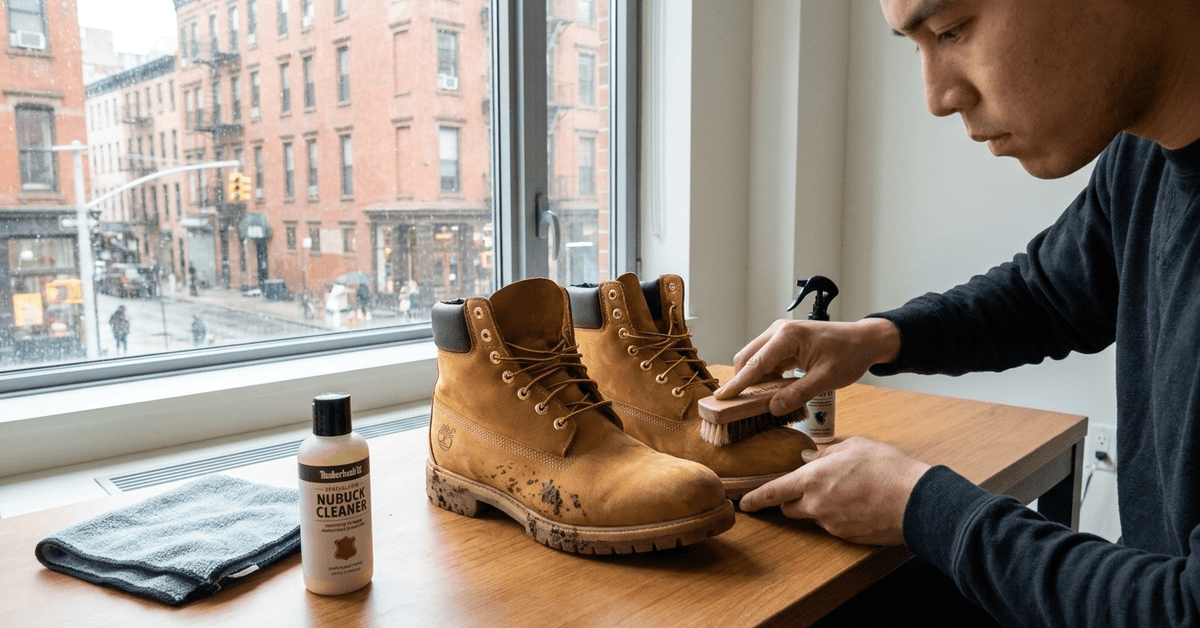
    Image 1

    The Sanding Process Changes How Damage Works

    Smooth leather has a sealed surface that repels liquids for a few seconds before absorption. Nubuck’s sanded surface has no such barrier. Liquid hits the raised fibers and wicks in almost instantly. 

    City environments compound this problem. Pollution particles, brake dust, and fine grit from construction sites settle into the nap throughout the day. A pair of nubuck boots worn on a London commute picks up a film of grime that’s invisible until the next morning, when the surface looks dull and flat.

    I would skip nubuck entirely for anyone who can’t commit to a 90-second post-wear brushing habit. The material punishes neglect faster than any other leather type, and once the nap flattens from embedded dirt, restoration gets expensive.

    The Daily Brush That Prevents 80% of Nubuck Damage

    A nubuck brush with rubber or crepe bristles is the single most useful tool in any boot care routine. Not a suede brush. Not a horsehair brush. The wrong bristle type can scratch the finish or push particles deeper into the fibers.

    Dry-First, Then Brush: The Sequence That Matters

    One thing most care instructions gloss over: the boot needs to be completely dry before brushing. Running a brush over a damp nubuck surface pushes moisture and dirt particles into the leather, creating those gray smudge marks that look like permanent stains.

    After wearing boots through rain or damp streets, stuff them loosely with newspaper and let them sit at room temperature for a few hours. No radiators, no hair dryers, no sunny windowsills. Heat warps the leather and cracks it along the flex points. 

    Once the surface feels dry to the touch, short strokes with the nubuck brush lift dirt and restore the nap’s direction.

    This two-minute routine after every wear prevents the kind of buildup that requires a full deep clean. Think of it like flossing: boring, fast, and dramatically cheaper than the alternative.

    Deep Cleaning Nubuck Boots After Rain and Street Stains

    Sometimes the daily brush is not enough. A rainstorm in Toronto or a festival weekend in Berlin leaves the kind of mess that needs a dedicated cleaning session. The tools for this are different from daily maintenance, and mixing them up is a common mistake.

    A proper deep-cleaning kit fits inside a small bag and includes these items:

    • Nubuck-specific cleaner in foam or liquid form (never saddle soap or dish detergent, both of which strip the finish)
    • Cleaner eraser for spot-treating individual marks without wetting the entire boot
    • Microfiber cloth for dabbing and lifting, never cotton towels that leave lint in the nap
    • A shoe tree to hold the boot’s shape during drying

    Coffee, Mud, and Bar-Floor Marks

    Different stains call for different first responses. A mud splash should dry completely before any attempt to clean it. Scrubbing wet mud into nubuck grinds particles into the fibers. Let it cake, then flake it off with a brush.

    Coffee and alcohol spills need immediate blotting with a dry microfiber cloth. Press down without rubbing. 

    Rubbing spreads the stain outward and deeper. After blotting, let the boot dry fully, then apply a small amount of nubuck cleaner in circular motions over the affected area.

    Eraser vs. Liquid Cleaner: Picking the Right One

    The eraser is better for dry, surface-level scuffs. It works like a pencil eraser, lifting marks through gentle abrasion. Liquid cleaner handles stains that have penetrated the nap. 

    A good rule: if the mark disappears when you rub your thumb across it, try the eraser first. If the color has changed and stays changed, go liquid.

    Stain Type First Tool Technique Drying Needed First?
    Mud splash Nubuck brush Flake off dried mud, then brush Yes
    Coffee or alcohol Liquid cleaner Blot, dry, then clean in circles Partial (blot first)
    Scuff or dry mark Cleaner eraser Light rubbing, then brush nap Yes
    Water ring Microfiber cloth + brush Even out moisture, then dry and brush No (address immediately)

    The water ring stain is the sneakiest one. A single raindrop can leave a visible circle if part of the boot dries faster than the rest. The fix is counterintuitive: lightly dampen the entire surface with a cloth so it dries evenly, then brush once fully dry.

    Conditioning Nubuck Without Flattening the Nap

    Standard leather conditioner will ruin nubuck boots. This point needs repeating because the instinct to “moisturize” leather with cream or oil is strong, and it’s wrong for this material. 

    Cream conditioners seal the surface and flatten the nap permanently. The velvety texture that makes nubuck distinctive disappears under a layer of waxy product.

    Spray Conditioners: The Only Safe Option

    Nubuck conditioner sprays are formulated to absorb into the fibers without coating them. Hold the can about 15 cm from the surface and apply a light, even mist. 

    Two light coats beat one heavy coat every time. A heavy application can leave dark spots that take days to even out.

    Let the boots air dry completely between coats. No forced heat. A shoe tree from a reputable leather care supplier inside the boot during this process helps maintain shape while the fibers absorb the conditioner.

    Waterproofing Nubuck Boots: Why Monthly Spraying Wastes Product

    The standard advice for waterproofing nubuck is to apply a water-repellent spray once a month. I think that schedule is wasteful and poorly timed for anyone living in a city with variable weather patterns like New York, Amsterdam, or Melbourne.

    A fixed monthly calendar ignores two realities. 

    First, the spray coating washes away during deep cleaning, so any month where a deep clean happens mid-cycle leaves the boot unprotected for weeks. Second, dry months where boots see minimal rain don’t need reapplication at all.

    A better approach ties spraying to events, not dates:

    • Reapply after every deep clean, since the cleaning process strips the previous coat
    • Spray the night before any forecasted rain or snow
    • Skip months where the boots stay dry and see only indoor wear

    This event-based method uses less product and keeps protection active exactly when the boot faces moisture. A monthly habit, by contrast, often means spraying boots that sit in a closet during dry spells and missing the window right after a rainstorm scrub.

    Boot covers or galoshes are worth considering for heavy downpours. They look ridiculous. They also cost less than one professional nubuck restoration, and cities like Chicago and Paris can dump a centimeter of rain in thirty minutes during spring.

    Storing Nubuck Boots in a Small City Apartment

    Compact living spaces create specific storage problems for nubuck. Tossing boots into a pile near the front door exposes them to humidity, dust, and heat from nearby radiators. 

    The leather absorbs ambient moisture, and mold can develop on the nap within a week in humid climates.

    A few storage habits make a measurable difference:

    • Cedar shoe trees absorb internal moisture and keep the boot from collapsing into creases
    • A breathable fabric bag (never plastic, which traps humidity) protects against dust
    • A small portable dehumidifier in the shoe cabinet controls ambient moisture, especially useful in cities like Singapore or Miami where indoor humidity stays high year-round

    Boots should live away from direct sunlight and heat sources. A closet shelf beats a rack by the window, even though the rack is more convenient. 

    The American Leather Chemists Association recommends storing leather below 70% relative humidity and away from UV light, both of which degrade the fiber structure over time.

    Questions People Ask About Nubuck Boot Care

    These come up constantly in forums and search results, and the answers are rarely specific enough to act on.

    • Q: Can I use a suede brush on nubuck boots?
      Suede brushes with brass or steel bristles are too aggressive for nubuck’s finer nap. Stick with rubber or crepe bristle brushes designed for nubuck. The softer material lifts dirt without scratching the surface.
    • Q: How do I remove oil stains from nubuck?
      Sprinkle cornstarch or talcum powder on the stain and leave it overnight. The powder absorbs the oil slowly. Brush it off the next morning and repeat if needed. Liquid cleaners tend to spread oil stains rather than lift them.
    • Q: Is nubuck waterproof after spraying?
      No spray makes nubuck fully waterproof. A water-repellent spray buys time by causing droplets to bead on the surface, but prolonged exposure to rain will still soak through. Think of it as a delay, not a seal.

    Conclusion

    Nubuck boots reward the city dweller who treats care as a short daily habit rather than an occasional rescue mission. The right brush, the right conditioner type, and event-based waterproofing keep the texture intact through seasons of urban wear. 

    Skipping the standard leather cream aisle and reaching for nubuck-specific products is the single decision that separates boots that last from boots that flatten within months. A two-minute routine after each wear costs nothing and saves everything.

  • Step-By-Step guide to Removing Scuff Marks from Patent Leather

    Step-By-Step guide to Removing Scuff Marks from Patent Leather

    Patent leather picks up scuffs the way a white car picks up bird droppings. One subway ride, one crowded escalator, and that mirror finish looks like it survived a street fight.

    The standard fix most cleaning guides repeat is petroleum jelly and a soft cloth. But the product choice matters far less than timing and technique, two things those guides barely mention.

    This one is for the daily commuter: the person wearing patent leather oxfords to the office or carrying a patent leather crossbody through packed metro stations. If city grit is a daily opponent, the repair process needs to match that pace.

    Why Patent Leather Scuffs Faster on City Streets

    Regular leather absorbs minor contact. A light brush against a wall or a bump from a passing bag barely registers on a matte surface. 

    Patent leather has no such forgiveness because the high-gloss polyurethane or lacquer coating sits on top, exposed to every point of contact like a freshly waxed car hood.

    City environments multiply the problem. Concrete sidewalks carry fine grit that acts like low-grade sandpaper against any smooth surface. 

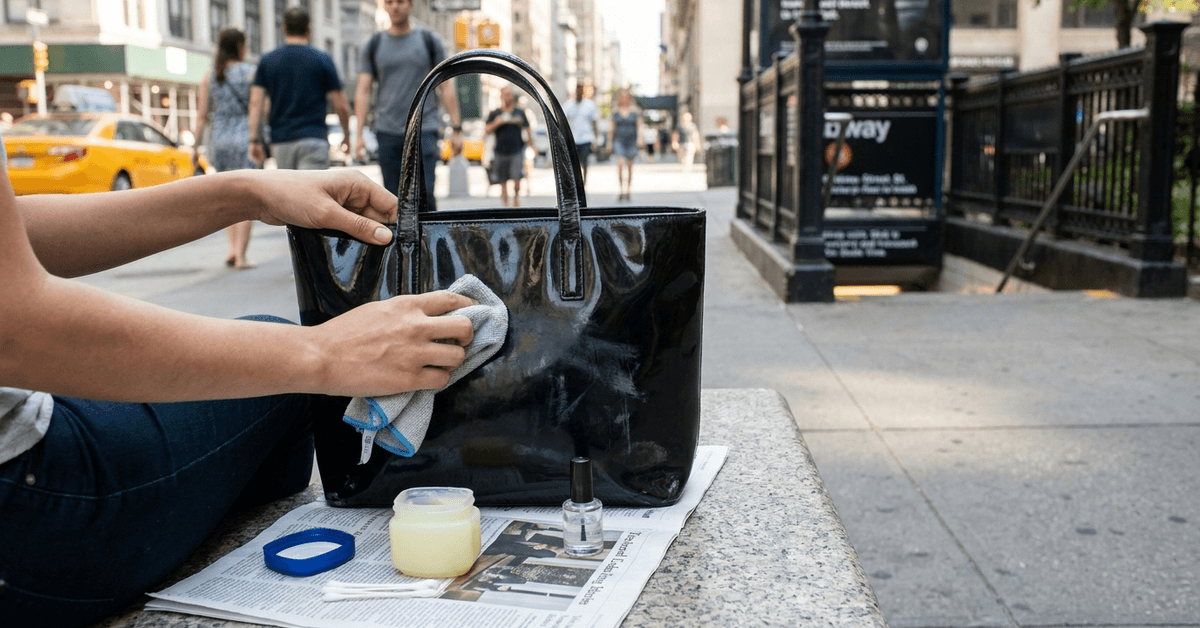
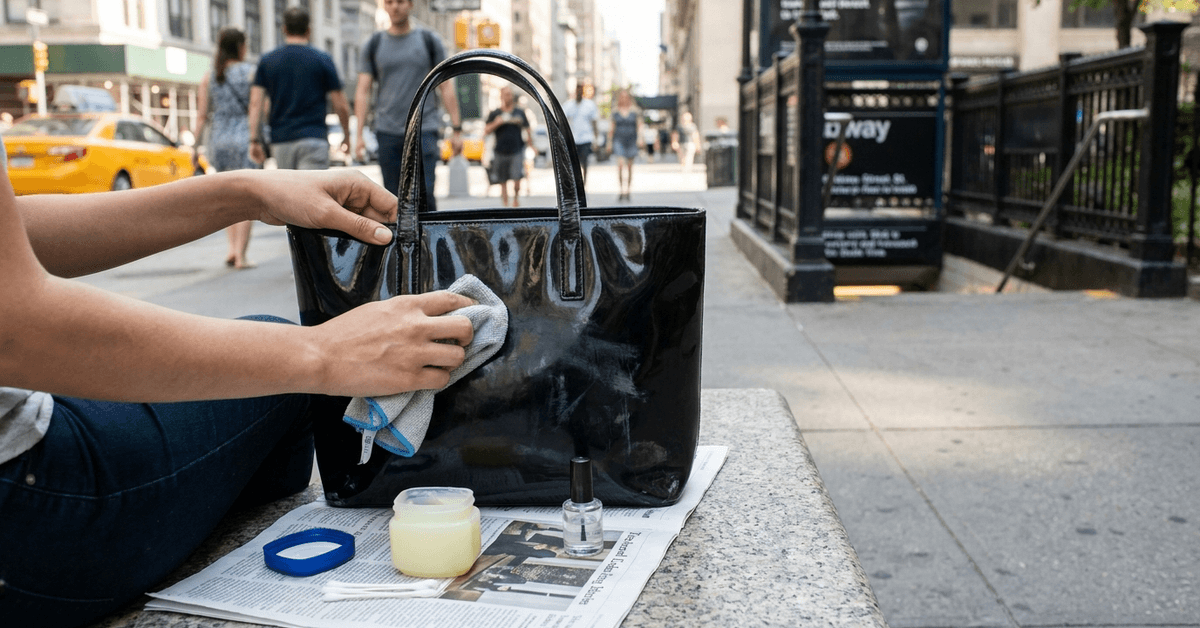
    Image 1

    Escalator edges, bus seats, and the metal poles on commuter trains all create contact points that standard leather shrugs off but patent leather records instantly.

    The Commute Factor

    Think about a typical rush-hour train ride. A patent leather shoe touches the floor, the seat frame, maybe another passenger’s luggage. Each contact leaves a potential mark. The same shoe in a car or at a desk job might go weeks without a single scuff.

    Cities like Amsterdam and Paris add cycling and scooter commuting to the equation. Pedal straps, scooter decks, and bike baskets all create friction zones that hit footwear and bags at predictable spots.

    Why Color Makes a Difference

    Darker patent leather, like deep navy or black, hides shallow surface marks better than lighter shades. 

    A pale blush or white patent surface shows every contact point. I’d pick black or deep burgundy patent leather for any accessory that faces a daily city commute, specifically because lighter colors demand twice the maintenance for half the visual payoff.

    The Five-Minute Scuff Removal Process

    Speed is the real variable in patent leather repair. A scuff treated within a few hours responds to gentle cleaning alone. 

    Leave that same mark for a week, and the coating begins absorbing the discoloration. The fix becomes harder, and sometimes the mark becomes permanent.

    The process breaks into three stages: clean, soften, and buff. Each stage takes less than two minutes.

    Clean the Surface First

    Loose dirt sitting on top of a scuff makes it look worse than it is. A dry microfiber cloth removes that layer. Paper towels, napkins, or tissues leave fibers behind and can scratch the finish, so they should never touch patent leather.

    If grime sticks, a fragrance-free baby wipe does the job. These are easy to carry in a commuter bag and work on patent surfaces without leaving residue. Light circular motions across the scuffed area, then a pat dry with a clean section of the cloth.

    Soften the Mark and Buff It Out

    Once the surface is clean, apply a small amount of mineral oil directly to the scuff. Rub gently with the cloth for about 30 seconds, using light circular pressure. The oil softens the displaced coating material and allows it to settle back into position.

    Buff the area with a dry section of the cloth until the shine returns. Sometimes the scuff disappears entirely. Sometimes a faint shadow remains. That shadow usually fades over the next day or two as the coating re-levels.

    I would skip petroleum jelly for this step, and I think the common advice to reach for Vaseline as a first-line patent leather fix deserves a hard second look. 

    Petroleum jelly leaves a tacky film on the surface that collects city dust, street grit, and fiber from bag linings within hours. Mineral oil absorbs cleaner and dries without that sticky residue. 

    What to Pack in a City Bag for Patent Leather First Aid

    A small kit keeps patent leather looking sharp between full cleanings. The items take up less space than a phone charger.

    These are the essentials worth carrying:

    • Microfiber cloth (a single small square, folded): handles both cleaning and buffing without scratching the surface
    • Fragrance-free baby wipes (two or three in a resealable pouch): quick surface cleaning in transit, no need for water
    • Cotton swabs: reach into seams, creases, and detailed areas on shoes where a cloth can’t apply enough pressure
    • A travel-size bottle of mineral oil: available at most city drugstores and pharmacies for under $5

    That kit fits inside a zip pouch smaller than a wallet. The mineral oil bottle is the bulkiest piece, and even that fits inside most jacket pockets.

    Stubborn Scuffs and the Limits of Home Fixes

    Some marks go deeper than the surface coating. A scuff that exposes the base leather underneath, or one that cracks the patent finish, is past the point where household products can help.

    Clear Nail Polish as a Targeted Repair

    Clear nail polish works as a spot fix for medium-depth scuffs that don’t respond to mineral oil. Apply it with a cotton swab directly on the mark, staying within the damaged area only. Let it dry completely before wearing or storing the item.

    The nail polish fills in minor surface cracks and restores a degree of gloss. But it changes the texture slightly. 

    The repaired spot may look marginally different from the surrounding area under direct light. On darker patent leather, this is rarely noticeable. On lighter shades, the difference can be visible.

    Knowing When a Cobbler Is the Better Call

    A scuff that splits the patent finish or peels the coating away needs professional attention. Neighborhood cobblers in areas like London’s Soho or Berlin’s Mitte specialize in this type of repair. 

    Department store shoe counters can also provide spot-cleaning guidance and point toward the right patent leather care products. Professional repair apps have started operating in urban centers, offering pickup and delivery for leather repair. 

    The cost runs higher than a DIY fix, but for a high-end patent leather bag or dress shoe, the investment in professional restoration is often worth the price difference.

    Daily Habits That Reduce Patent Leather Scuffing

    Repair is reactive. The bigger win for daily commuters is reducing how often scuffs happen.

    Some prevention habits that make a measurable difference:

    • Store shoes and bags in dust bags after each use, even for overnight storage, to block dust that dulls the finish over time
    • Rotate patent leather items across the week instead of wearing the same pair daily, especially in damp climates like northwestern Europe
    • Carry the item in a protective sleeve during transit if possible, particularly for bags that ride against body or seat surfaces during commutes
    • Check contact points on regular commute routes: if a particular bag always brushes against a rough seat edge, shift how the bag sits
    Prevention Method Effort Level Scuff Reduction
    Dust bag storage after each use Low (30 seconds) Reduces surface dulling and minor contact marks
    Weekly rotation with other footwear Low Cuts wear-per-item roughly in half
    Carrying sleeve during transit Medium Protects against the highest-friction commute moments
    Choosing darker patent colors One-time decision Lighter scuffs stay invisible longer on dark surfaces

    The single most effective habit on this list is rotation. A pair of patent leather shoes worn three days per week instead of five accumulates roughly 40% fewer scuff events, simply because two days of rest also mean two fewer commutes of exposure.

    Items to Keep Away from Patent Leather

    A few common cleaning mistakes make scuffs worse or permanently damage the finish.

    Colored shoe polish almost never matches patent leather’s gloss-coat color and leaves visible residue. Abrasive scouring pads tear through the coating in seconds. And leather sprays formulated for matte or nubuck surfaces contain solvents that dissolve patent leather’s topcoat.

    Excessive moisture is another risk. Soaking patent leather, even briefly, lets water seep into seams and loosen the bond between the coating and the base material. A damp cloth is fine. A wet cloth, or rain without a protective cover, is not.

    The Leather Care Guide from Saphir Médaille d’Or breaks down which products are safe for different leather types, including patent.

    Questions People Ask About Removing Scuffs from Patent Leather

    A few of these come up constantly among commuters trying to keep patent leather intact through daily city wear.

    • Q: Can I use rubbing alcohol to remove scuffs from patent leather?
      Rubbing alcohol can strip the glossy topcoat on patent leather, leaving a dull spot that looks worse than the original scuff. Stick with mineral oil or a product specifically labeled for patent surfaces.
    • Q: How long do scuff marks take to become permanent on patent leather?
      Shallow surface scuffs can often be buffed out days later. Deeper marks that sit for more than a week start bonding with the coating, and the removal success rate drops sharply after that window.
    • Q: Does patent leather crack more easily in cold weather?
      Cold temperatures make the polyurethane coating stiffer and less flexible. A patent leather shoe flexed repeatedly during a cold-weather walk is more prone to surface cracking than the same shoe at room temperature.

    Conclusion

    Patent leather holds up in city environments when the repair response is fast and the cleaning products stay simple. 

    The commuters who keep their patent finishes intact are the ones who treat scuffs the same day, not the same month. 

    Mineral oil, a microfiber cloth, and 30 seconds of buffing do more than any expensive specialty product sitting unused at home. Stepping out with that mirror-shine finish intact after a rough commute week feels like a small, satisfying victory.

  • Sneaker Maintenance Checklist: Daily Habits for Longevity

    Sneaker Maintenance Checklist: Daily Habits for Longevity

    A pair of sneakers worn daily on city pavement loses about 30% of its tread depth in the first three months. That timeline shrinks even faster in rain-heavy cities like London or Vancouver.

    The typical sneaker care guide throws a product list at you and calls it a day. But the fastest way to destroy a pair has nothing to do with cleaning frequency. It has everything to do with drying method, rotation, and the five minutes after you get home.

    This one is for the daily commuter walking six-plus kilometers through concrete, subway platforms, and crowded sidewalks. If sneakers are your primary footwear and replacing them every few months feels wasteful, this routine changes that math.

    Why City Pavement Eats Sneakers Faster Than Trails

    Something odd happens when sneaker care articles talk about wear and tear. They treat every environment the same. A hiking trail, a gym floor, and a Tokyo sidewalk all get the same advice. That makes no sense.

    Concrete and Asphalt Are Abrasive Surfaces

    Concrete sidewalks in cities like New York or Paris grind rubber soles differently than packed dirt or even asphalt roads. The flat, hard surface creates consistent friction on the same contact points of the sole, wearing down tread in a predictable pattern. 

    Image 1

    Trail runners get uneven wear because terrain varies. City commuters get concentrated wear because the surface never changes.

    Look at the bottom of a pair that’s done three months of city walking. The ball of the foot and outer heel will be noticeably smoother than the rest. 

    Rain, Puddles, and the Moisture Problem

    Getting caught in a sudden rainstorm is part of city life in Vancouver, Singapore, and most of Northern Europe. The issue is not the water itself. The issue is what happens in the next 12 hours.

    Sneakers left wet overnight develop a musty smell within 48 hours. The adhesive between the sole and upper weakens over repeated wet-dry cycles. Mold growth starts in warm, enclosed spaces faster than people expect.

    The Nightly Two-Minute Routine That Keeps Sneakers Alive

    A full deep-cleaning session once a month sounds reasonable on paper. 

    But I would bet on a two-minute nightly wipe over a monthly scrub every time, based on how dirt and moisture settle into mesh and canvas fibers overnight. The damage happens between wearings, not during them.

    A Quick Wipe-Down After Each Wear

    The simplest version of this: keep a microfiber cloth near the front door. Wipe the uppers and toe box when you take the sneakers off. That interrupts dirt from bonding with the material overnight.

    Crep Protect Wipes are a popular portable option for this. A damp microfiber cloth does the same job at home for a fraction of the cost. The wipe takes about 30 seconds. The payoff compounds over weeks.

    Spot-Treating Stains the Same Night

    A stain that sits for 24 hours is ten times harder to remove than one treated immediately. That timeline matters for street food spills, coffee drips, and puddle splashes that happen during a normal city day.

    The treatment is simple:

    • Mild dish soap mixed with cold water in a spray bottle handles most stains on leather, canvas, and synthetic uppers
    • A soft-bristled brush (an old toothbrush works) loosens grime from seams and textured surfaces
    • Knit and mesh materials need a lighter touch: dab instead of scrub, and avoid hot water that can shrink the weave

    Specialized cleaners like Jason Markk work well across multiple fabric types. But for daily spot treatment, the dish soap solution covers about 90% of cases.

    Removing Insoles and Airing Out

    After a full day of walking through markets, subway cars, and packed streets, the inside of a sneaker traps heat and moisture. Removing the insoles and leaving the sneaker open overnight lets both the footbed and the interior dry naturally.

    Baking soda sprinkled inside overnight pulls moisture and neutralizes odor. 

    Sneaker Balls and similar deodorizer products are a more convenient version of the same idea. Either approach works. The step that matters is removing the insoles. Most people skip it.

    Sneaker Cleaning Products: The $20 Kit Versus the $3 Fix

    I think the common recommendation to buy a dedicated sneaker cleaning kit is overblown for daily maintenance. A $20 Jason Markk set or a $15 Crep Protect bundle makes sense for quarterly deep cleans. 

    For everyday upkeep, mild dish soap, cold water, a microfiber cloth, and a soft brush handle the job at roughly one-fifth the cost. That said, one product category earns its price tag: waterproofing spray

    A silicone-based or fluoropolymer spray applied to new sneakers adds a layer of water and stain resistance. The catch is reapplication frequency. A single coat lasts about two to four weeks of daily city use, not the “all-season protection” most labels promise.

    Product Type Approximate Cost Best Use Case Reapplication Needed
    Mild dish soap + cloth $3 Daily wipe-downs and spot cleaning N/A
    Sneaker cleaning kit (Jason Markk, Crep Protect) $15–$20 Deep cleaning every 4–6 weeks N/A
    Waterproofing spray $10–$18 Rain protection for mesh and canvas Every 2–4 weeks with daily wear
    Sneaker deodorizer (Sneaker Balls, baking soda) $5–$8 Odor and moisture control After each heavy-use day

    Baking soda at $3 a box, replaced every few months, handles both deodorizing and mild stain treatment.

    The marketing around sneaker care products treats every scuff like a crisis. A daily commuter who wipes down sneakers nightly and treats stains within hours does not need a specialized solution for routine grime. 

    Save the premium cleaner for suede, nubuck, or heavily stained knit uppers where dish soap might not cut it.

    Drying Mistakes That Ruin Sneakers Faster Than Dirt

    The single fastest way to destroy a pair of sneakers is tossing them near a heater or radiator after they get wet. 

    Heat warps adhesive bonds between the sole and upper. It also dries leather too quickly, causing cracks. Mesh and knit materials shrink under direct heat.

    The Newspaper Method Still Works

    Stuff wet sneakers with crumpled newspaper or clean rags. The paper absorbs moisture from inside while the sneaker maintains its shape. Replace the stuffing every few hours if the sneakers are soaked through.

    Air drying in a shaded, ventilated area is the safest approach. A shoe rack near the front door, away from radiators and direct sunlight, gives sneakers the airflow they need. The drying process takes 12 to 24 hours for a fully soaked pair.

    Rotation: The Maintenance Step Nobody Budgets For

    Wearing the same pair of sneakers every single day never lets them fully dry between uses. The moisture from foot sweat alone (about half a pint per day for an average adult) saturates insoles and inner linings.

    Rotating between two pairs gives each pair a full rest day. This extends the life of both pairs significantly. 

    Most sneaker care articles focus entirely on cleaning products and skip the rotation question. I’d argue rotation does more for sneaker longevity than any cleaning kit on the market.

    Lace Maintenance and Small Details That Add Up

    Dirty laces drag down the look of an otherwise clean sneaker. A weekly rinse under running water keeps them presentable. Badly frayed laces should be replaced rather than cleaned, and replacement laces cost less than a cup of coffee.

    Re-lacing after washing also gives you a chance to check the eyelets and tongue for wear. Loose eyelets can create pressure points during long walks. The tongue slipping sideways is usually a sign the laces are threaded incorrectly or unevenly.

    Tracking Wear and Finding Sneaker Services in 2026

    A few apps help city commuters stay ahead of maintenance needs:

    • Strava lets users tag specific footwear to each activity and tracks cumulative mileage per pair
    • Apple Health and Google Fit log daily step counts, which can estimate total distance per sneaker pair over time
    • Google Maps and Instagram searches for “sneaker cleaning” or “sneaker repair” in any major city turn up local specialists

    Professional sneaker cleaning services exist in most cities with populations over 500,000. A full deep clean typically runs $15 to $40 depending on the city and the condition of the sneakers. 

    For a pair that costs $150 or more, the math on professional cleaning versus replacement makes sense at least once or twice a year.

    The Strava app is especially useful for commuters who walk and run in the same pair. Tagging footwear to activities builds a log that tells you when a pair is approaching its mileage limit.

    Packing Sneakers When Traveling Between Cities

    A spontaneous trip to Berlin, Barcelona, or any city with cobblestone streets puts extra stress on sneaker soles. Packing matters more than people think.

    • Reusable dust bags or a wrapped t-shirt prevent scratches and scuffs inside a bag
    • Small silica gel packets tucked inside the sneaker control humidity during transit
    • A travel-sized pack of wipes and a spare set of laces handle unexpected stains or breakage on the road

    The silica gel trick is the most overlooked packing habit for sneaker care. Those packets, often thrown away from new shoe boxes, absorb moisture during flights and train rides where temperature changes cause condensation inside bags.

    Questions People Ask About Urban Sneaker Care

    These are the questions that come up most when sneaker maintenance gets specific to city life.

    • Q: How often should I deep clean sneakers if I wear them daily in the city? A deep clean every four to six weeks is a reasonable schedule for daily city wear. The nightly wipe-down handles surface grime between those sessions. Waiting longer than six weeks lets embedded dirt permanently discolor lighter-colored fabrics.
    • Q: Can I put sneakers in the washing machine instead of hand cleaning? Machine washing loosens adhesive and can deform the shoe structure, especially on pairs with foam midsoles. Hand cleaning with mild soap and cold water takes about five minutes per shoe and preserves the build quality.
    • Q: Is baking soda safe to use inside all sneaker types? Baking soda works well inside synthetic and canvas interiors. For leather-lined sneakers, a sneaker-specific deodorizer is a better choice since baking soda can dry out leather over time.

    Conclusion

    City sneakers take a beating that no suburban pair ever experiences on a regular basis. The nightly two-minute wipe, proper drying away from heat, and rotating pairs matter more than any product. 

    Sneaker longevity in an urban setting comes down to daily habits done consistently over months. The best time to start protecting a pair is the same day they come out of the box.

  • The Safe Way to Dry Wet Sneakers Without Warping the Shape

    The Safe Way to Dry Wet Sneakers Without Warping the Shape

    Mesh running shoes and a surprise rainstorm turn a $150 pair of sneakers into a soggy, shapeless mess in about ten seconds flat.

    The instinct is always the same: blast them with heat, stuff them near a radiator, and hope for the best. That instinct wrecks more sneakers per year than actual wear and tear ever could.

    Most sneaker drying advice online treats the problem like it’s universal. It isn’t. A pair drying on a Tokyo balcony in July behaves nothing like the same pair sitting by a window in Denver.

    This one is for the urban commuter. The person who walks 20 blocks a day, owns two or three pairs in rotation, and refuses to let one bad rainstorm retire a shoe early.

    Why Heat Destroys Sneakers Faster Than Rain Does

    Rain itself is rarely the thing that kills a sneaker. The damage comes afterward, during the drying phase, when people reach for the fastest fix they can find.

    The glue that bonds a sneaker’s sole to its upper starts softening at temperatures above 60°C (140°F). A standard hair dryer on its low setting sits right around that threshold. A radiator or space heater pushes well past it. 

    Featured Image

    The sole separates from the upper, the midsole foam warps, and the shoe loses its structural fit permanently.

    Warping, Shrinkage, and Sole Separation

    Knit and mesh uppers are especially vulnerable. These materials contract when exposed to concentrated heat, pulling the shoe tighter across the toe box and changing the fit of the entire shoe. Once that shrinkage happens, there’s no reversing it.

    Leather and synthetic leather respond differently but no better. Heat dries the oils out of leather, leaving it stiff and cracked. That white crease line across the toe of an old pair? Heat accelerated that.

    Mold and That Smell That Never Leaves

    Slow drying in a closed space creates a second problem: mold. Sneakers trapped inside a gym bag, a locker, or a closet with no airflow become breeding grounds within 24 to 48 hours.

    The smell that sets in after mold starts growing is nearly impossible to remove completely. Baking soda and charcoal inserts can mask it, but the spores live in the foam. 

    I’d argue that mold damage is harder to fix than a worn-out sole, because at least a sole can be replaced at a cobbler for $30 to $50.

    The Safest Way to Dry Wet Sneakers Step by Step

    The method itself is simple. The discipline of following it instead of taking shortcuts is where people fall off.

    Pull the Laces and Insoles Out First

    Laces and insoles trap moisture between layers. Removing them lets air circulate through the entire shoe interior instead of just the opening. 

    Lay the insoles flat on a dry towel and hang the laces separately. Both dry significantly faster when they’re not compressed inside a wet shoe.

    Blot, Stuff, and Swap

    A microfiber towel works best for blotting. Press it against the upper and inside the shoe without wringing or twisting the material. Wringing stretches the upper and misaligns the shape.

    After blotting, stuff the shoe with loosely crumpled paper towels or plain newsprint. The stuffing serves two purposes: it pulls moisture out of the interior, and it holds the shoe’s shape while the material dries. 

    Swap the stuffing every one to two hours, especially if the air is humid. Saturated paper stops absorbing and just sits there.

    Now, about the stuffing material itself. Newspaper has been the default recommendation for decades, and I think that advice deserves a second look. Plain white paper towels absorb moisture at a comparable rate without the ink transfer risk. 

    I’ve seen enough ink-stained insoles on forums like r/Sneakers on Reddit to question why newspaper is still the first suggestion everywhere. Colored ink on a wet white knit upper is a stain that doesn’t come out.

    Air Drying Placement Matters More Than People Realize

    A well-ventilated spot is the single most important variable. A balcony, an open window, or a hallway with cross-ventilation all work. 

    Direct sunlight does not. UV exposure fades colors and weakens adhesive bonds over time. The exception is a pure white leather shoe that has no dye to fade, and even then, limit sun exposure to an hour or two at most.

    A small desk fan pointed at the shoes from about a foot away speeds drying time by roughly half compared to still air alone. No heat required.

    Dedicated Shoe Dryers Are Worth More Than the DIY Method

    The standard advice says air dry, stuff with newspaper, be patient. 

    But I’d push back on the idea that a $40 shoe dryer is unnecessary when it consistently outperforms the newspaper method, particularly for anyone drying sneakers more than once a month.

    Models like the PEET Original or the DryGuy DX Forced Air use low-temperature airflow to dry shoes in two to four hours without risking heat damage. 

    Compare that to the eight-to-twelve-hour wait with paper stuffing and a fan. The time difference alone is worth the price.

    The practical benefit goes beyond speed. A shoe dryer applies consistent, even airflow through the entire interior. 

    Paper towels leave cold spots where moisture lingers, especially in the toe box and around the heel cup. Those cold spots are exactly where mold starts.

    A shoe dryer makes the most sense for commuters, frequent travelers, and anyone rotating fewer than three pairs. If the sneaker gets wet on Monday night and needs to be worn Tuesday morning, air drying alone won’t cut it. A shoe dryer will.

    Drying Method Approximate Dry Time Risk of Damage Best Suited For
    Fan and paper towel stuffing 8 to 12 hours Very low Daily routine, mild dampness
    Dedicated shoe dryer (PEET, DryGuy) 2 to 4 hours Low Frequent rain, travel, fast turnaround
    Radiator or space heater 1 to 2 hours High Not recommended
    Direct sunlight 3 to 5 hours Moderate White shoes only, limited use

    The sweet spot for most city commuters is owning a shoe dryer and keeping paper towels as backup for travel.

    Your City’s Humidity Changes Everything About Drying

    A drying technique that works perfectly in Los Angeles might completely fail in Manila or Singapore. Humidity is the variable that most sneaker care guides ignore, and it changes the math on every recommendation.

    High-Humidity Cities Need Faster Extraction

    Cities like Tokyo, New York, and Singapore sit above 70% average relative humidity during summer months. Paper towel stuffing in those conditions stays damp longer because the air itself can’t absorb much more moisture. 

    The swap-every-two-hours rule becomes swap-every-hour, and a fan becomes mandatory rather than optional.

    A portable shoe dryer from PEET may be the only realistic option for anyone drying sneakers overnight in a humid apartment without central air conditioning. 

    Leaving shoes to air dry in a small Hong Kong or Manila apartment during monsoon season is an invitation for mold.

    Dry Climates Give More Room for Patience

    Cities like Madrid, Denver, and Phoenix make sneaker drying almost effortless. Low humidity means the air itself does most of the work. Paper stuffing, an open window, and four to six hours will handle most situations without a fan or a dryer tool.

    The trade-off in dry climates is that leather dries too fast and cracks. A light application of leather conditioner after drying prevents that brittleness.

    Prevention Gear That City Commuters Should Own

    Drying sneakers correctly is half the equation. Keeping them dry in the first place takes a short list of inexpensive tools:

    • Water-resistant spray like Crep Protect or Jason Markk Repel, reapplied every two to three weeks during rainy seasons
    • A compact waterproof shoe bag (brands like Pack-It make foldable versions) for tossing in a backpack when rain is forecasted
    • Spare socks in a zip-lock bag, because wet socks inside dry shoes recreate the same moisture problem
    • A weather app set to hourly updates so the commute route and shoe choice can match the forecast

    The prevention side costs less than $30 total and takes about five minutes of weekly maintenance. That’s cheaper than replacing one pair of ruined sneakers.

    Quick mistakes to avoid on rainy commute days:

    • Leaving wet sneakers sealed inside a backpack or locker overnight
    • Using a washing machine’s spin cycle to “dry” sneakers (this destroys midsole foam)
    • Stacking wet shoes on top of each other inside a drying rack
    • Skipping the insole removal step because the shoes “aren’t that wet”

    Questions People Ask About Drying Wet Sneakers

    These are the questions that keep popping up in sneaker forums and city lifestyle threads. Quick answers, no fluff.

    • Q: Can I put sneakers in the dryer on a low heat setting? A tumble dryer, even on low, generates enough heat to soften adhesive and warp midsole foam. The tumbling motion adds impact damage on top of the heat. Skip it entirely and use a fan instead.
    • Q: How long does it take sneakers to air dry completely? The range depends almost entirely on humidity. Expect 8 to 12 hours in a humid environment and 4 to 6 hours in a dry one. A desk fan cuts those numbers roughly in half.
    • Q: Does putting sneakers in rice work like it does for phones? Rice absorbs some surface moisture, but it doesn’t generate airflow inside the shoe. Grains also get stuck in mesh uppers and inside lace eyelets. Paper towels and moving air do the job better and leave less mess.

    Conclusion

    Drying wet sneakers the right way takes patience, but the payoff is a pair that keeps its shape and comfort for months longer. 

    The biggest mistake is reaching for heat, and the simplest fix is a fan and a stack of paper towels. City weather will always be unpredictable, so the habit matters more than any single product or trick. 

    Pick a method that fits the humidity where you live, and your sneakers will thank you for it.

  • How to Store and Protect Delicate Enamel Pins on Bags

    How to Store and Protect Delicate Enamel Pins on Bags

    Soft enamel pins chip after about two weeks of daily subway commuting. That timeline surprises most people, because the damage happens in tiny, invisible increments rather than one dramatic scratch.

    The standard advice centers on which pinback to buy. But pin backs solve a loss problem, and loss is rarely the thing that ruins a city commuter’s collection. Abrasion is. Bags land face-down on train floors, lean against grimy seats, and get squeezed between bodies during rush hour.

    This article is for the person who pins flair to a daily bag and rides transit in cities like New York, London, or Tokyo. Not the collector storing pins in a felt-lined case at home.

    Why Enamel Pins Chip So Fast on City Bags

    Enamel pins take damage from two directions at once, and most care guides only talk about one. The pin back prevents falling. The pin face takes every bump, scrape, and smear from the world outside. 

    How to Store and Protect Delicate Enamel Pins on Bags

    City commuting puts bags through dozens of contact events per trip: setting a bag on a platform bench, leaning it against a subway wall, pressing through a crowd. Each contact is gentle enough to go unnoticed, but the cumulative effect shows up as dull spots on gold plating and tiny enamel chips along raised metal lines.

    Soft Enamel vs Hard Enamel on Transit

    Soft enamel pins have recessed paint areas sitting below raised metal ridges. Those ridges catch friction first, so the metal plating wears down before the color does. Hard enamel pins are polished flat, making them more resistant to surface scratches. 

    I would pick hard enamel for any pin I plan to wear on a commuter bag, specifically because the flat surface doesn’t catch against fabric weave the way soft enamel ridges do.

    The metal type matters just as much. Pins with iron or zinc alloy bases oxidize faster in humid transit environments. Brass-based pins hold up longer against city moisture but cost more per unit.

    Pin Backs for Daily Commuters: Rubber vs Locking

    The pin back conversation dominates every forum thread about enamel pin security. Two main options exist for daily bag use: rubber clutch backs and metal locking backs. The choice seems obvious. Locking backs hold tighter. But the answer gets more complicated for someone who actually commutes with pins every day.

    Rubber Clutch Backs and Backer Cards

    Rubber backs grip the pin post snugly and pop off with a quick pull. Members of pin communities in Berlin and Tokyo favor these for commuting because they allow fast swaps without tools. 

    Pairing rubber backs with the original backer card adds a layer of shock absorption. The card sits between the pin post and the bag fabric, preventing the post from piercing too far through and reducing wobble during movement.

    A bag bouncing on a bus seat sends vibrations through every pin. Backer cards absorb a small amount of that energy. Rubber backs paired with backer cards create a low-friction attachment: secure enough for a subway ride, easy enough to remove at home.

    Metal Locking Pin Backs

    Locking pin backs (sometimes called pin lockers) use a metal cylinder that clamps the post and requires a tiny screwdriver or Allen wrench to release. They’re popular among collectors in fast-moving cities like Paris and Chicago, where crowded platforms create genuine theft or snag risk.

    I think locking pin backs are overrated for anyone commuting daily with a rotating collection, and the reason is specific: every lock-unlock cycle puts rotational torque on the pin post

    Rubber backs slide straight on and off. Locking mechanisms twist. Over weeks of daily use, that repeated twisting can loosen the solder joint where the post meets the pin body. 

    For a collector who pins once and displays for months, locking backs are ideal. For a commuter swapping three pins before the morning train, the tool requirement and post stress make them a worse fit than a firm rubber clutch.

    Best Bag Fabrics for Wearing Enamel Pins Every Day

    Not every bag material holds pins equally well. Thin nylon lets pins wobble. Leather resists pin puncture, which sounds like a plus until the pin hole stretches and won’t close. 

    The sweet spot is a medium-weight woven fabric that grips the pin post without tearing.

    Canvas and Denim Tote Bags

    Canvas and denim are the default choices for pin display in cities like San Francisco. Both have a tight enough weave to hold a pin post firmly, and they resist tearing even after repeated pin insertions in the same spot. 

    Denim is slightly better for long-term use because its twill weave distributes stress across more threads per square centimeter than plain-weave canvas.

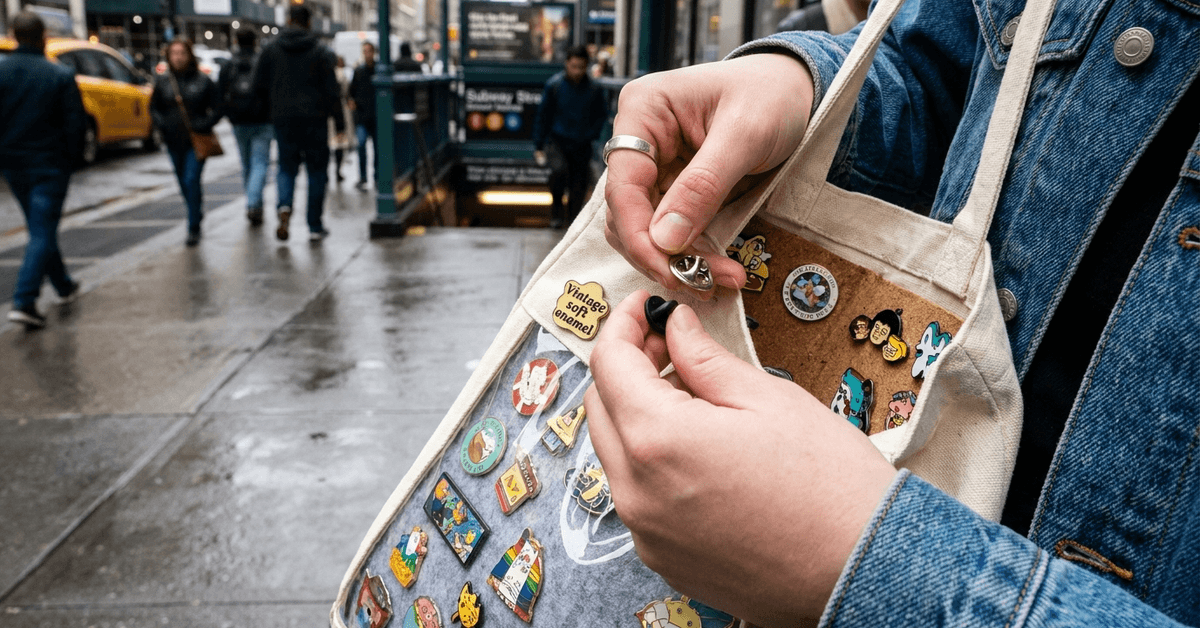
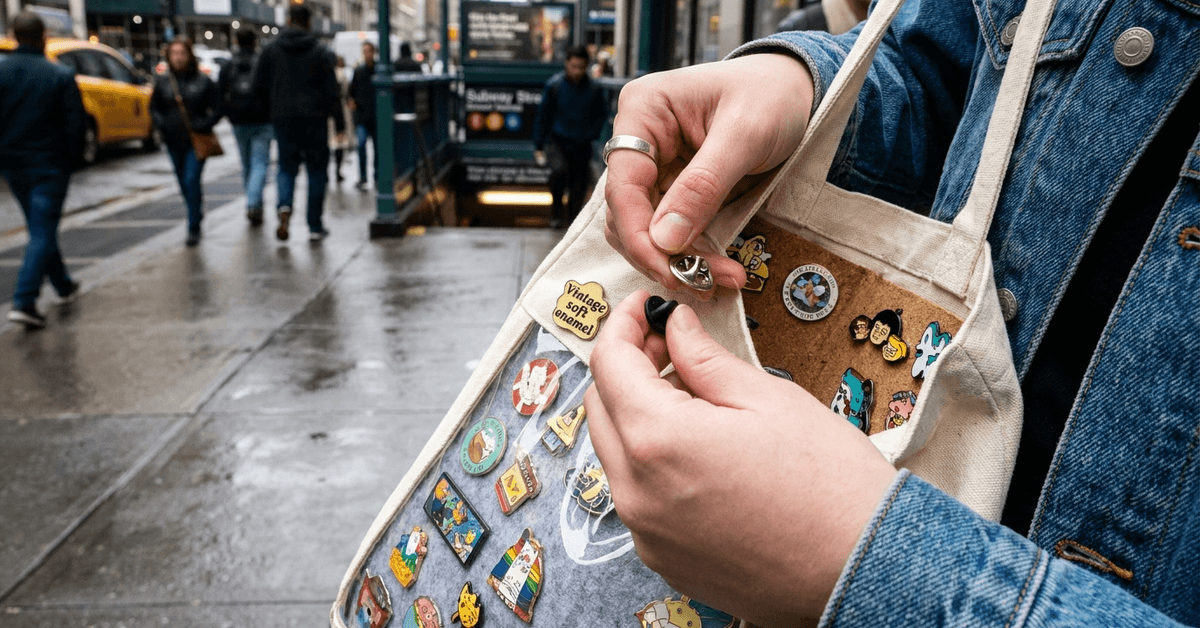
    One overlooked trick from experienced urban pin wearers: slide a piece of thick felt or foam inside the bag, behind the section where pins attach. 

    The pins push through both the outer fabric and the felt, which cushions impacts when the bag gets knocked around on rough sidewalks or cobblestone streets. The felt also prevents pin posts from snagging on items stored inside the bag.

    Ita Bags for Complete Pin Protection

    Ita bags come from Japanese fan culture and have a clear PVC window on the front, with pins attaching to a removable fabric insert behind the window. 

    The clear panel completely shields pin faces from outside contact. Rain, grime, friction from other bags on the train: none of it touches the enamel surface.

    • Standard ita bag crossbodies hold roughly 20 to 30 pins of 25mm size
    • Backpack-style ita bags fit 40 to 80+ pins with larger display windows
    • The removable insert means swapping an entire pin layout takes seconds, not minutes of individual pin removal

    I was skeptical about ita bags for daily commuting until I saw reviews on FandoMara’s ita bag guide describing users carrying them through full convention days and rainy commutes without a single scratch on their pins. 

    The PVC window does what no pin back can: it protects the front of the pin, the part that faces outward and takes the most city abuse.

    The tradeoff is aesthetic. Ita bags have a specific look rooted in anime and fandom culture. For someone who prefers a minimal canvas tote, an ita bag won’t fit their style.

    Weatherproofing Enamel Pins Against Rain and City Grime

    Urban pin wear means exposure to rain, humidity, air pollution, and the mysterious sticky residue that coats every public transit seat. Each of these degrades pin quality in different ways.

    Protecting Pins During Rain

    Rain doesn’t ruin pins on contact. But water sitting in the recessed areas of soft enamel pins accelerates oxidation on exposed metal. 

    Cities with frequent sudden showers, like Amsterdam or London, create repeated wet-dry cycles that stress metal plating.

    • Spray a water-resistant coating on the bag fabric around the pin area, not on the pins themselves
    • For full rain protection, use a clear pouch or zip-close bag that fits over the pinned section
    • After getting caught in rain, pat pins dry with a soft cloth as soon as possible

    Cleaning Off City Grime

    City air deposits a thin film of particulate matter on exposed surfaces. Over weeks, this film dulls enamel and discolors metal plating. Pins worn daily on a commuter bag need cleaning every two to three weeks.

    A microfibre cloth (the kind used for eyeglasses) works well because it lifts grime without scratching. Mild dish soap mixed with warm water handles heavier buildup. 

    PinMart’s pin care guide recommends avoiding abrasive cleaners entirely, even on metal-only pins. The polishing compounds in abrasive cleaners strip plating faster than city pollution does.

    Rotating and Storing Pins Between Commutes

    Most pin damage on city bags accumulates over time. Rotating pins off the bag and onto a home display board gives high-value or fragile pins a break from daily wear.

    A practical rotation system looks like this:

    • Keep a small organizer box at home with divided compartments for pins not in active rotation
    • Limit daily bag display to five or fewer pins, which reduces total loss exposure per trip
    • Use travel pin rolls (fabric rolls with individual pin slots) for day trips or multi-city travel
    • Reserve rare, vintage, or sentimental pins for display boards at home and carry replaceable pins on the daily bag

    The weekly pin check is the habit that prevents gradual damage from going unnoticed. Every Sunday, pull each pin off the bag and inspect for bent posts, loose backs, chipped enamel, or dull spots. 

    Catching a bent post early means a simple straightening. Catching it late means a snapped post and a lost pin on the Tuesday morning commute.

    Questions People Ask About Protecting Enamel Pins on Bags

    A few quick answers to the searches that keep coming up around this topic.

    • Q: Can I put clear nail polish on enamel pins to protect them?
      Clear nail polish adds a thin protective layer, but it yellows over time and can peel off in humid conditions. A better option for daily-wear pins is choosing hard enamel construction, which already has a polished, durable surface that resists scratching without any added coating.
    • Q: Do magnetic pin backs work for city commuting?
      Magnetic backs are convenient for dress shirts and thin fabrics, but they slip too easily on heavier bag materials like canvas or denim. A strong bump on the subway can knock a magnetic-backed pin right off. Rubber clutch backs grip better on thick fabrics.
    • Q: How many pins can I safely put on a messenger bag?
      That depends on the bag’s fabric weight and the pin spacing. Five to eight pins spaced at least two centimeters apart is a good range for most canvas messenger bags. Placing pins too close together lets them knock against each other during movement, which chips enamel edges faster than any external contact.
    • Q: Are enamel pins safe to wear on bags in the rain?
      Brief rain exposure won’t destroy a pin, but repeated wet-dry cycles corrode exposed metal, especially on soft enamel designs where the metal ridges sit above the paint. Drying pins immediately after rain and storing the bag in a dry spot overnight prevents most weather damage.
    • Q: What’s the best way to carry pins through airport security?
      Remove pins from your bag before the security line and place them in a small padded pouch inside your carry-on. X-ray machines won’t damage enamel, but the rough handling of bins and conveyor belts chips exposed pin faces. Put them back on your bag after clearing security.

    Conclusion

    City commuting puts enamel pins through conditions that home display never does. The right bag fabric, a firm rubber clutch back, and a weekly inspection habit prevent most of the damage. 

    Rotating pins off the bag and cleaning them with a microfibre cloth every few weeks keeps the enamel looking sharp. 

    Treating pins as gear that needs maintenance, rather than decoration that takes care of itself, is the real difference.