Blog

  • How to Clean Knit Upper Running Shoes Without Pulling Threads

    How to Clean Knit Upper Running Shoes Without Pulling Threads

    One careless scrub across a Nike Flyknit upper, and a single thread starts pulling loose. That tiny snag spreads into a visible run within days.

    Knit running shoes are built from interlocking yarns, and that structure punishes cleaning mistakes fast. A bristle brush or a washing machine cycle can do permanent damage to adidas Primeknit or New Balance knits.

    This guide is for the urban commuter wearing knit runners as everyday shoes. Subway platforms, coffee spills, street dust, and rain all hit the same pair.

    The method for cleaning knit fabric is different from every other sneaker material, and the small details are easy to get wrong.

    Why Knit Fabric Snags Faster Than Other Sneaker Materials

    The reason knit uppers feel so comfortable is the same reason they fall apart under rough handling. 

    The fabric is a network of interlocking loops, similar to a sweater. Each loop holds onto the one next to it. One caught yarn can unravel an entire visible section.

    Leather or canvas sneakers handle friction well because their material is woven tightly or bonded in layers. Knit has open gaps between loops for breathability, and those gaps are exactly where fingers, brushes, and rough surfaces catch.
    Featured Image

    How One Snag Becomes a Bigger Problem

    A pulled thread in knit doesn’t sit still. Tension from walking redistributes across nearby loops, and within a few days of normal wear, that single pull becomes a loosened patch. 

    Trimming the thread with scissors can stop the run, but the area stays structurally weaker than the surrounding fabric.

    This makes the cleaning approach for knit shoes fundamentally different from leather sneakers. Pressure, water temperature, and the direction of your brush strokes all affect whether a cleaning session helps or causes damage.

    Hand-Cleaning Knit Uppers Step by Step

    The whole process takes about five minutes per shoe once prepped. That’s faster than waiting for a machine cycle and far less risky for the knit.

    Pull out the laces and insoles first. Both collect separate grime and should be cleaned on their own. Tap the soles together outdoors to knock off dried dirt or sand. A soft shoe brush or old toothbrush handles the remaining dry debris.

    Mixing the Right Cleaning Solution

    A small amount of mild dish soap mixed into a bowl of cold water is the standard. Hot water weakens the adhesive bonds between the sole and upper, and it can cause synthetic yarns to warp or shrink.

    Too much soap creates residue that attracts more dirt after the shoes dry. A teaspoon per bowl of cold water is enough for both shoes.

    Section Cleaning: Small Circles, One Inch at a Time

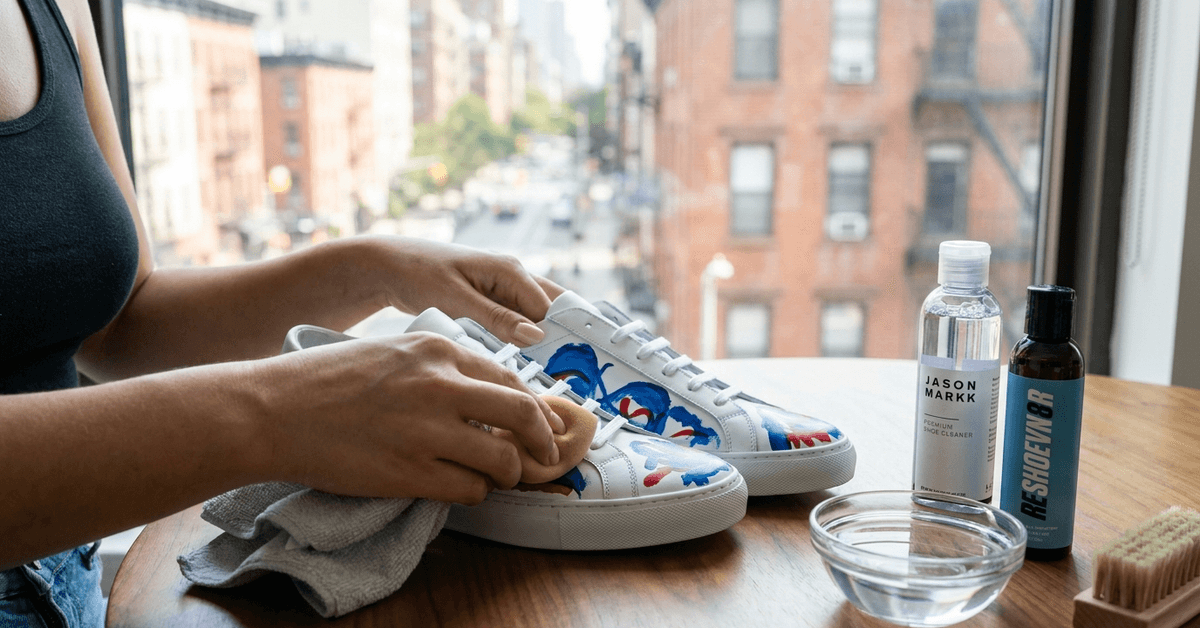
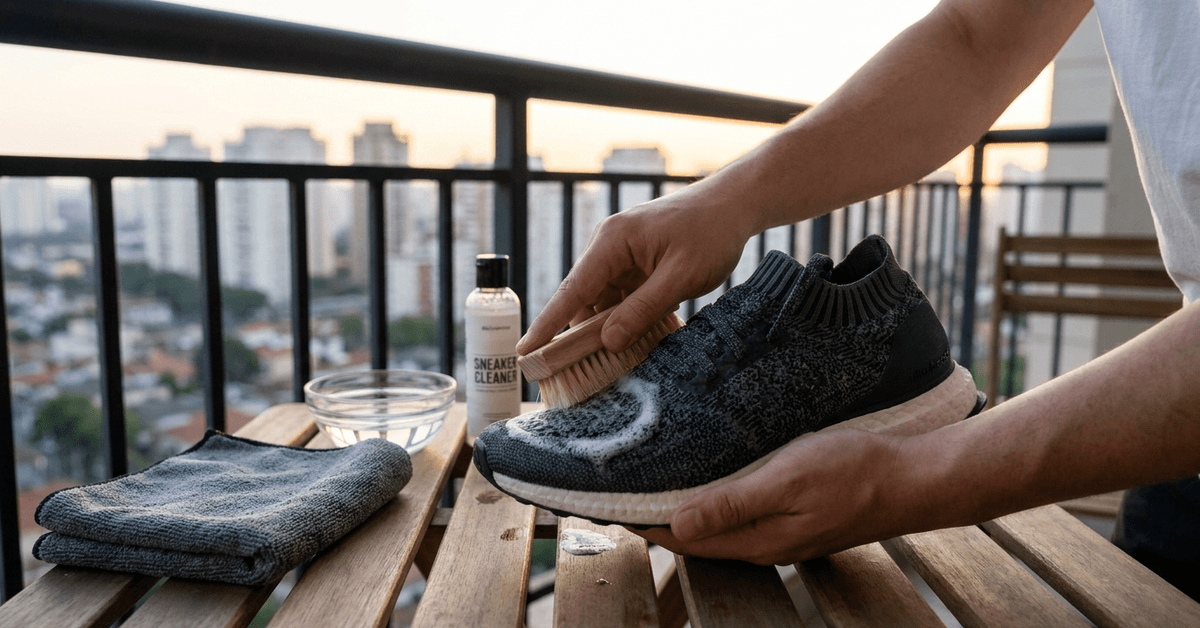
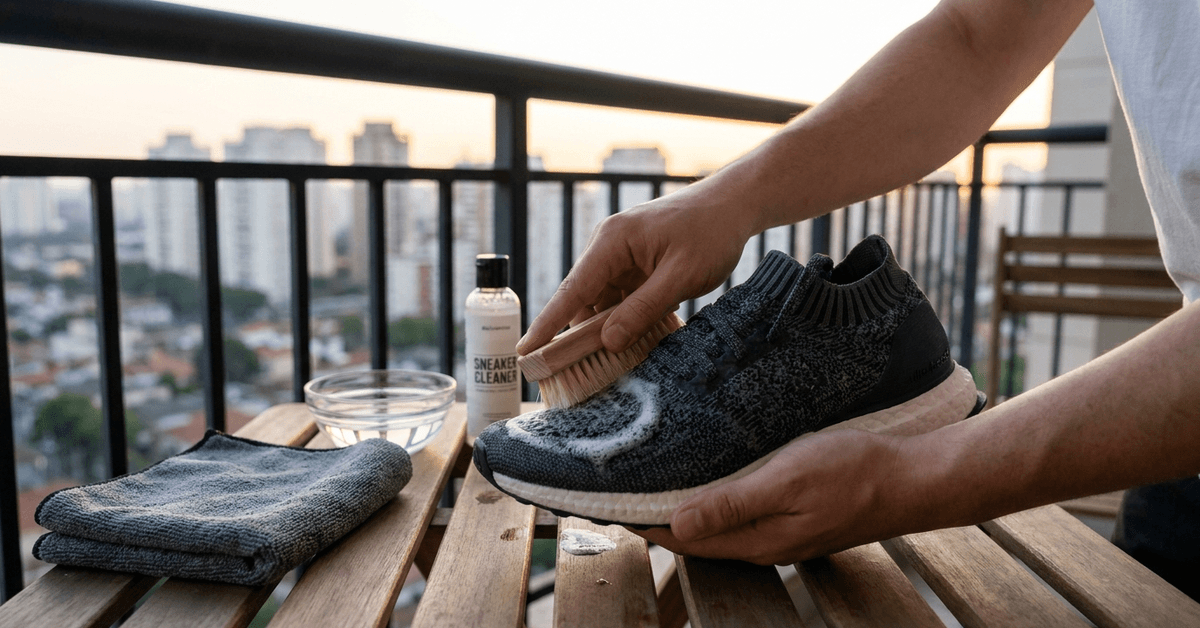
    Dip the soft brush into the solution and shake off the excess. The brush should be damp, not dripping.

    Move in small circular motions across one-inch sections of the knit. Do not press hard. After each section, wipe away suds with a damp microfiber towel. A soaked towel pushes water into the glue layer beneath the knit and loosens the bond.

    This section-by-section approach prevents saturation and keeps thread tension even across the upper. It works well in tight spaces: bathroom sinks, kitchen counters, or apartment balconies.

    Drying Knit Shoes Without Heat Damage

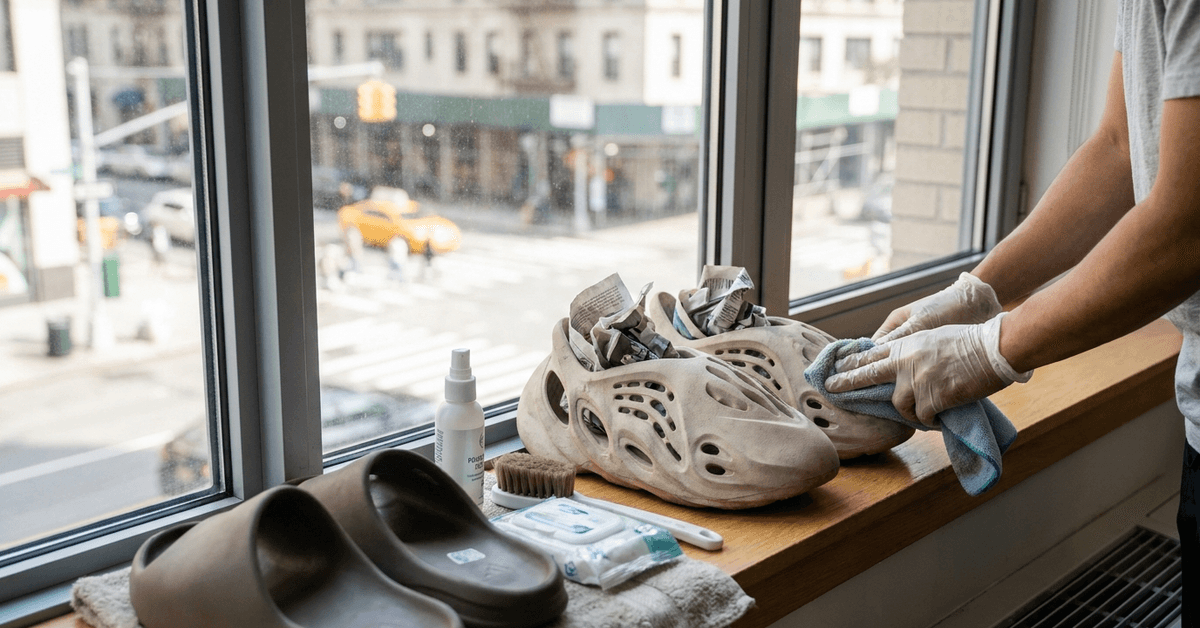
    After cleaning, stuff each shoe with crumpled newspaper or a dry microfiber towel to absorb moisture and hold shape. Let them air dry at room temperature.

    Direct heaters, sunny windowsills, and hair dryers are all problems for synthetic knit. Heat causes the yarn to lose elasticity and makes existing thread pulls worse. 

    Room temperature drying takes longer. But it preserves the structure in a way no shortcut can match.

    Dish Soap vs. Specialized Sneaker Cleaners for Knit Shoes

    The standard recommendation across sneaker communities is to buy a dedicated cleaning product like Jason Markk or Sneaker LAB. I would skip Jason Markk for routine knit cleaning and stick with unscented dish soap in cold water. 

    The active cleaning agent in most sneaker solutions is a mild surfactant: the same thing that makes dish soap work. On pure knit uppers dealing with everyday city grime, the cleaning results are difficult to tell apart.

    Specialized cleaners earn their price on mixed-material shoes where suede panels, leather accents, or textured overlays need a pH-balanced formula. Pure knit uppers, though, respond well to basic soap.

    Feature Mild Dish Soap Specialized Sneaker Cleaner
    Cost per clean Fractions of a cent $1–2 per use on average
    Safe for knit uppers Yes, with cold water Yes
    Residue risk Low if diluted properly Low
    Mixed-material cleaning Limited Better for suede and leather panels

    Dish soap handles routine knit cleaning. The specialty bottle makes more sense when suede or leather enters the picture.

    When a Specialty Product Earns Its Price

    Stubborn stains from grease, wine, or paint sometimes need a targeted formula. Products built for sneaker cleaning break down oil-based stains more effectively than dish soap alone. 

    Sneaker LAB and Reshoevn8r both have stain-specific products that work on knit without the harsh chemicals found in household spot removers like bleach or rubbing alcohol.

    If a stain survives the dish soap method after two passes, a specialty cleaner is worth trying before sending the shoes to a professional service.

    Thread Pulls Happen More During Commuting Than Cleaning

    Sneaker care guides focus almost entirely on the washing process. But a large share of thread damage on knit uppers happens outside of cleaning altogether. 

    Bag zippers catch on ankle collars. Keys in jacket pockets brush against toe boxes. Bike pedals with metal grips scrape the medial side of the shoe on every rotation.

    I was surprised how many thread pulls I traced back to commuting friction when looking at Nike Flyknit and adidas Primeknit damage patterns across sneaker forums. The cleaning obsession misses the more constant, daily source of snags.

    Storage Fixes for City Apartments

    Small living spaces force shoes into tight spots where snag risks multiply. A few changes cut the problem down:

    • Stack knit shoes on open racks or cubbies, away from hooks and hanging bags with metal hardware
    • Keep a lint roller near the door for a quick surface pass before heading out
    • Use sticky tape after park runs to lift debris before it works deeper into the yarn
    • Carry a travel-size soft brush if you use shared office gyms or coworking spaces

    These storage habits prevent more thread damage than any cleaning technique.

    Urban Stains That Call for a Different Approach

    City dirt behaves differently from trail mud. Coffee splashes, street dust, rain-soaked grime, and transit floor residue each interact with knit yarn in their own way. 

    The blotting motion matters more than the product for liquid stains, since rubbing pushes the stain deeper into the yarn loops and stretches the fabric sideways.

    A few stain-specific notes for commuters:

    • Coffee and tea: Blot immediately with a dry cloth, then spot-clean with the dish soap solution within 24 hours
    • Street dust and soot: Dry-brush first with a soft bristle, then damp-wipe in one direction only
    • Rain and puddle splashes: Let dry naturally, then brush off the residue. Never scrub wet knit.
    • Grease or oil: Apply a drop of dish soap directly to the spot, let it sit for two minutes, then blot clean

    A protective spray like Crep Protect applied once a month creates a barrier against most liquid-based stains. The spray is invisible and does not change the texture of the knit. It reduces how deeply liquids penetrate, which means lighter cleaning sessions later.

    Letting any stain sit for more than a day makes removal significantly harder. Acting fast beats using a stronger product every time.

    When Professional Sneaker Cleaning Makes Sense

    Sometimes the mess goes beyond a home clean. Spilled drinks at a bar, construction dust after a street festival, or mud from a rain-soaked commute can saturate knit fabric in ways that hand-cleaning cannot fully fix.

    Several cities now have sneaker cleaning services that specialize in delicate fabrics. The Sneaker Laundry in Melbourne and Dropwash in New York both offer app-based pickup and delivery for shoes that need deeper treatment. Ask any service specifically about their process for knit uppers before handing over a pair. A service using machine methods or heavy brushes defeats the purpose.

    Questions People Ask About Cleaning Knit Running Shoes

    These are the searches that come up most when people are trying to keep their knit sneakers from falling apart.

    • Q: Can I put knit running shoes in the washing machine? No. Machine agitation pulls threads, and the spin cycle can deform the knit structure permanently. Prolonged water exposure also weakens the adhesive between the sole and upper. Hand-cleaning with cold water and a soft brush is the only method that protects knit fabric.
    • Q: How often should I clean knit sneakers if I wear them daily? A light wipe-down after each outing prevents buildup, and a full hand-clean every one to two weeks is enough for daily city wear. The goal is to clean before dirt bonds into the yarn loops, not after it has set.
    • Q: Does trimming a pulled thread fix the problem? Trimming stops the run from spreading, but the area around the pull stays weaker than the rest of the fabric. Trim close to the surface with sharp scissors and avoid pulling the thread further. Prevention through gentle cleaning and smart storage does more long-term than any repair.

    Conclusion

    Knit running shoes hold up longer when the cleaning method matches the delicate structure of the fabric. Cold water, mild dish soap, and a soft brush in small circles handle most city grime without pulling threads. 

    Storage and daily commuting cause more thread damage than the cleaning process itself for most wearers. A five-minute hand-clean routine every week or two keeps city knit sneakers looking sharp and structurally intact.
  • A Beginner’s Guide to Sneaker Restoration Tools and Brushes

    A Beginner’s Guide to Sneaker Restoration Tools and Brushes

    A pair of Nike Flyknits survived three months of Berlin U-Bahn floors and came out looking close to new. The trick had nothing to do with the $35 cleaning kit collecting dust under the sink.

    Most sneaker cleaning advice starts and ends at “buy the right products.” That framing skips the part that does 80% of the work: matching a specific brush type to a specific material before any liquid touches the shoe.

    This guide is for the person wearing $150+ sneakers on daily commutes, through rain-soaked sidewalks and subway platforms, who wants those shoes to last a full year instead of four months. City grime is a different animal than trail mud or gym floor scuffs, and the cleaning approach should match.

    Why Brush Selection Matters More Than Cleaning Solution

    Every sneaker care article lists the same five or six products. And sure, the products matter. 

    But the gap between a trashed pair and a restored pair usually comes down to one decision made before the scrubbing starts: which bristle type hits which panel of the shoe.

    A hard-bristle brush on Adidas Ultra Boost Primeknit will shred the fabric. A soft-bristle brush on a rubber outsole caked in subway platform grit will just push the dirt around. 

    Featured Image

    Soft-Bristle Brushes and Where They Belong

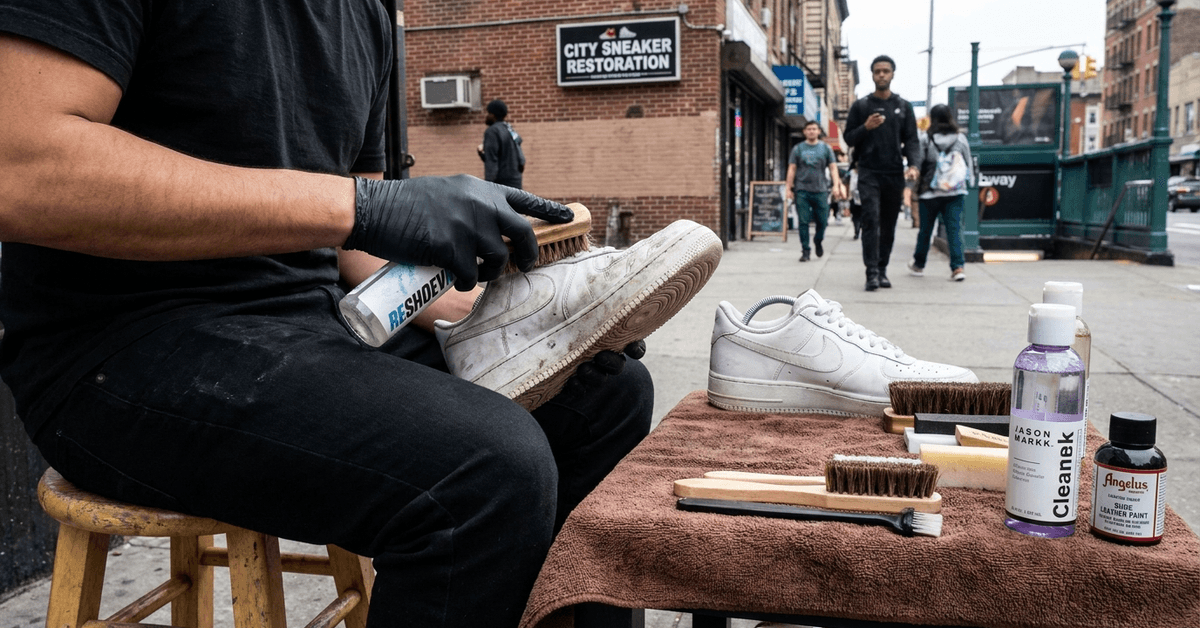
    Soft bristles work on mesh, knit uppers, and premium suede. The Reshoevn8r Soft Brush handles Nike Flyknit and similar woven uppers without pulling threads or pilling the surface. Anything labeled “delicate” on the care tag falls into this category.

    The pressure matters as much as the bristle type. Light circular motions across mesh panels lift embedded dust without forcing particles deeper into the weave. Pressing hard defeats the purpose of choosing a soft brush in the first place.

    Medium and Hard Bristles: Canvas, Leather, and Outsoles

    Canvas and standard leather respond to medium-bristle brushes. Toe boxes and side panels collect the most visible city dust, and a medium brush clears that layer in two or three passes per section.

    Hard bristles are for outsoles only. The treads on a pair of Air Force 1s after a week of London sidewalks will have tar, gum residue, and compacted grit wedged into every groove. 

    Jason Markk’s Hard Brush handles rubber outsoles well, but keep it away from anything above the midsole.

    The City Sneaker Cleaning Process That Saves Time

    Breaking the process into short steps makes it easier to fit into a weeknight. The sequence matters more than the speed, and skipping even one step changes the result.

    Prep the Shoe Before Any Liquid

    Pull the laces out completely and remove the insoles. Both hold odor and stains from subway commutes that go unnoticed when they stay inside the shoe. 

    Insert shoe trees to hold the sneaker’s shape while scrubbing. A crumpled newspaper works as a backup if shoe trees are not available.

    Dry brush the entire shoe before adding any solution. This step removes loose dust and surface debris so the wet brush does not trap particles into the fabric. Skipping the dry brush is the fastest way to push city grime deeper into mesh.

    Scrub, Rinse, and Dry the Right Way

    Mix a small amount of sneaker-safe cleaning solution with water. Reshoevn8r and Jason Markk Premium Shoe Cleaner both work across common materials without harsh chemical smells. A homemade mix of mild dish soap and water is a decent fallback for leather and canvas when the name-brand stuff runs out.

    Dip the right brush (soft for knit, medium for leather or canvas) into the solution and scrub in small circles. Focus on the areas that catch the most street exposure: toe caps, heel counters, and the stitching along the sole.

    Pat the shoe with a microfiber cloth after each section instead of dunking the whole sneaker. Air dry in a shaded spot. Direct sunlight fades color and cracks glue bonds on the sole, which is a mistake that shows up two weeks later when the outsole starts peeling.

    I would pick Reshoevn8r’s solution over Jason Markk for knit uppers specifically because the foam consistency clings to vertical mesh panels without dripping off mid-scrub.

    Advanced Restoration: Paint, Sole Whitening, and Protection

    Sometimes city wear goes past what a brush and soap can fix. Yellowed midsoles, scuffed leather, and oxidized soles need a second tier of tools.

    Sneaker Paint for Faded or Scuffed Leather

    Angelus Leather Paint covers scuffs and restores color on smooth leather. The application needs a steady hand and thin coats. Thick layers crack and peel within a week, especially on flex points like the toe crease.

    Color matching is tricky. The paint comes in dozens of shades, but sneaker colorways rarely match a single paint pot perfectly. Testing on a hidden spot (inside the tongue or under the insole flap) prevents a visible color mismatch on the toe box.

    Sole Whitening and Oxidation Reversal

    Oxidation turns white soles yellow over time, and city air pollution speeds up the process. Salon Care 40 (a hair developer cream, oddly enough) applied under plastic wrap and UV light can reverse yellowing on rubber and icy soles.

    This process carries risk. Too much UV exposure warps the rubber. Too little does nothing. The window between “perfectly white” and “slightly warped” is narrow, so testing on a beater pair first is a smart move.

    Protective Sprays After Restoration

    A water-repellent spray locks in the work after a full restoration. Crep Protect and Sneaker Shields are the two most common options for unpredictable weather cities like London and Amsterdam.

    One coat after every deep clean builds a barrier against daily splashes and light rain. The spray does not make sneakers waterproof, though. A heavy downpour still soaks through, and wearing restored sneakers in a storm undoes hours of effort.

    Here is a comparison of the three brush types and their best uses:

    Brush Type Best Material Avoid Using On Price Range
    Soft-bristle Mesh, knit, suede Rubber outsoles (ineffective) $8-$15
    Medium-bristle Canvas, smooth leather Delicate knit uppers $8-$12
    Hard-bristle Rubber outsoles, treads Mesh, suede, knit (damages fabric) $7-$12

    The price difference between these brushes is minimal. The material mismatch risk is not.

    Mistakes That Ruin City Sneakers During Cleaning

    A few recurring errors show up in sneaker communities online, and they all trace back to rushing the process or using the wrong tool.

    Common mistakes to watch for:

    • Scrubbing mesh with a hard brush destroys the weave and creates visible fuzz that cannot be reversed
    • Skipping the dry brush step traps loose grit under wet solution, grinding it into fabric fibers
    • Drying sneakers in direct sunlight fades color and weakens sole adhesive within days
    • Over-applying cleaning solution leaves white residue lines after drying, especially on dark suede
    • Ignoring laces and insoles allows odor buildup that no amount of exterior cleaning fixes

    Every one of these mistakes costs more to fix than to prevent. A $3 pair of replacement laces and a five-minute dry brush session solve the two cheapest problems on the list.

    Keeping Restored Sneakers Clean on City Streets

    Restoration only sticks if the daily habits match. City environments work against clean sneakers constantly, so small adjustments extend the time between full cleaning sessions.

    A few maintenance habits that work for daily commuters:

    • Carry a pocket-sized microfiber cloth for quick wipe-downs on public transit or at the office
    • Rotate pairs during wet weather weeks instead of wearing restored sneakers through rain
    • Reapply protective spray after every full cleaning session, not just the first one
    • Avoid the grimiest sidewalk stretches after rainstorms when puddles carry oil and street runoff

    I think the single biggest oversight in sneaker care content is the rotation strategy. A $180 pair worn seven days a week in a city like New York hits end-of-life in four months. 

    The same pair rotated with a second option lasts twice as long, and the total spend on two pairs over a year drops below buying three replacements of one.

    Digital Communities for Sneaker Restoration Tips

    Online communities fill the gap between a packaged cleaning kit and real city-tested technique. The crowd-sourced advice is often more specific than brand-produced guides.

    Reddit’s r/Sneakers has active restoration threads with before-and-after photos from people cleaning shoes in specific cities. The advice skews practical because users share failures alongside successes, which branded content never does.

    Instagram accounts like @shoefluent and @sneakerheaduniversity post material-specific video tutorials. YouTube channels such as TheSneakerLaundry run full-length guides covering less common materials like nubuck and patent leather.

    The platform matters less than the specificity. A five-minute video showing how to clean a Jordan 1 mid after a rainy London commute beats a generic “how to clean sneakers” post every time.

    Questions People Ask About Sneaker Restoration

    These come up constantly in forums, comment sections, and search results. A few quick answers that add to what the guide covers above.

    • Q: Can I put sneakers in the washing machine instead of hand cleaning? Machine washing works for canvas shoes like Converse Chuck Taylors, but the agitation destroys glue bonds on most performance sneakers. Knit uppers lose their shape after a single machine cycle, and no amount of shoe trees will fix a warped Flyknit toe box.
    • Q: How often should I deep clean city sneakers? Once every two to three weeks for daily-wear pairs in a major city. Light wipe-downs with a microfiber cloth between sessions keep surface grime from setting into the material permanently.
    • Q: Is sneaker restoration worth it for shoes under $100? The math depends on the shoe. A $90 pair that lasts an extra six months through regular cleaning saves more than the $20 spent on supplies. The break-even point is roughly two extra months of wear.

    Conclusion

    Sneaker restoration in a city comes down to technique, not expensive products or complicated kits. The brush-to-material match and the dry-brush-first sequence do more than any $40 cleaning set ever will. 

    Rotation and protective spray stretch each restoration job across months instead of weeks. Every commuter with a decent pair of sneakers already owns half the tools needed to keep them looking sharp.

  • How to Clean Foam Runners and Slide Sandals Quickly

    How to Clean Foam Runners and Slide Sandals Quickly

    EVA foam is porous. That single material fact explains why your foam runners look trashed after one week of city commuting. Most cleaning guides throw a dozen specialty products at you. 

    A $15 sneaker spray here, a $20 cleaning kit there. Plain dish soap and a microfiber cloth do the same job for about forty cents per wash.

    This piece is for the daily commuter stuffing slides into a backpack between the train and the office. Small apartment, no yard, limited time. If that sounds like your situation, the cleaning method matters less than the drying method, and almost nobody talks about that part.

    Why EVA Foam Picks Up City Grime So Fast

    The material that makes foam runners lightweight and comfortable is the same material that turns them into dirt magnets. 

    EVA foam (ethylene-vinyl acetate) has a closed-cell structure filled with tiny air pockets. Those pockets sit at the surface, creating micro-grooves that trap dust, oil, and moisture on contact.

    Subway Dust and Street Oil Hit Differently

    A foam runner worn through a city park picks up loose soil that brushes off easily. A foam runner worn through a subway station picks up a mix of metal dust, brake particulate, and human oil that bonds to the surface. 

    The cleaning approach has to match the type of grime, not just the amount of it. Slide sandals have an even bigger problem. Open-toe designs expose the entire footbed to direct contact with whatever the wearer steps through. 

    Puddle water in cities like London or São Paulo carries road oil and dissolved grime that soaks into an unprotected footbed within seconds.

    The Stain Timeline Nobody Mentions

    Fresh grime on EVA foam wipes off in under a minute. Grime that sits for 48 hours bonds with the foam’s surface and needs soap and scrubbing. 

    Grime that sits for a week or longer can permanently discolor lighter-colored foam. I’d argue that cleaning frequency matters more than cleaning intensity for anyone wearing Crocs or YEEZY Foam Runners daily. 

    A 30-second wipe every other day beats a 20-minute deep clean once a month.

    The Two-Minute Wipe-Down for Daily Commuters

    The fastest cleaning method uses two things already in most apartments: a damp microfiber cloth and a drop of fragrance-free dish soap. That combination handles about 90% of daily city grime on both foam runners and slide sandals.

    How a Quick Wipe-Down Works

    Tap the shoes together over a trash can or against an outdoor ledge to knock loose particles free. Dampen a microfiber cloth with lukewarm water and add one small drop of mild soap. 

    Rub in small circles over the stained areas, letting the soap solution lift the grime rather than pressing hard enough to push it deeper into the foam. A second pass with a clean, damp cloth removes soap residue.

    The whole process takes less time than brushing your teeth. And for commuters juggling tight morning routines, that speed difference between a wipe-down and a full wash makes the difference between doing it and skipping it.

    Portable Cleaning for Transit Days

    Packs of sneaker-specific wipes from brands like Sneaker LAB fit inside a jacket pocket or backpack pouch. They work well for mid-day touch-ups, especially after walking through rain or stepping in something unexpected.

    I would keep one pack of Sneaker LAB wipes in a bag during rainy seasons, but I wouldn’t replace the dish soap wipe-down at home. The wipes handle surface marks. They don’t cut through oil-based grime the way soap does.

    Deep Cleaning Foam Runners and Slides at Home

    Sometimes a wipe-down isn’t enough. Rain-soaked foam, coffee spills, and muddy shortcuts through city parks leave stains that need a proper wash.

    The Soapy Soak Method

    Fill a sink or basin with lukewarm water (never hot) and add a small amount of mild dish soap. Dip a soft sponge or cloth into the solution, wring out most of the water, and blot the dirty areas rather than scrubbing aggressively. 

    Pay extra attention to the textured surfaces on foam runners where grime collects in the pattern grooves.

    Rinse by wiping the shoe down with a clean, damp cloth. Repeat until no soap residue remains. Then pat dry with a towel before moving to the drying step.

    For slide sandals, focus the cleaning effort on two zones:

    • The footbed, where sweat and skin oils accumulate and cause odor
    • The strap crevices, where street dust packs in tightly and resists light wiping
    • The bottom tread, where embedded stones or grit can scratch indoor floors if not removed

    Cleaning Products Worth the Money (and Ones That Aren’t)

    A quick comparison of common cleaning approaches for foam footwear:

    Method Cost Per Clean Best For Limitation
    Dish soap + microfiber cloth ~$0.40 Daily grime, oil stains Requires sink access
    Sneaker wipes (Sneaker LAB) ~$1.50 per wipe On-the-go touch-ups Surface cleaning only
    Cleaning spray (Jason Markk) ~$0.80 per use Mid-level stains, quick refresh Doesn’t cut deep oil stains
    Professional app service $15-$30 per pair Heavy staining, restoration Turnaround time of 2-5 days

    Dish soap wins on cost and effectiveness for routine cleaning. Professional services through apps like Reshoevn8r or city-specific options like Kickswrap in Tokyo make sense for expensive pairs or heavy restoration jobs, but not for weekly upkeep.

    Drying Foam the Right Way

    I think the biggest mistake foam runner owners make has nothing to do with cleaning. It happens during drying. 

    Heat warps EVA foam permanently, and the damage is irreversible once the shoe loses its shape. I’ve seen YEEZY Foam Runners listed on resale sites at half price because someone left them on a radiator overnight.

    What Wrecks Foam During Drying

    Three common drying errors destroy foam footwear:

    • Placing shoes on a radiator or heating vent (temperatures above 40°C/104°F soften EVA foam and cause warping)
    • Leaving shoes in direct sunlight on a windowsill during summer (UV exposure fades color and heat softens the structure)
    • Using a hair dryer on high heat to speed things up (concentrated heat causes localized deformation)

    The Safe Drying Setup for Small Apartments

    Stuff each shoe with newspaper or a dry microfiber towel to absorb internal moisture and help the shoe hold its shape.

    Place the shoes on a flat surface indoors, away from heat sources, where air circulates freely. A small portable fan pointed at the shoes cuts drying time significantly without adding any heat.

    A breezy windowsill works during cooler months as long as the window doesn’t face direct afternoon sun. The goal is airflow, not warmth. Foam dries fine at room temperature. Forcing heat onto it to save an hour of drying time can cost you the entire shoe.

    Keeping Foam Footwear Clean Between Washes

    Prevention does more for foam longevity than any cleaning product. A few small habits reduce how often deep cleaning becomes necessary.

    A foam-safe protector spray applied once a week creates a thin barrier against water and light stains. Crep Protect is one of the more widely available options, and a single can lasts roughly 12 applications on a pair of foam runners.

    Storing foam runners and slides in a dust bag or a clean shoe bag between wears keeps loose particles from settling into the foam while the shoes sit in a gym bag or locker. This sounds like a small thing, but foam sitting loose inside a dusty backpack for eight hours picks up as much grime as a short walk outside.

    Rotating between two pairs of daily foam footwear also gives each pair time to air out and dry fully between wears. Trapped moisture breeds bacteria and causes odor faster than external dirt does. Even one extra pair in the rotation makes a measurable difference.

    City-Specific Cleaning App Services

    Several cities now offer app-based shoe cleaning pickup and drop-off. Tokyo has Kickswrap. 

    NYC has Mint Condition. Reshoevn8r covers most major US cities. These services run between $15 and $30 per pair for a full cleaning and are worth considering for seasonal deep cleans or high-value pairs that need careful treatment.

    Questions People Ask About Cleaning Foam Runners and Slides

    A few questions come up constantly when talking about foam footwear care in city environments.

    • Q: Can I put foam runners in the washing machine? Most manufacturers advise against it. The agitation cycle can warp the foam, and hot water settings accelerate the damage. A hand wash in lukewarm soapy water takes about five minutes and carries zero risk of deforming the shoe.
    • Q: How often should I clean foam runners if I wear them daily? A quick wipe-down every two or three days keeps surface grime from bonding with the foam. A deeper soapy wash once every two weeks handles accumulated oil and sweat stains. That schedule works for most city commuters without eating into free time.
    • Q: Do sneaker cleaning sprays work better than dish soap? For everyday cleaning, dish soap performs identically to most $12-$18 sneaker sprays. The sprays add convenience for on-the-go cleaning, but they don’t cut through oil-based city grime any better than a basic soap solution.

    Conclusion

    Clean foam runners and slide sandals don’t need expensive kits or complicated routines to stay fresh. Dish soap, a microfiber cloth, and smart drying habits handle the job for under a dollar per wash. 

    The real threat to foam footwear isn’t the dirt you walk through but the heat you dry them with. Treat drying as the most important step, and your city shoes stay in rotation much longer.

  • How Humidity Affects Your Sneakers and How to Prevent Crumbling

    How Humidity Affects Your Sneakers and How to Prevent Crumbling

    A pair of unworn Air Max sitting in a sealed shoebox for two years can crack apart the moment they hit pavement. The soles don’t wear out. They disintegrate. 

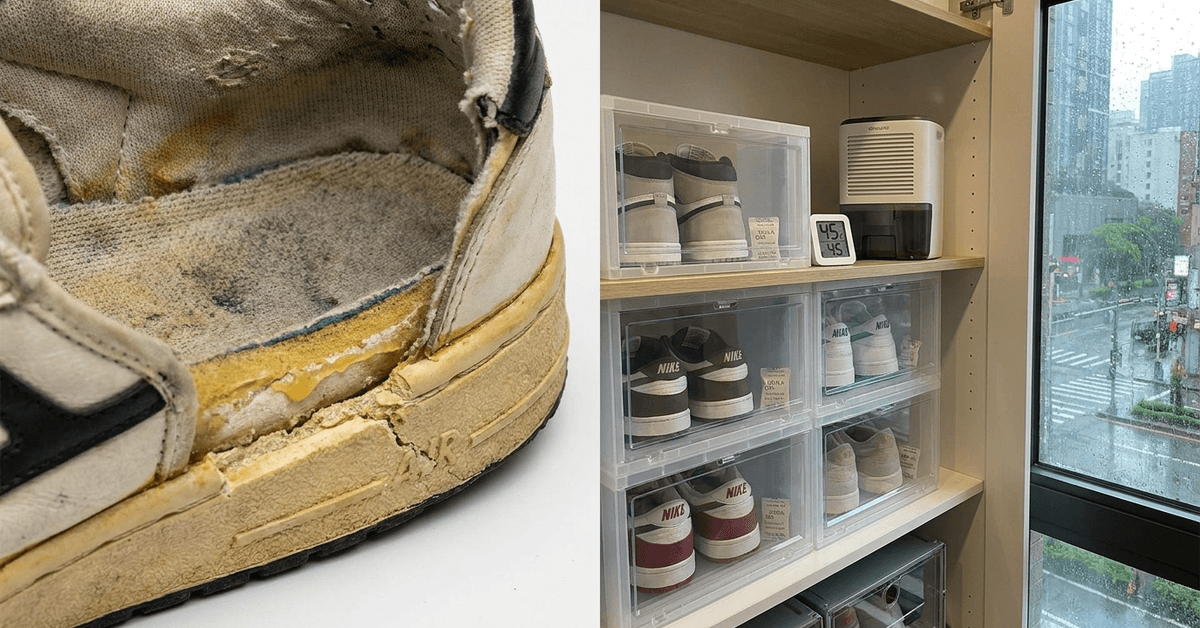
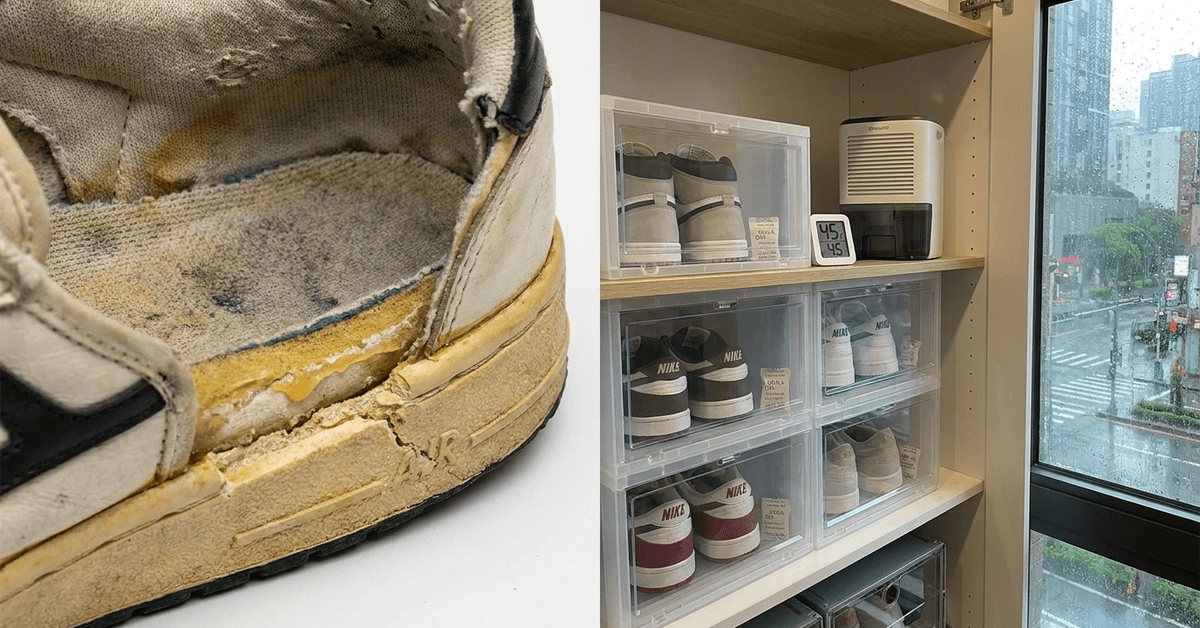
    Polyurethane foam, the material in most sneaker midsoles, breaks down through a chemical reaction with moisture and oxygen, and a sealed box in a humid apartment is the perfect environment for that reaction.

    Most sneaker care advice focuses on cleaning routines and rotation schedules. Almost none of it addresses the specific conditions inside a city apartment closet, where poor ventilation and temperature swings create humidity pockets that sit against foam and glue for months at a time.

    This one is for the urban sneaker collector living in a compact apartment, stacking shoeboxes in a closet or under a bed, trusting that “stored” means “safe.” If that sounds familiar, some of these details might save a pair or two.

    Polyurethane Foam and the Chemistry of Sneaker Crumbling

    The soles on most modern sneakers are made of polyurethane (PU) foam. This material has a built-in expiration date that few sneaker buyers think about. 

    PU foam degrades through a process called hydrolysis: water molecules in the air attack the chemical bonds holding the foam together. Over time, the foam hardens, cracks, and eventually turns to powder.

    Featured Image

    Why Unworn Sneakers Crumble Faster

    A pair worn regularly gets flexed, aired out, and exposed to varying conditions that slow the hydrolysis process. A pair sitting still in a sealed box does the opposite. Stagnant air traps moisture against the foam. 

    No flexing means the material stiffens in one position. The process accelerates in storage, which is why vintage pairs crumble at far higher rates than daily wearers.

    I would argue that the common advice to “keep your rare pairs boxed and stored” is one of the most damaging recommendations in sneaker culture. PU foam breaks down faster in a sealed box sitting in a closet above 60% humidity than on a pair worn once every two weeks. 

    The evidence sits in every sneaker forum thread showing deadstock pairs from 2015 crumbling at first wear. Rotation and airflow do more for longevity than any amount of careful boxing.

    Glue and Stitching Break Down Too

    Humidity doesn’t stop at foam. The adhesives bonding uppers to midsoles weaken when exposed to sustained moisture and heat. Stitching absorbs water and can rot over months of improper storage. 

    If a pair smells musty or the glue along the sole edge feels tacky when pressed, the damage has already started.

    Which Cities Put Sneaker Collections at Risk

    Apartment living compounds the humidity problem. A ground-floor unit with no cross-ventilation in a subtropical city creates conditions that a shoe stored in a dry garage in Colorado would never face. Some cities make this worse than others.

    Singapore sits above 70% relative humidity for most of the year. Miami spikes dangerously after summer storms, especially in older buildings without modern HVAC. 

    Tokyo’s rainy season pushes indoor moisture levels high enough to fog windows, and open shoe racks in small apartments offer zero protection. New Orleans pairs humidity with flood risk, making under-bed and basement storage a gamble.

    Temperate Cities Are Not Safe Either

    This problem doesn’t belong exclusively to the tropics. New York summers push indoor humidity past comfortable levels in buildings without central air. 

    Northern European cities like London and Amsterdam deliver months of damp, drizzly weather that slowly raises closet moisture levels. 

    A small apartment with radiator heat can swing between bone-dry winter air and muggy summer conditions, and those temperature fluctuations stress PU foam and adhesives in cycles.

    How to Spot Humidity Damage on Sneakers Early

    Catching damage early is the difference between a simple fix and a pair headed for the trash. A seasonal check, maybe four times a year, takes five minutes per pair and can flag problems months before they become irreversible.

    Signs to look for during a seasonal inspection:

    • Cracking along the midsole: flex the sole gently by hand and check for tiny fissures, especially near the heel and toe
    • Yellowing or fogging on clear or translucent sole components, a sign of oxidation accelerated by moisture
    • Soft, tacky patches on rubber or foam surfaces that should feel firm and dry
    • Musty odors or visible mildew on insoles, inside the toe box, or along interior seams

    Spotting any one of these on a pair that’s been sitting in storage for six months or longer means the conditions in that storage area need to change immediately.

    Preventing Sneaker Crumbling in a City Apartment

    Prevention splits into two categories: what to do with pairs worn regularly and what to do with pairs stored for longer stretches. Both matter, but the long-term storage decisions tend to cause the most damage when done wrong.

    Short-Term Storage Between Wears

    A few low-cost habits go a long way between wears:

    • Toss a silica gel packet into each shoe after wearing. A single sachet absorbs ambient moisture inside the shoe overnight.
    • Rotate the collection. Wearing each pair at least once every couple of weeks keeps materials flexible and releases trapped moisture.
    • Air sneakers out after wearing, but keep them away from direct sunlight and radiators. High heat accelerates PU breakdown just as fast as humidity does.

    Long-Term Storage for Rare or Seasonal Pairs

    Storing sneakers for months at a time demands more than a shoebox on a shelf. The raw material science makes this clear: sealed environments plus moisture equals hydrolysis.

    Storage Method Humidity Control Airflow Cost
    Original shoebox (sealed) None Minimal Free
    Breathable cotton dust bag Passive absorption Good ~$3–$5 per bag
    Acid-free tissue + silica in container Active absorption Moderate ~$10–$15 setup
    Closet dehumidifier (Eva-Dry, Pro Breeze) Active removal Depends on placement ~$25–$50

    The original shoebox, the default storage method for most collectors, offers the least protection. 

    I think spending $25 on a compact closet dehumidifier from Eva-Dry gives a better return than any sneaker cleaning product on the market. A dehumidifier changes the entire environment. A cleaning kit fixes one pair at a time.

    Cotton bags beat plastic containers every time. Plastic traps moisture inside with the shoe. Cotton allows airflow while keeping dust out. For high-value or limited pairs, wrapping them in acid-free tissue paper adds a moisture buffer without sealing them off.

    Monitoring Humidity Levels at Home

    A basic hygrometer costs under $15 and tells the whole story. The target range for sneaker storage is 40% to 60% relative humidity. Above 60%, PU foam degradation accelerates. Below 40%, leather can dry out and crack.

    Check the hygrometer reading every two weeks during humid months. If the closet consistently reads above 60%, a dehumidifier or a change in storage location is the fix. 

    Apps like AccuWeather provide real-time outdoor humidity data, which helps predict when indoor levels will spike. Smart humidistats from brands like Xiaomi can trigger alerts when room conditions cross a threshold.

    Cleaning Sneakers After Humidity Exposure

    Regular cleaning after humid-weather wear prevents moisture from settling into materials and starting the damage cycle. 

    A dry microfiber cloth wipe after each wear removes surface moisture and city grime. Let the pair air-dry completely before putting them back in any enclosed storage.

    Deep Cleaning Every Few Months

    Products like Jason Markk and Crep Protect clean surface grime and add a thin moisture barrier. 

    Avoid soaking sneakers or running them through a washing machine. Water trapped inside foam after a deep soak does the exact thing this entire article warns against. Apply cleaning solutions with a brush, wipe off, and dry thoroughly.

    Professional Sneaker Restoration

    Advanced crumbling or sole separation may need professional attention. 

    Cobblers in cities like Los Angeles and London now specialize in sneaker restoration, offering re-gluing, sole reconditioning, and full rebuilds. Restoration runs expensive, but for sentimental or limited-edition pairs, it can be worth the cost. 

    Vetting a restorer through review platforms like Yelp or through Reshoevn8r’s network helps avoid a botched job on a pair that already needs saving.

    Questions People Ask About Humidity and Sneaker Crumbling

    These come up repeatedly in sneaker forums and search results, and a few of them get incomplete answers elsewhere.

    • Q: Does wearing sneakers more often prevent sole crumbling? Regular wear slows the process because flexing the foam and exposing it to open air interrupts the stagnant moisture conditions that accelerate hydrolysis. A pair worn once every two weeks holds up better than a pair boxed for a full year.
    • Q: Are certain sneaker brands more resistant to humidity damage? Brands using rubber or EVA foam soles instead of polyurethane tend to resist hydrolysis better. EVA doesn’t undergo the same chemical breakdown. Checking sole material before buying stored or vintage pairs can save a lot of frustration.
    • Q: Should I insure my sneaker collection against humidity damage? Renters and homeowners insurance riders can cover high-value collections, though specific coverage varies. Apps like Lemonade offer policies that may apply, but reading the fine print on what counts as “damage” versus “wear” is worth doing before filing a claim.

    Conclusion

    Sneaker crumbling has a clear cause, and most of the damage happens during storage, not during wear. The cheapest fix is also the most effective: airflow, rotation, and a $15 hygrometer. 

    Collectors who treat storage conditions as seriously as cleaning routines will keep pairs lasting years longer. A closet that stays below 60% humidity does more for a sneaker collection than any single product ever could.

  • Simple Tips to Prevent Heel Drag On Your Daily Beaters

    Simple Tips to Prevent Heel Drag On Your Daily Beaters

    A pair of Nike Air Force 1s can lose half their heel thickness after six weeks of daily city walking. That number drops even faster on cobblestone streets in Rome or Paris.

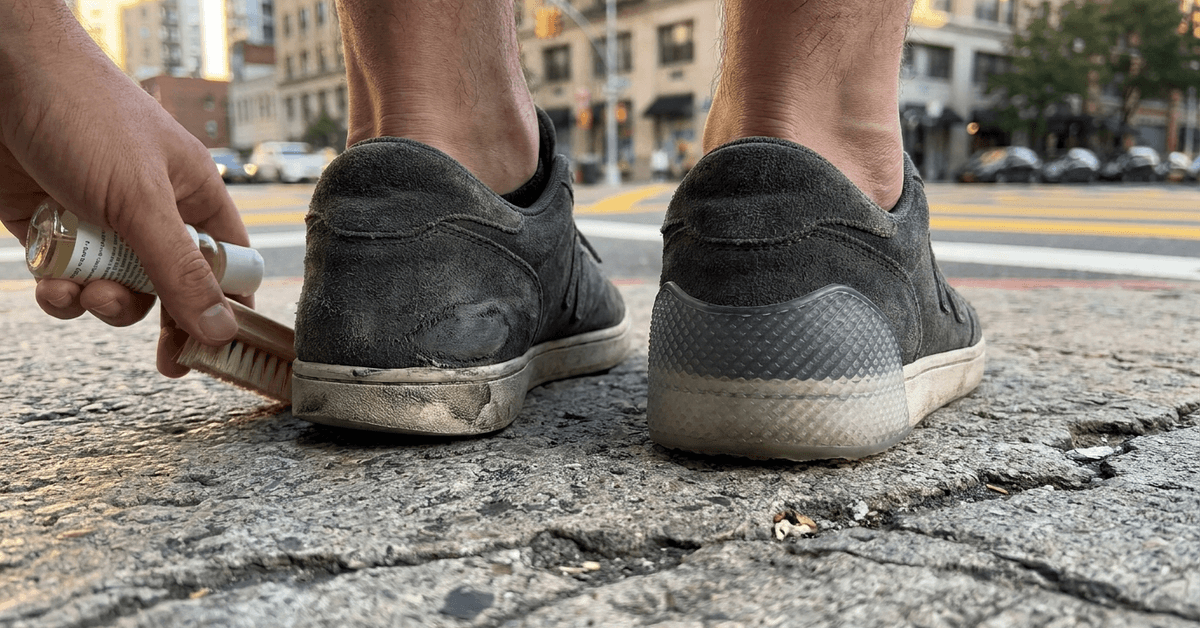
    Most sneaker care advice treats all pavement the same. The surface under your feet and the rubber compound on your outsole determine lifespan more than any cleaning habit or rotation schedule.

    This guide is for the person logging 5,000 or more steps a day on city sidewalks, subway platforms, and crosswalk grates, then wondering why their shoes look like they survived a cheese grater.

    Why Soft Outsoles Die on City Pavement

    The relationship between outsole material and urban ground surfaces is the first thing every sneaker owner should understand. 

    Brands market comfort-focused foam and lightweight construction, and those features do feel good on day one. The tradeoff hits around week six, when the heel starts flattening unevenly.

    Surface Type Changes Everything About Wear

    Cobblestone cities like Rome and Paris grind down soft rubber compounds faster than flat asphalt streets in Tokyo or New York. 

    Featured Image

    Tile floors in subway stations and shopping centers add a polishing effect that smooths out tread patterns. Concrete crosswalks at high-traffic intersections act like fine-grit sandpaper on every step.

    I’d argue that surface type matters more than brand loyalty when picking city sneakers. 

    A pair of New Balance shoes with Vibram outsoles will outlast a premium Nike runner on London’s mixed pavement every time, because the rubber compound is harder and the tread pattern grips rather than scrapes.

    Nobody matches their sneaker purchase to their city’s dominant surface type. That gap costs people two or three extra pairs per year.

    The Heel-Striker Problem

    Heel-strikers land on the back edge of the shoe with most of their body weight concentrated in a small contact area. 

    City schedules rarely allow for slow, mindful steps. Rush-hour walking speeds up cadence and shortens stride length, and both changes increase heel drag pressure.

    The wear pattern shows up fast: one side of the heel grinds down more than the other, the midsole compresses unevenly, and the shoe starts tilting. At that point, even an insole swap can’t fix the structural damage.

    Stop Buying Three Pairs When One Good Pair Works

    Sneaker rotation is the most repeated advice for extending shoe life. The logic sounds reasonable: spread the wear across multiple pairs. 

    I think this advice misses the point entirely when all three pairs have soft foam outsoles like those on most Nike and Adidas lifestyle models.

    One Hard-Soled Pair Beats Three Soft Ones

    Spreading wear across three soft-soled sneakers means replacing three pairs in nine months instead of one pair in three. 

    The math doesn’t save money. A single pair built with hard rubber outsoles or a cup sole construction, like the ASICS Gel-Lyte or the Reebok Classic, will outlast any rotation of comfort-first designs on city pavement.

    My take on sneaker rotation is different than what most guides suggest: rotate based on outsole hardness, not brand. Keep one hard-soled pair for heavy walking days and a lighter pair for short errands.

    That split gives the comfort shoe a chance to recover its foam shape without grinding it down daily. Gel or orthopedic inserts from brands like Superfeet or Dr. Scholl’s can firm up the heel area and reduce collapse. 

    The insert absorbs impact that would otherwise transfer directly to the outsole, and that extra cushion layer changes how weight distributes across the heel.

    Cheap Fixes That Add Months to City Sneakers

    Prevention and repair sit on different ends of the sneaker care timeline. Both are worth knowing, because even a well-chosen outsole eventually takes damage on city pavement. 

    A small investment in protective accessories and basic repair supplies can stretch a shoe’s usable life by three to six months.

    Stick-On Heel Guards and Sole Protectors

    Small adhesive pads that attach to the heel’s underside cost a few dollars and take less than a minute to apply. 

    Brands like Sneaker Shields make pads specifically sized for common sneaker models. Gel sheets from Solemates or Forcefield cover larger outsole areas and distribute impact force across a wider surface.

    These protectors need regular replacement. A few things to keep in mind:

    • Heel pads last about two weeks of daily city walking before the adhesive weakens or the pad itself wears through
    • Gel sole sheets can be custom-cut by cobblers in cities like Barcelona or Chicago for a tighter fit
    • Replacement timing matters more than initial application: a worn-out pad creates uneven contact and accelerates the problem

    A 60-second wipe-down after each wear session removes grit, concrete dust, and city grime that acts as an abrasive layer between the outsole and pavement. 

    A soft-bristle brush once a week handles deeper cleaning. These two habits alone slow heel erosion noticeably.

    Cobbler Repairs vs DIY Patch Kits

    Professional cobblers and sneaker repair clinics like Minute Cobbler in Toronto or Melbourne can add rubber wedges matched to your sneaker’s brand and color. Some offer drop-off service through local delivery apps.

    For quick fixes between cobbler visits, DIY patch kits handle small worn spots:

    • Shoe Goo fills in heel divots and bonds to most rubber outsoles
    • Tuff Toe works for toe caps and heel edges on athletic shoes
    • Pre-molded patches cover larger flat spots and set overnight
    • Each kit requires full curing time, usually 24 hours, so plan to wear a different pair the next day
    Feature Professional Cobbler DIY Patch Kit
    Cost per repair $15–$30 per heel $5–$10 per tube/kit
    Durability 3–6 months of daily wear 4–8 weeks of daily wear
    Convenience Requires drop-off or appointment Apply at home, any time
    Color matching Matched to shoe brand/color Limited color options

    A cobbler repair lasts longer and looks cleaner, but costs more per visit. DIY kits work for travelers, spontaneous fixes, or anyone living far from a repair shop.

    City Sneaker Durability: Which Brands Handle Pavement

    Not all sneakers are built for heavy pavement use. Choosing the right outsole construction at the point of purchase eliminates most of the drag problem before it starts. 

    Stitched soles and cup sole designs tend to hold shape longer than glued constructions, and some can be resoled by a cobbler when the tread wears flat.

    Hard Rubber Outsoles to Look For

    ASICS Gel-Lyte and Reebok Classic models use denser rubber compounds on the heel that resist abrasion on surfaces like asphalt and concrete. The New Balance 997 gets consistently good marks for outsole longevity among daily city commuters in Tokyo and Madrid.

    The Adidas Continental 80 uses a Continental rubber outsole, the same material found on Continental bicycle tires. I was surprised at how well that compound holds up on wet city pavement, given that most Adidas lifestyle shoes wear out fast.

    Nike Air Force 1 is one of the most popular city sneakers sold, but the outsole rubber is softer than competitors at a similar price. An AF1 without protective pads or regular cobbler maintenance may need replacing after two to three months of daily urban walking.

    Replaceable and Stitched Soles

    Sneakers built with visible stitching or a cup sole allow for sole replacement down the line. A cobbler can remove a worn sole unit and attach a new one, which costs less than buying a whole new pair. 

    This option works best on chunkier silhouettes where the sole is a separate piece rather than a molded foam unit fused to the upper.

    A Weekly Routine for City Sneaker Longevity

    Combining the right shoe choice with consistent maintenance creates a system that works without much thought. A simple weekly schedule ties together the habits, gear, and repair knowledge covered above.

    • Monday through Friday: alternate between a hard-soled pair for long walking days and a lighter pair for short-distance days
    • Each evening: 60-second wipe-down of outsoles with a damp cloth to remove grit
    • Sunday: soft-bristle brush deep clean, inspect heel wear, and replace protective pads if worn
    • Monthly: swap insoles, check adhesive pads, and evaluate whether a cobbler visit is needed

    That routine takes less than five minutes per day. The Sunday check catches uneven wear before it becomes structural damage.

    Questions People Ask About Stopping Heel Drag

    These are the questions that come up most often when city walkers start paying attention to their outsoles.

    • Q: How often should heel guards be replaced?
      About every two weeks for daily walkers covering 5,000+ steps on city pavement. The adhesive weakens and the pad material compresses. Leaving a worn guard on creates uneven contact and can speed up the damage it was supposed to prevent.
    • Q: Are expensive sneakers more durable on city streets?
      Price and durability don’t track as closely as most people assume. A $90 New Balance 997 can outlast a $180 Nike lifestyle shoe because the outsole compound is harder. Check the outsole material, not the price tag.
    • Q: Does walking speed affect heel drag?
      Faster walking often means shorter strides and harder heel strikes, both of which increase drag. Slowing down on rough surfaces like cobblestones makes a measurable difference, though city schedules don’t always allow for that.

    Conclusion

    City sneakers die on pavement because most people pick shoes for looks, not outsole hardness. Matching the rubber compound to your city’s dominant surface type matters more than any cleaning routine. 

    A single pair of hard-soled sneakers, maintained weekly, can outlast three pairs of soft-soled shoes rotated carelessly. The best time to protect your heels is before the first walk, not after the damage shows.

  • The Best Way to Clean Reflective (3M) Materials on Streetwear Shoes

    The Best Way to Clean Reflective (3M) Materials on Streetwear Shoes

    That reflective 3M panel on your sneakers looked electric the first week. Two subway rides later, city grime turns it into a dull grey patch that barely catches a phone flash.

    Standard sneaker cleaning advice doesn’t help here. Brushes, all-purpose sprays, and branded kits are built for leather and mesh, not Scotchlite micro-beads.

    This one is for the city sneakerhead who dropped real money on a reflective pair and wants the flash to last past month one.

    The cleaning process is short and cheap. But the wrong move is permanent.

    Why Regular Sneaker Cleaning Wrecks 3M Panels

    Sneaker care guides tend to treat every surface the same: stiff brush, all-purpose spray, scrub hard. That routine works fine on leather uppers and mesh knit. On 3M reflective overlays, it causes damage that can’t be reversed.

    The problem is structural. 3M Scotchlite uses thousands of microscopic glass beads bonded to a thin adhesive layer. 

    Featured Image

    Those beads bounce light directly back toward its source, which is why reflective panels pop so hard under headlights and camera flash. But that bead layer is far more fragile than the rest of the shoe.

    How Scotchlite Micro-Beads React to Brushes and Chemicals

    A stiff-bristled brush can scratch and dislodge individual beads, leaving dull patches that no product will fix. Chemical-based wipes and alcohol sprays strip the coating that holds beads in place. 

    Even water temperature plays a role: hot water softens the adhesive layer, and the reflective film can bubble, peel, or lift away from the shoe permanently.

    This is why the most dangerous cleaning mistake on reflective sneakers isn’t using the wrong product. It’s treating reflective sections the same way as leather or canvas.

    Cleaning 3M Reflective Areas Step by Step

    The supplies for this job are simple. A soft microfiber cloth, a soft-bristled brush (a clean makeup brush or baby toothbrush works for edges), dye-free soap diluted in room-temperature water at a ratio of about one drop per cup. That’s the full kit.

    An optional silicone-based protector spray designed for reflective finishes can add a barrier after cleaning. Apply it outdoors or near an open window to avoid inhaling fumes.

    Dry Dust-Off and Damp Cloth Technique

    Start dry. A clean microfiber cloth picks up loose dust and fine city grit before any liquid touches the surface. Skipping this step means wet grit acts like sandpaper on the micro-beads.

    Then lightly dampen the cloth. Not dripping, not soaked. Dab it across the reflective panels with zero downward pressure. The goal is to lift surface grime, not push particles deeper into the bead layer.

    A drop of diluted soap on the cloth handles anything the dry pass missed. Rinse the cloth frequently so grime doesn’t spread back onto clean sections.

    Stubborn Marks and When to Stop Scrubbing

    Marks that survive the damp wipe need the soft-bristled brush. Small circular motions work better than back-and-forth scrubbing, which tends to streak reflective surfaces.

    There’s a point where pushing harder causes more damage than the stain itself. A faint mark on a working reflective panel is better than a clean spot that no longer catches light. Knowing when to quit is part of the process.

    After cleaning, dry the area immediately with a fresh cloth. Never leave water sitting on 3M panels. Room-temperature air drying is the safest finish. Skip hairdryers, radiators, and direct sunlight entirely.

    Branded Sneaker Cleaning Kits vs. Soap on 3M Panels

    Sneaker cleaning brands have built a massive market around specialty kits. Jason Markk, Reshoevn8r, and Crep Protect all sell cleaning solutions at the $15 to $25 range. 

    These kits do solid work on leather, suede, and mesh. The question is whether they belong anywhere near a reflective 3M surface.

    Why I’d Skip Expensive Kits for Scotchlite Specifically

    I would skip branded sneaker kits like Jason Markk or Reshoevn8r for 3M panels specifically, because their cleaning solutions are formulated for porous materials. 

    Some contain surfactants not listed on the label that can cloud reflective coatings over time. A microfiber cloth and dye-free soap do the same job on 3M Scotchlite surfaces without that risk.

    I know this goes against the popular advice to “just use Jason Markk for everything.” On leather, sure. 

    On suede, absolutely. But 3M micro-bead panels are a completely different material, and treating them as one more shoe surface is how reflective coatings die early.

    If a kit’s label does not specifically mention 3M compatibility, treat it as unsafe for the reflective areas. Use it on the rest of the shoe and switch to diluted soap for the panels.

      Branded Sneaker Kit DIY (Soap + Microfiber)
    Cost $15–$25 per kit Under $5 total
    Tested on 3M? Rarely specified on label Soap is pH-neutral, microfiber is non-abrasive
    Risk to reflective coating Unknown surfactants may cloud beads Minimal when diluted properly
    Best for Leather, suede, mesh uppers 3M reflective panels

    Save the branded kit for everything else on the shoe and keep plain soap for reflective sections.

    Mistakes That Permanently Destroy 3M Reflective Sneakers

    The wrong cleaning move on a reflective panel is usually irreversible. These errors end reflectivity for good:

    • Bleach or alcohol-based cleaners dissolve the bead-bonding adhesive and destroy reflectivity permanently
    • Stiff brushes or abrasive sponges scratch and dislodge micro-beads, creating dead patches no product can restore
    • Hot water softens adhesive layers, causing bubbling and separation of the reflective film from the shoe surface
    • Forced drying with heat (hairdryers, radiators, direct sun) warps adhesive and discolors the reflective coating
    • Glass cleaner or screen wipes contain ammonia and solvents that strip reflective coatings within just a few uses

    Sneakerheads on the r/Sneakers subreddit have posted panels flaking after just two rounds of glass wipes. The damage shows up as small clear spots where beads have lifted off the surface. Once those beads are gone, so is the reflectivity.

    How to Maintain 3M Reflective Panels Between City Wears

    Cleaning reflective panels only matters if daily habits don’t undo the work. And honestly, what happens between cleanings affects panel longevity more than the cleaning itself.

    Rotation and Proper Storage

    Wearing the same reflective pair every day grinds city grime into the panels through sheer repetition. Rotating between two pairs gives reflective surfaces time to air out and prevents buildup from settling permanently into the bead layer.

    After wearing, store shoes away from direct sunlight and heat sources. Both humidity and UV light degrade 3M adhesive over time. A closet shelf or shoe box beats an open rack near a window every time.

    The Quick-Wipe Routine That Cuts Full Cleanings in Half

    A 30-second wipe with a dry microfiber cloth after each wear prevents grime from hardening on reflective panels. This one habit cuts the need for full soap cleanings dramatically.

    Stashing a travel-size microfiber cloth in a jacket pocket or bag makes this easy to do right after getting home. City weather shifts fast, and catching dirt before it dries into the bead layer saves real effort later.

    A few more habits that protect reflective panels over time:

    • Avoid wearing reflective sneakers in heavy rain. Light rain is fine if dried promptly, but prolonged moisture weakens adhesive bonds.
    • Check weather apps before heading out in a reflective pair. Planning dry walking routes sounds obsessive, but it extends panel life noticeably.
    • Test any new cleaning product on a small hidden section of the reflective area before applying it to the full panel.

    Questions People Ask About Cleaning 3M Reflective Sneakers

    Sneaker forums and search queries surface the same questions constantly. A few are worth answering directly.

    • Q: Can I put 3M reflective sneakers in the washing machine?
      No. Machine agitation, detergent chemicals, and uncontrolled water temperature all risk shredding the reflective micro-bead layer. Hand cleaning with a damp cloth is the only safe method for these panels.
    • Q: Does rain permanently damage 3M reflective panels on shoes?
      Light rain exposure won’t cause lasting damage if shoes are dried promptly. The real danger is prolonged moisture sitting on the adhesive layer for hours, which loosens the bond between beads and fabric.
    • Q: How often should I clean the reflective parts of my sneakers?
      A dry microfiber wipe after each wear handles regular maintenance. Full soap cleanings should only happen when visible stains appear, roughly every two to four weeks for daily city wear.

    Conclusion

    Reflective 3M sneaker panels demand a different cleaning approach than every other material on the shoe. A microfiber cloth, dye-free soap, and room-temperature water handle nearly every city stain safely.

    Heat, harsh chemicals, and rushed drying cause more permanent damage than the dirt itself ever will. Protect the adhesive layer underneath those micro-beads, and the reflective flash lasts for years.

  • How to Clean Luxury Leather Sneakers Without Stripping the Paint

    How to Clean Luxury Leather Sneakers Without Stripping the Paint

    A single wipe with the wrong cloth can pull $200 worth of custom paint off a luxury sneaker. That number sounds dramatic until it happens to a hand-finished pair after one overeager cleaning session.

    Most sneaker care guides treat painted leather the same as regular leather. They recommend the same brushes, the same cleaners, the same scrubbing technique. Painted finishes are a completely different material category.

    This guide is for the sneaker collector who owns at least one pair of hand-painted or custom-blended luxury kicks and dreads cleaning day more than a rainy commute.

    The Biggest Threat to Painted Sneakers Isn’t the City. It’s the Cleaning.

    Rain, dust, and salt get all the blame. But the majority of paint damage on luxury sneakers happens during cleaning, not during wear. A single session with the wrong product or too much pressure strips more finish than six months of sidewalk grime.

    That sounds backwards, so let me explain the mechanics. Luxury brands use paint that is hand-finished or custom-blended for color accuracy. These finishes sit on top of the leather rather than being dyed through. 

    Standard shoe cleaners, even ones marketed as “gentle,” often contain alcohol or surfactants strong enough to dissolve that top layer.

    Featured Image

    How Paint Comes Off During Cleaning

    The process is subtle. A rough brush catches a micro-crack in the paint surface. Cleaning solution seeps underneath. The next stroke lifts an entire section of color. Once that bond breaks, the surrounding paint becomes vulnerable too.

    Harsh cleaning agents like bleach or heavy-duty soap are obvious culprits. But even soft-bristle shoe brushes create enough friction on painted overlays to cause damage when paired with liquid cleaners. 

    The combination of moisture and abrasion is what breaks paint adhesion, not either one alone.

    Pre-Cleaning Inspection That Saves the Finish

    Check sneakers under natural light before touching them with any product. Hold each shoe at an angle and look for hairline cracks, chips, or areas where paint has started to lift. 

    If any of those exist, skip the cleaning liquid entirely for that section and use only dry methods. A simple test works well here: dampen a cotton cloth with plain water and press it gently against a hidden painted area near the heel or tongue. 

    If any color transfers to the cloth, the paint bond is already compromised, and a milder approach is necessary. Sometimes blowing away dry dust with compressed air handles the job without any contact at all.

    The Only Cleaning Kit That Makes Sense for Painted Leather

    Sneaker cleaning brands love selling $40 kits loaded with brushes and concentrated solutions. 

    I think a $12 collection of household items does a better job on painted leather than Jason Markk or Reshoevn8r kits for one specific reason: those branded kits are designed for general sneaker leather, not for painted finishes, and their brushes are too stiff for hand-finished surfaces.

    A painted leather cleaning kit should have five items:

    • pH-neutral cleaner free of alcohol (check the label, because many “gentle” formulas still contain isopropyl alcohol)
    • Distilled water instead of tap water, since mineral deposits from tap water leave white residue on dark paint
    • Makeup sponge for dabbing stuck spots without creating friction
    • A soft microfiber towel or lint-free cotton cloth for surface dust
    • A baby toothbrush reserved only for seams and crevices, never for painted panels

    Frequent travelers can pack all five items in a toiletry bag. The total weight is negligible, and none of these require special storage.

    Products That Will Ruin Painted Sneakers

    Some cleaning methods look safe but cause irreversible damage on painted surfaces:

    • Nail polish remover or acetone strips color within seconds
    • Magic erasers act as fine-grit sandpaper on paint
    • Household disinfectants contain chemicals formulated to break down organic coatings
    • Direct steam or soaking weakens the paint-leather bond permanently
    • Standard shoe brushes create micro-scratches across painted overlays

    One urban myth keeps circulating: toothpaste or baby wipes as sneaker cleaners. Both tend to fade bright painted panels after a single use. 

    Toothpaste contains mild abrasives designed to polish enamel, and those same abrasives sand away painted finishes.

    Step-by-Step Cleaning Routine for Painted Leather Sneakers

    The method below prioritizes minimal moisture and zero friction on painted areas. Each step builds on the previous one, so skipping ahead usually causes more harm than the dirt itself.

    1. Tap the soles together over a trash can or sink to release loose debris. Never scrape soles with metal tools or stiff edges.
    2. Run a dry microfiber towel across the upper in short, light strokes. This removes surface dust without engaging the paint layer. One direction only. No circular motions.
    3. Dampen a separate section of the towel with distilled water. Dab painted areas gently. The motion is a press-and-lift, not a wipe. Rubbing is the single fastest way to pull paint.
    4. For stuck grime, moisten a makeup sponge with a small amount of pH-neutral cleaner. Pat the area and check the sponge after every two dabs. If color appears on the sponge, stop immediately and let the area dry before trying again with water only.
    5. A baby toothbrush can reach seam crevices and stitching lines, but it should never touch painted overlays. Keep brush contact limited to unpainted leather, rubber, and fabric sections.
    6. Pat dry with a lint-free cloth. Let the sneakers air dry at room temperature away from direct sunlight and heaters. Heat accelerates paint cracking on leather.
    Cleaning Method Safe for Painted Leather? Risk Level
    Distilled water + microfiber dab Yes Low
    pH-neutral cleaner + makeup sponge Yes (with patch test) Low-Medium
    Branded sneaker cleaning kit brush No (too abrasive for paint) High
    Magic eraser No Very High
    Acetone or nail polish remover No Extreme

    The safest path stays in the top two rows of that table. Everything below involves friction or chemicals that painted finishes cannot handle.

    City-Specific Problems That Damage Painted Sneakers

    Different environments attack painted leather in different ways, and the fix for one city’s problem can make another city’s problem worse.

    Rain and Humidity Damage

    Rainy cities like London and Seattle create water spots and streaking on painted leather. 

    A water-repellent spray made for painted leather can help, but only after a patch test on a hidden area. Some repellent sprays contain silicone compounds that cloud matte paint finishes. Check labels for Crep Protect’s painted leather line before applying anything.

    Salt Stains in Winter Cities

    Salt from treated sidewalks in New York and Montreal leaves white crystalline marks on painted sneakers. 

    Dab salt stains with distilled water as soon as possible. Salt that sits overnight bonds with the paint layer and becomes much harder to remove without damaging the finish.

    Dry Dust in Hot Climates

    Dusty cities like Madrid and Athens present a simpler problem. Daily dry wiping with a microfiber cloth handles most accumulation. 

    Between wears, dust bags protect painted surfaces better than shoe boxes alone, because boxes still allow airborne particles to settle.

    Keeping Painted Sneakers Alive Between Cleanings

    Long-term care matters as much as the cleaning routine itself. Paint cracks come from storage mistakes and repeated stress as often as they come from dirt.

    • Rotate pairs so painted sneakers get rest days between wears. Paint flexes with every step, and continuous wear accelerates cracking.
    • Store in dust bags, not plastic wrap. Plastic traps moisture, which softens paint adhesion over time.
    • Use padded shoe inserts during travel to prevent toe-box creases. Creases are where paint cracks first.
    • Clean spills immediately. Coffee, rain puddles, and drink splashes bond with painted surfaces faster than with standard leather. A same-day wipe prevents most staining.

    A thin layer of sneaker-friendly sealant can add a protective barrier, but I would only recommend sealants specifically labeled for painted leather from brands like Jason Markk

    Generic leather sealants can alter the sheen and texture of custom paint jobs. Some collectors use clear removable wraps during long walking days or events, peeling them off afterward to reveal the original finish underneath.

    Questions People Ask About Cleaning Painted Leather Sneakers

    These come up a lot in sneaker forums and care threads, so they deserve straight answers.

    • Q: How often should I clean painted leather sneakers? A dry wipe after each wear and a damp cleaning every two to three weeks works for regular city use. Over-cleaning causes more paint damage than under-cleaning in almost every case.
    • Q: Does waterproofing spray affect painted sneaker colors? Some sprays dull matte finishes or add an unwanted glossy sheen. Always test on a hidden section first. Sprays designed for painted leather specifically tend to be color-safe.
    • Q: Is it safe to machine wash painted leather sneakers? No. Machine washing combines heat, excess water, tumbling friction, and detergent. All four destroy painted finishes. Hand cleaning is the only option.

    Conclusion

    The biggest mistake painted sneaker owners make is treating these shoes like regular leather kicks. Every cleaning product, every brush stroke, and every storage choice either protects or erodes that finish. 

    A gentle routine done consistently beats an aggressive deep clean every time. Knowing what not to use matters more than owning the fanciest cleaning kit on the shelf.

  • The Best Ways to Contrast Bright Sneakers With Neutral Outfits

    The Best Ways to Contrast Bright Sneakers With Neutral Outfits

    Most bright sneaker purchases go wrong before the box opens. The buyer picks a color they love, ignores the shoe’s shape, and ends up with a pair that fights every trouser hem in their closet.

    The color gets all the attention in pairing guides. But the silhouette of a bright sneaker determines 80% of whether the outfit looks planned or panicked.

    This guide is for the city commuter who already owns a closet full of black, gray, and beige, and wants one pair of loud sneakers that works across the whole rotation without thinking too hard every morning.

    Why Silhouette Matters More Than Color When Picking Bright Sneakers

    Every bright sneaker guide starts with color. Red goes with gray. Turquoise pops against cream. That advice is fine, but it skips the part where the outfit falls apart: the shape of the shoe meeting the shape of the pant leg.

    A chunky neon sneaker under slim-cut trousers creates a visual weight mismatch that no amount of color coordination can fix. And a sleek low-top under wide-leg joggers makes the shoe disappear, which defeats the purpose of going bright in the first place.

    Image 1

    Low-Tops vs Chunky Soles and the Wardrobe They Demand

    Low-top bright sneakers pair well with tapered chinos, slim jeans, and cropped trousers. The shoe sits close to the ankle, so the transition between pant and sneaker stays clean. Cities like Berlin and Amsterdam lean toward this sleeker profile, partly because cycling culture rewards shoes that don’t catch on pedals.

    Chunky or platform bright sneakers need roomier pants to balance the proportions. Relaxed denim, straight-leg trousers, and joggers all give the shoe enough visual space. New York and London trend toward this bulkier silhouette, where the shoe is meant to be the loudest piece on the body.

    How Your City Should Shape Your Sneaker Choice

    I’d argue that geography should influence silhouette more than personal taste when picking bright sneakers for daily commuting. A chunky neon runner that looks sharp on a Brooklyn sidewalk can look out of place on a Copenhagen bike lane. 

    The raw trend data backs this up: Stockholm leans toward tonal neutrals with reflective sneaker details for after-dark cycling safety, while Tokyo pairs structured technical fabrics with clean lines and utility accessories.

    The smarter move is to watch commuters in your own neighborhood for a week. Train platforms and bus stops are better style labs than Instagram hashtags. Pay attention to what shoe shapes show up most often with neutral outfits, and buy into that silhouette.

    Color Pairing Bright Sneakers the Intentional Way

    Once the silhouette matches the wardrobe, color becomes a much easier decision. The goal is to make the bright sneaker look chosen, not accidental.

    All-Black Outfits Are the Laziest Base for Bright Sneakers

    I think the all-black-plus-bright-sneakers formula that every style guide recommends is a crutch. My issue is specific: a solid black outfit creates so much contrast that the sneakers look like they belong to a different person. 

    The eye jumps straight to the feet and ignores every other styling decision.

    Earth tones do a better job. Tans, stone, off-white, and khaki create a warmer gradient that lets a bright sneaker feel like part of the outfit instead of a neon sign strapped to the ankles. 

    Urban commuters in Copenhagen and Milan pair beige chinos with a khaki trench and orange or lime sneakers, and the result reads as intentional. If an all-black base feels necessary, layer different textures to break up the monochrome. Cotton over linen, a leather jacket over a knit. 

    Add a light gray scarf or hat to create a step between the black clothing and the bright shoe. That middle shade softens the contrast.

    The White Canvas Approach

    A full white outfit works as a blank canvas for neon green, hot pink, or patterned sneakers. City walkers in Barcelona use this approach frequently during spring markets and festivals.

    The trick to keeping a white outfit from looking clinical: break it up with a textured belt or a crossbody bag in a muted tone. A smartphone case matching the sneaker color creates a small visual callback without being obvious about it.

    Picking Colors That Match Your Existing Neutrals

    Not every bright sneaker color works with every neutral base. The combinations that tend to work best break down like this:

    Neutral Base Strong Sneaker Colors Weaker Pairings
    Gray and charcoal Red, yellow, cobalt blue Neon green (too jarring)
    Beige and tan Orange, lime, turquoise Hot pink (clashes warm tones)
    White and cream Neon green, pink, patterned Yellow (low contrast, washes out)

    Multi-color soles add flexibility here, since they pull from several palette families at once and match more outfits across a week of commuting.

    Accessories That Stay Out of the Sneaker’s Way

    The instinct when wearing bright sneakers is to match accessories aggressively. Bright watch, bright bag, bright hat. This usually backfires. Too many color accents scatter the eye and the sneakers lose their punch.

    The One-Repeat Rule

    A single, small accessory that echoes the sneaker color is enough. The rest of the accessories should stay neutral. Some pairings that work:

    • A watch with a colored strap in the same family as the sneaker accent
    • A thin cord bracelet in a muted version of the shoe’s color (popular in Paris as a subtle link between shoe and wrist)
    • A phone grip or case matching the sneaker shade

    Anything beyond that starts competing. Minimalist canvas totes and simple metal wristwear let the shoes stay in focus without making the rest of the outfit feel empty.

    Bags and Layers That Complement, Not Compete

    A crossbody bag in a complementary neutral shade ties the look together without adding another loud color. 

    An off-white backpack works well with earth-toned outfits and loud soles. The bag should serve a function (carrying a laptop, a water bottle, a book) and the color should feel like a background player.

    For cold weather layering, windbreakers and oversized knits in muted colors keep the sneaker as the standout piece. Matching high socks to the neutral palette rather than the shoe color prevents the lower half of the outfit from becoming a color circus.

    Keeping Bright Sneakers Clean in City Conditions

    Bright colors show dirt faster than black or white shoes. Dust, rain splatter, and subway grime all become visible within a day or two of city wear. Cleaning and rotation are non-negotiable if the shoes are supposed to look sharp.

    Daily and Weekly Sneaker Maintenance

    A few habits make a real difference in how long bright sneakers hold their color:

    • Mini cleaning wipes from brands like Crep Protect fit into a back pocket or small bag compartment and handle surface stains on the go
    • Compact travel brushes take care of deeper scuffs during a lunch break or between meetings
    • Shoe trees placed inside after each wear prevent creasing and keep the shape intact
    • Avoiding direct sunlight during storage slows color fading on neon and pastel shades

    Rotation Saves Money Long-Term

    Owning two pairs of bright sneakers and alternating daily extends the life of both. The materials get a full day to breathe and dry between wears, which prevents the kind of sole breakdown that turns a six-month shoe into a three-month shoe.

    Getting Style Ideas Without Falling Into Algorithm Traps

    Most style apps push trending content that may not match the specific neutral-plus-bright formula. Searching strategically works better than scrolling passively.

    On Pinterest, build a dedicated board for bright sneaker pairings and save only outfits that match the neutral base colors already in the closet. 

    Lookbook shows what locals wear in cities like Tokyo and Melbourne, which helps calibrate expectations for what a bright sneaker outfit looks like on a real commuter versus a professional model.

    Streetwear hashtags on social platforms can spark ideas, but the better research method is paying attention to real commuters. A morning train in Toronto or a tram stop in Madrid will show dozens of neutral-plus-bright combinations that no algorithm curates.

    Questions People Ask About Bright Sneakers and Neutral Outfits

    A few of the most common questions about pulling off this look, answered quickly.

    • Q: Can bright sneakers work in a business casual office?
      Low-top sneakers in a single bold color (not neon) pair fine with chinos and a blazer in most business casual settings. The test is whether the shoe could pass for a fashion choice or reads as athletic wear. Chunky soles tend to push past that line.
    • Q: How many pairs of bright sneakers should I own?
      Two is the practical sweet spot. One warm-toned pair (red, orange, yellow) and one cool-toned pair (blue, green, purple) cover most neutral wardrobes without creating closet clutter. Rotation also extends the life of each pair.
    • Q: Do bright sneakers work in winter?
      Absolutely, though the approach shifts. Pair them with heavier textures like wool trousers and layered knits. Reflective details on sneakers (common in Scandinavian brands) add a safety element for short winter daylight.
    • Q: What is the easiest first bright sneaker color to buy?
      Red is the safest entry point because it pairs equally well with gray, black, navy, and tan. A clean red low-top is about as versatile as a bright sneaker gets, and it works across seasons without looking seasonal.
    • Q: Are multi-color sneakers harder to pair than single-color ones?
      They can be easier, surprisingly. Multi-color soles pull from several palette families, so they tend to match more outfits across a week than a single bold shade. The tradeoff is that they draw more attention, which means the rest of the outfit needs to stay quieter.

    Conclusion

    Bright sneakers paired with a neutral wardrobe create an easy daily formula that scales across seasons. The silhouette of the shoe matters more than the color for making the outfit look cohesive. 

    Earth tones and textured layers give the sneakers room to stand out without visual chaos. Start with one pair of red low-tops, and the rest of the wardrobe falls into place.

  • How to Style Technical Outerwear and Windbreakers in the City

    How to Style Technical Outerwear and Windbreakers in the City

    An Arc’teryx Beta jacket retails for $400. A Uniqlo BlockTech Parka costs around $80. Both will keep a commuter dry during a 15-minute walk from the subway to the office.

    That $320 price gap buys real performance differences. But those differences almost never activate during a normal city commute. Gore-Tex earns its premium over hours of sustained exposure, not during the sprint between a bus stop and a lobby.

    Most windbreaker recommendations treat city commuters and mountain hikers as the same buyer. They’re not. The transit rider who ducks underground every 10 minutes has wildly different demands than someone spending six hours on an exposed ridgeline.

    This piece is for the office commuter in a weather-variable city: London, New York, Tokyo, Toronto. Someone who needs a jacket that works with trousers and clean sneakers, fits inside a tote, and handles surprise rain without looking like expedition gear.

    Gore-Tex on a Metro Platform

    The outdoor gear industry built its pricing around sustained weather exposure. A three-layer Gore-Tex shell like the Arc’teryx Beta SL at $500 makes sense when rain hammers you for two straight hours on a trail. 

    The sealed seams, pit zips, and RECCO reflectors justify the price tag in that context.

    Image 1

    Why 15 Minutes Changes Everything About Waterproofing

    City commuting creates an entirely different wear pattern. A typical transit commuter spends maybe 10 to 20 minutes outdoors between heated buildings, covered platforms, and enclosed vehicles. 

    At that exposure level, a water-resistant polyester jacket performs nearly identically to a fully waterproof Gore-Tex shell.

    I’d skip Gore-Tex entirely for a daily city commute. The Uniqlo BlockTech Parka at roughly $80 handles wind resistance, water repellency, and light rain through a 20-minute walk just as capably as a $400 Arc’teryx Beta for that duration. 

    Gore-Tex earns its cost after 30 to 60 minutes of continuous, heavy rain. Urban commuters almost never reach that threshold.

    This matters because the jacket you can afford to replace easily is the jacket you wear without anxiety. Cramming onto a packed metro car, brushing against wet railings, tossing it over a chair at lunch: that casual treatment destroys expensive technical shells faster than weather does.

    How to Pick a Windbreaker for Your Actual Commute

    Jacket shopping for city use means filtering out features designed for backcountry conditions. A commuter doesn’t need avalanche reflectors or helmet-compatible hoods. What matters lives in a much smaller set of specs.

    Breathability and Weight for Transit Riders

    Rush-hour trains and buses run hot. A jacket that blocks wind and rain but traps heat creates a different kind of misery: showing up to work damp from sweat instead of rain. 

    Light polyester shells, like the BlockTech fabric Uniqlo uses, tend to breathe better than heavier waterproof membranes in stop-and-go transit situations.

    Weight plays into this too. Anything over 15 ounces starts feeling like unnecessary armor for a commute. The sweet spot for city windbreakers sits between 8 and 12 ounces, heavy enough to block a strong gust but light enough to forget you’re wearing it.

    Pockets, Hoods, and the Details That Save a Morning

    I think pocket placement matters more than waterproof ratings for the daily commuter, and the Uniqlo BlockTech line gets this right with a chest pocket fitted with a slide fastener for a phone or transit card. 

    Reaching into a deep hip pocket while wearing a backpack is awkward. A chest-level zippered pocket solves that small daily friction.

    Hoods deserve more scrutiny than most buyers give them. A hood that adjusts tightly around the face stays put during wind. A loose, decorative hood flaps around and blocks peripheral vision at crosswalks. Adjustable drawcords are not optional for city walking. 

    Removable hoods add versatility for indoor-outdoor transitions, but the attachment mechanism needs to be clean enough that removing the hood doesn’t leave visible snaps or zippers exposed.

    Layering a Technical Jacket for the Office

    Technical jackets carry an image problem. The outdoor industry designed them to look sporty, which clashes with most office dress codes. But the right pairing erases that tension.

    Pairing a Shell with Workwear

    A neutral-toned shell jacket (black, navy, charcoal) over slim-fit trousers and low-profile sneakers reads as polished rather than athletic. The trick is avoiding anything with loud branding, reflective strips, or contrast-colored zippers. Minimal, discrete logos make a technical jacket blend into a professional wardrobe.

    Berlin commuters figured this out early: a windbreaker over a crewneck knit or a lightweight hoodie creates a layered silhouette that works for both the train and the office kitchen. The combination hits that space between too casual and too corporate.

    Switching Between Day and Evening Plans

    Spontaneous dinner plans after work don’t require a full outfit change. Swapping athletic sneakers for low-profile leather shoes and adding a crisp button-up shirt underneath the same shell jacket shifts the look enough for most restaurants and bars.

    Jackets with adjustable cuffs and a clean hem make this transition smoother. A cinched waist or drawcord hem can be loosened for a relaxed evening look or tightened during a rainy walk. 

    This dual functionality is why a single well-chosen windbreaker can replace both a rain jacket and a light evening layer.

    City Windbreaker Brands Compared: Price vs. Performance

    The gap between budget and premium technical jackets shrinks dramatically when the use case is strictly urban. This comparison focuses on what each jacket delivers for a daily transit commuter, not a weekend hiker.

    Feature Uniqlo BlockTech Rains Jacket Arc’teryx Beta
    Price ~$80 ~$125 ~$400
    Waterproofing Water-resistant (DWR coating) Fully waterproof (PU-coated) Fully waterproof (Gore-Tex)
    Weight Light (~12 oz) Medium (~16 oz) Light (~13 oz)
    Packability Folds small, fits in a tote Stiff PU, harder to compress Packs into its own pocket
    Office-appropriate look Clean, minimal logos Sleek Scandinavian aesthetic Sporty, visible branding
    Best city use Daily all-weather commuting Walking-heavy rainy days Long outdoor exposure, weekends

    For pure city commuting under 20 minutes of outdoor exposure, the Uniqlo and Rains options cover the functional requirements. The Arc’teryx earns its price for commuters who also bike, run, or spend extended time outdoors.

    Packability: The Feature That Decides Daily Wear

    A jacket you leave at home on a clear morning is useless when the sky opens at 4pm. That’s why packability matters more for city commuters than any waterproof rating or breathability score.

    A windbreaker that folds into its own pocket or compresses flat inside a tote bag gets carried on sunny mornings “just in case.” It sits in a desk drawer or the bottom of a backpack without taking space. That constant availability is the real performance metric for urban outerwear.

    Stiff, structured jackets like the Rains Jacket at $125 look great but compress poorly. The PU-coated fabric holds its shape, which is a styling advantage and a packability disadvantage. 

    For commuters who walk to work rain or shine, that tradeoff might work. For anyone who needs to stash a jacket mid-day, compressibility wins.

    Accessories Worth Pairing with a City Windbreaker

    Accessories fill the gaps a single jacket can’t cover. These pairings extend a windbreaker’s usefulness across more situations:

    • Waterproof crossbody bag for protecting a phone, wallet, and headphones during downpours
    • Packable beanie for cold-weather layering under or without a hood
    • Touchscreen-compatible gloves for phone access on chilly transit platforms
    • Water-repellent backpack (brands like Rains make matching panels) for laptop protection during bike commutes

    Matching bag and jacket materials creates a cohesive look. More practically, a water-repellent backpack means the laptop inside stays dry even if the commuter skips the jacket on a borderline weather morning.

    Keeping Technical Fabrics Working Through City Seasons

    Technical fabrics lose their water repellency over time. The DWR (durable water repellent) coating on most windbreakers degrades with washing, body oils, and friction from backpack straps.

    Washing a technical jacket with the brand’s recommended detergent (not regular laundry soap) and hang-drying instead of machine drying extends the DWR coating’s life span. High heat from dryers breaks down the coating faster than normal wear.

    Some brands build repair and replacement programs into the purchase. Patagonia’s repair service and Arc’teryx’s ReBird program both extend jacket lifespan past what normal consumer care achieves. 

    A jacket that lasts four city seasons instead of two cuts the annual cost in half, even at a higher purchase price.

    Signs the DWR coating needs reapplication:

    • Water stops beading on the fabric surface and instead soaks in
    • The jacket feels heavier after light rain
    • Damp patches appear on the outer shell where the fabric used to repel

    Reproofing sprays and wash-in treatments cost under $15 and add another season of performance. The 20 minutes spent reapplying DWR saves a $100+ replacement.

    Questions People Ask About Technical Windbreakers for City Commuters

    These are the questions that come up most when commuters start shopping for a city windbreaker.

    • Q: Can I wear a windbreaker to the office without looking too casual? Stick to solid, muted colors with no visible branding and pair the jacket with structured trousers or chinos. A black or navy shell over a collared shirt reads as intentional rather than sporty. The fabric should have a matte finish, not a shiny athletic sheen.
    • Q: How often should I wash a technical windbreaker? Less often than you’d think. Once every 10 to 15 wears is enough for most commuters unless it gets visibly dirty. Washing too frequently strips the DWR coating. Spot-clean stains and air the jacket out between wears.
    • Q: Are expensive Gore-Tex jackets worth it for city use only? For strictly urban commuting, probably not. Gore-Tex performance advantages appear during sustained exposure past 30 minutes in heavy rain. A $80 to $125 water-resistant jacket handles the typical 10 to 20 minute commute walk identically. The premium makes sense if you also hike, bike long distances, or spend weekends outdoors.
    • Q: What’s the difference between water-resistant and waterproof for city rain? Water-resistant fabrics (DWR-coated polyester) handle light to moderate rain for short periods. Waterproof fabrics (Gore-Tex, PU-coated materials) block water indefinitely. For a commuter who ducks indoors within 15 minutes, water-resistant is functionally equivalent to waterproof in most city rain situations.
    • Q: Do packable windbreakers hold up as well as structured jackets? They hold up differently. Packable jackets use thinner fabrics that compress easily but can feel less substantial. Structured jackets feel more polished but resist folding. For daily commuting where the jacket spends half its life crammed in a bag, packable designs handle that wear pattern better.

    Conclusion

    The best city windbreaker isn’t the one with the highest waterproof rating or the most technical specs. It’s the one that fits in a bag, looks right with office clothes, and costs little enough that spilling coffee on it doesn’t ruin a morning. 

    Technical outerwear for commuters should solve the problems commuters face, not the problems the outdoor industry built its marketing around. 

    A rainy Tuesday in October deserves a jacket that earns its spot in a tote bag, not one that earns its spot on a mountain.

  • How to Style Cropped Trousers With High-Top Sneakers

    How to Style Cropped Trousers With High-Top Sneakers

    Three centimeters of exposed ankle can make a $200 outfit look like laundry day. The gap between your trouser hem and the collar of a high-top sneaker is the single detail that separates “styled on purpose” from “shrank in the wash.”

    Most styling guides treat this pairing like it’s self-explanatory: just roll your pants and lace up. But the proportional math between inseam length, shoe collar height, and sock visibility is where people quietly get it wrong every single time.

    This one is for the daily city commuter walking 8,000+ steps, hopping between subway platforms and café meetings, and wanting to look like the outfit was planned without spending twenty minutes on it.

    The Ankle Gap That Makes or Breaks Cropped Trousers and High-Tops

    Getting the hem-to-collar ratio right is the difference between a street style photo and a confused tourist. The cropped trouser’s bottom edge should sit 1 to 3 centimeters above the sneaker collar

    Lower than that, and the trouser bunches against the shoe. Higher than that, and it starts reading as capri pants on a beach vacation.

    Image 1

    How Washing Changes the Crop Length

    A detail almost nobody talks about: trouser fit changes after several washes. Cotton twill and lightweight blends shrink unevenly, and a pant that hit perfectly at the ankle bone after purchase may ride up to mid-shin after five cycles in a warm dryer. 

    I’d suggest air-drying cropped trousers flat rather than machine-drying them, specifically because cotton twill loses about a centimeter of inseam length per aggressive wash cycle.

    Check the mirror before leaving home. Sounds basic, but that extra centimeter of shrinkage can turn a deliberate crop into an accidental flood.

    Collar Height Varies More Than People Expect

    A Chuck Taylor All Star collar sits lower than a Nike Air Force 1 Mid collar by a meaningful margin. That difference changes how much skin sits between the trouser hem and the shoe. 

    Taller collars reduce the visible gap, so they pair better with shorter crops. Lower collars need a longer inseam to avoid the “forgot socks” look.

    Picking Cropped Trouser Fabric That Works on City Pavement

    Fabric choice controls how the trouser drapes against the shoe, and this interaction matters more than color matching. 

    A stiff trouser pools and buckles at the bottom. A soft one flows past the shoe collar and hides it. Neither is ideal if the goal is showing the sneaker on purpose.

    Cotton Twill for Warm-Weather Walking

    Cotton twill breathes well and holds a clean line above a sneaker collar without clinging. 

    It is the default for summer city walks and sits well in temperatures above 20°C. The trade-off: it wrinkles faster than any other trouser fabric after a few hours of sitting on public transit.

    Lightweight Wool for Business-Casual Commutes

    Wool sounds heavy, but lightweight wool cropped trousers drape sharply and resist wrinkling through a full workday. 

    For anyone splitting time between an office and an evening out, wool keeps the look polished without needing to change pants. The cost per wear makes sense over a full season.

    Technical Blends for Rainy Cities

    Commuters in Amsterdam or Copenhagen already know this. Technical fabric blends handle light rain without looking like hiking gear. 

    A slight synthetic mix in the weave repels water while still looking like normal trousers from a distance. The fit stays consistent across weather conditions, which cotton simply cannot do.

    Which High-Top Sneakers Pair Best with Cropped Trousers

    The sneaker silhouette controls the entire outfit’s personality. A slim canvas high-top reads completely different from a chunky platform, and neither is universally better.

    I would pick chunky high-tops over slim canvas ones for slim-fit cropped trousers, even though the standard advice says slim-on-slim creates the cleanest line. My reasoning: a slim trouser paired with a slim sneaker makes the lower leg look like one narrow column with no visual break. 

    A chunkier sole and wider collar create proportion contrast that gives the outfit architecture. Slim-on-slim flatlines the silhouette.

    Sneaker Style Best Trouser Fit Season Example
    Canvas high-top (Converse Chuck Taylor) Wide-leg or relaxed crop Spring, Summer Casual weekend walks
    Leather high-top Slim or tapered crop Autumn, Winter Business-casual commute
    Chunky/platform high-top Slim crop All year Statement streetwear

    Leather high-tops handle rain better than canvas and age into a patina that canvas never develops. For anyone in a city with an unpredictable autumn, leather is the safer year-round pick.

    Outfit Formulas That Work on Actual City Streets

    Formulas save time. The goal is removing decisions from a 7 AM morning without ending up in the same outfit five days running.

    The Commuter Formula

    Tapered wool crop + leather high-top + longline coat. This combination handles a train, an office, and a post-work bar without needing a wardrobe change. The longline coat balances the visual weight between the slim pant and the bulkier shoe.

    The Weekend Formula

    Wide-leg cotton crop + canvas high-top + boxy t-shirt. Streetwear energy, zero effort. 

    The proportions flip compared to the commuter formula: the volume lives in the trouser instead of the coat. That shift keeps the two outfits from looking like variations on a theme.

    Sock Strategy (This Part Gets Overlooked)

    Socks change the outfit more than most people realize. Three approaches work well for cropped trousers and high-tops:

    • Visible logo sports socks add a deliberate, athletic accent that reads as intentional styling rather than accident
    • Subtle merino wool socks in a matching tone create a clean, unbroken line from pant to shoe
    • No-show socks leave the ankle exposed for a sharper break, which works best in temperatures above 22°C

    A mismatched sock color between trouser and shoe creates a “banding” effect that chops the leg into three sections. Matching sock tone to either the pant or the shoe color solves this instantly.

    City-Specific Takes on This Pairing

    How cities wear cropped trousers and high-tops differs in ways that go beyond personal taste. Climate, transit infrastructure, and local norms shape what people reach for.

    London: Oversized Outerwear Runs the Look

    The Shoreditch approach layers an oversized coat or bomber over neutral cropped trousers and lets a bright sneaker carry all the personality. 

    London rain means leather or treated canvas high-tops outperform regular canvas by a wide margin. Suede is a losing bet unless a waterproofing spray is applied weekly.

    Tokyo: Tonal Palettes and Clean Lines

    Harajuku dressers keep the palette within two tones and let a single pop-color high-top break the monotony. The silhouettes tend toward slim and precise. 

    Loose or rumpled crops look out of place against Tokyo’s sharper street style. Cladwell, an outfit-planning app, can help replicate this discipline for people outside Japan who want that tonal consistency without the trial and error.

    New York: Layered and Street-Smart

    Brooklyn café culture leans into black wool cropped trousers with classic leather high-tops. The layering tends to be functional rather than decorative: a hoodie under a jacket, not a scarf draped for effect. 

    Resale platforms like Vestiaire Collective are popular for scoring leather high-tops at a fraction of retail, and the used sneaker market in New York is deep enough to find specific colorways without paying full price.

    Avoiding Common Cropped Trouser Styling Mistakes

    Even a well-planned outfit falls apart at the details. A few recurring problems show up in this pairing.

    • Patterned trousers plus logo-heavy sneakers create visual noise. Keep one element plain when the other is loud.
    • Cuffing trousers that are already cropped can push the hem too high and shift the outfit into capri territory. Only cuff if the original inseam gives enough room.
    • Wearing the same outfit from morning to evening without any swap. Switching a casual t-shirt for a crisp collared shirt updates the look for evening plans like gallery openings or rooftop spots without changing the bottom half.

    For daily outfit planning and mixing existing wardrobe pieces, Cladwell generates combinations from clothes already in the closet, which cuts down on the “I have nothing to wear” loop that burns morning time.

    Questions People Ask About Cropped Trousers and High-Top Sneakers

    A few of the most common questions around this pairing tend to come up in the same spots.

    • Q: Can cropped trousers and high-tops work in cold weather? Absolutely, but the fabric and sock choice carry the load. Wool crops with insulated merino socks and leather high-tops handle temperatures down to about 5°C. Below that, the exposed ankle becomes a liability, and a full-length trouser makes more sense.
    • Q: Do wide-leg cropped trousers look good with high-tops? They do, but the sneaker needs enough visual weight to balance the volume. A slim canvas shoe disappears under a wide pant leg. Chunky soles and wider collars hold their own. The proportion contrast between a flowing pant and a solid shoe is what makes this combination land.
    • Q: How short should cropped trousers be for high-top sneakers? The hem should sit 1 to 3 centimeters above the sneaker collar. Shorter than that reads as capri pants. Longer defeats the point of the crop. Measuring against the specific shoe being worn is the most reliable method, since collar heights differ between brands.
    • Q: Are high-top sneakers comfortable enough for all-day city walking? Most leather and canvas high-tops handle a full day of city walking, but insole quality varies. Brands like Converse are known for thin stock insoles, so swapping in an aftermarket insole adds cushioning for 10,000+ step days. Ankle support from the collar also reduces fatigue on uneven surfaces like cobblestones.

    Conclusion

    Cropped trousers and high-top sneakers are one of the few pairings that scales across seasons and cities. The proportion between hem and collar decides whether the look is intentional or accidental. 

    Fabric and sneaker silhouette do more work than color matching ever will. Pick the combination that fits how the city moves, and the outfit takes care of itself.